How to view, add or remove Startup Programs in Windows 10
Startup programs are those applications set to run automatically each time you boot up your computer as soon as you log in.
They don't require you (the computer user) to start them manually.
Some apps will open entirely while others only start background tasks.
Some applications are automatically set as Startup apps by default at the time of installation while others are set manually by the computer user when necessary.
As a computer user, you will find that there are some favorite apps that you use frequently. Like every time you start your computer you have to open and use them. Such need to be set as Startup programs to ease your work of opening them manually all the time.
As you keep installing new apps to your PC, the Startup programs list will keep building over time. While this creates convenience for some apps, it may result in a negative impact by slowing down your computer.
So it is important to have only the most necessary applications in the Startup programs list.
Windows 10 allows you to manage the startup programs, ie you can view all the startup programs, add new or remove some from the list.
In this article, you will learn how to add new applications to the startup programs, view the list of all the startup programs, and remove/disable others from the list.
How to add applications to Startup programs in Windows 10
This process typically involves copying the application's shortcuts into the startup folder.
Any executable application or file placed in the Windows startup folder is programmed to run automatically when the Windows boot.
Follow the steps below:
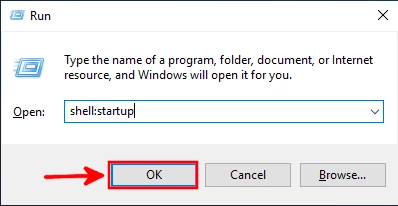
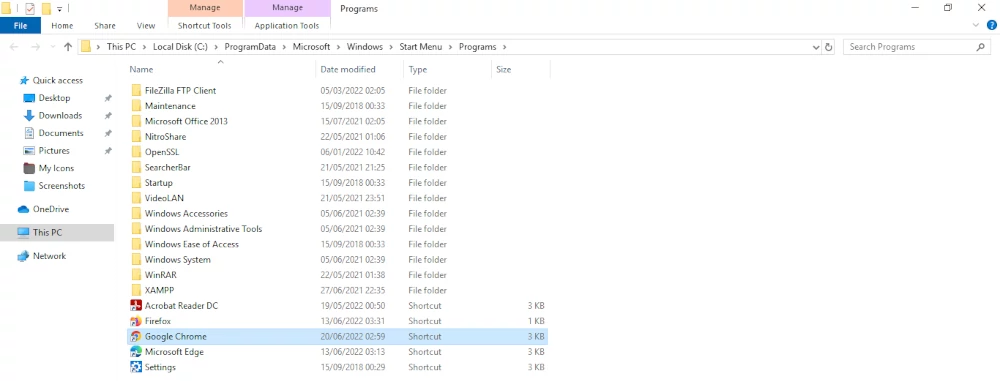
Step 1: Open the Windows startup folder. To do so, use the Windows + R keyboard shortcut, then type "shell: startup" in the small Run window that opens and click on the OK button.
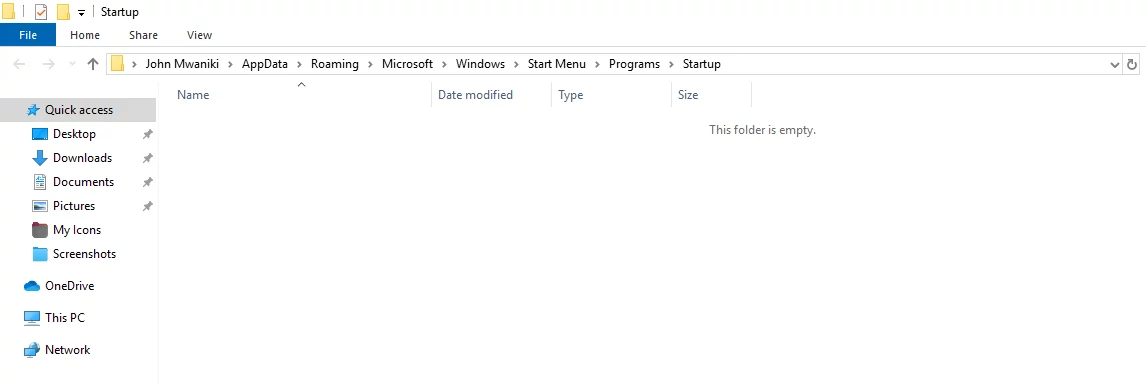
The startup folder will be opened in the Windows File Explorer as shown below.
Step 2: Copy the shortcut of the application that you want to make a startup program and paste it into this folder. The easiest way is to copy it from the desktop.
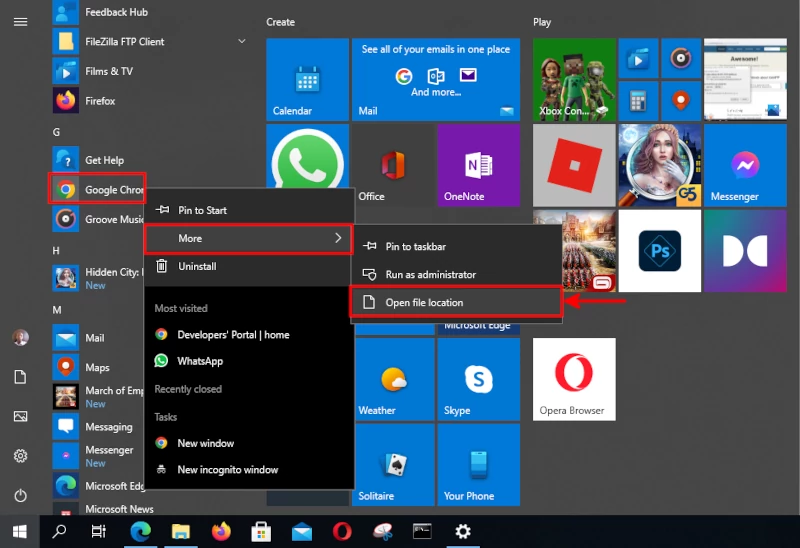
If the shortcut isn't available on the desktop, press the Windows key and scroll down the applications list to that app. Right-click on the app, select More in the menu, and then click on the Open file location option. If the "Open file location" option isn't available, it means the app can't run at startup.
This opens the location where the application shortcut is saved. Copy it and paste it into the startup folder that you had already opened earlier.
That's all.
Now at this point that application has been added to the Startup programs and will open automatically on its own the next time you boot your PC.
You will also note the application will now be listed among other startup programs when you check using either of the methods that I will show you below.
How to view Startup Programs using Startup Apps System settings
Open the Startup Apps System settings by pressing the Windows key and then typing "startup". Click on the Startup Apps option in the search results.
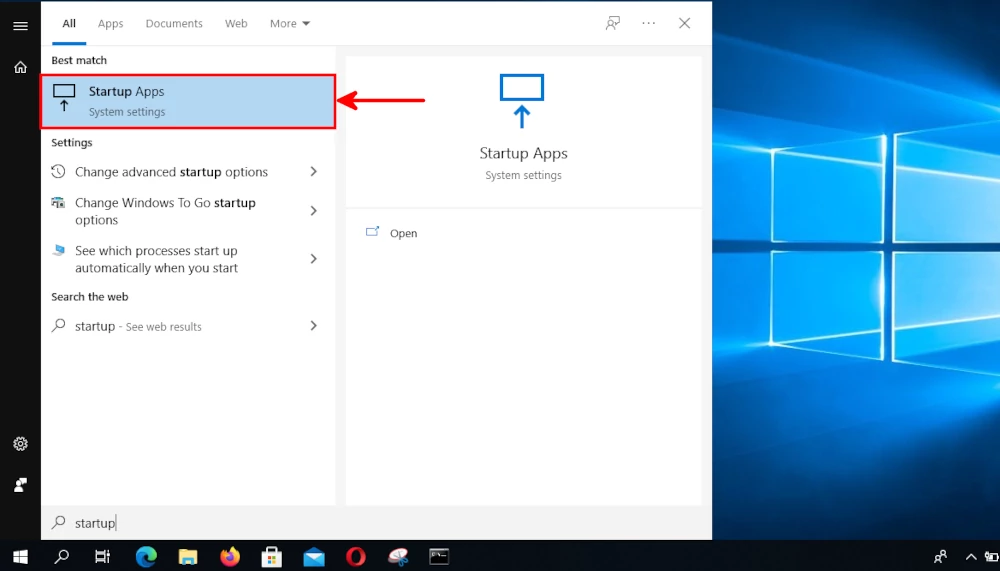
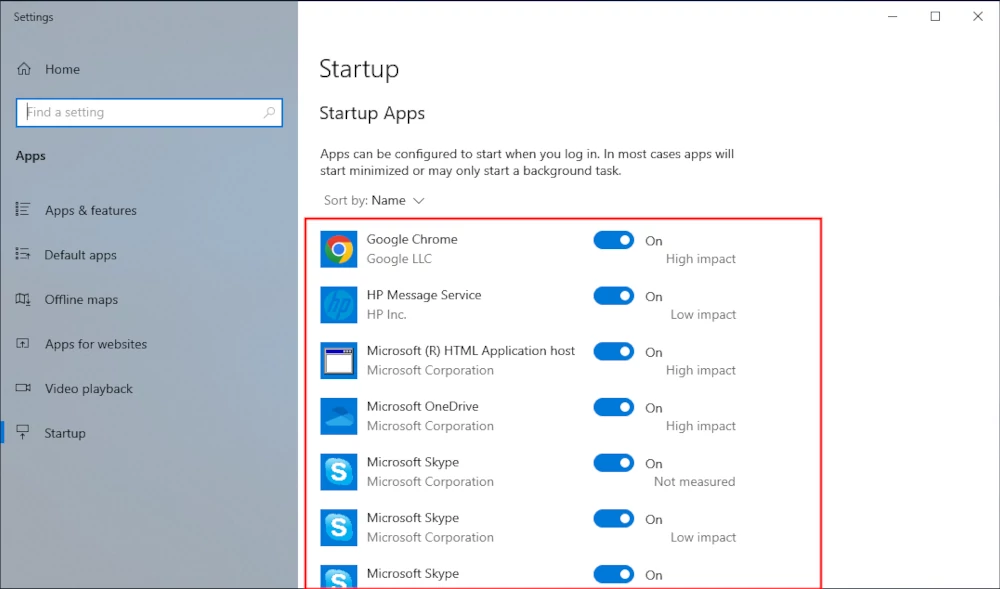
This will open the System Settings on the Startup Apps tab where you will be able to see a list of all Startup programs.
The app's information includes its icon, the app name, its publisher, the status (whether on or off), and its startup impact (if it has a high impact it is likely to slow down the computer during the starting).
How to Remove Startup Programs using System settings
To turn off an application from starting automatically on booting your computer, follow the steps below:
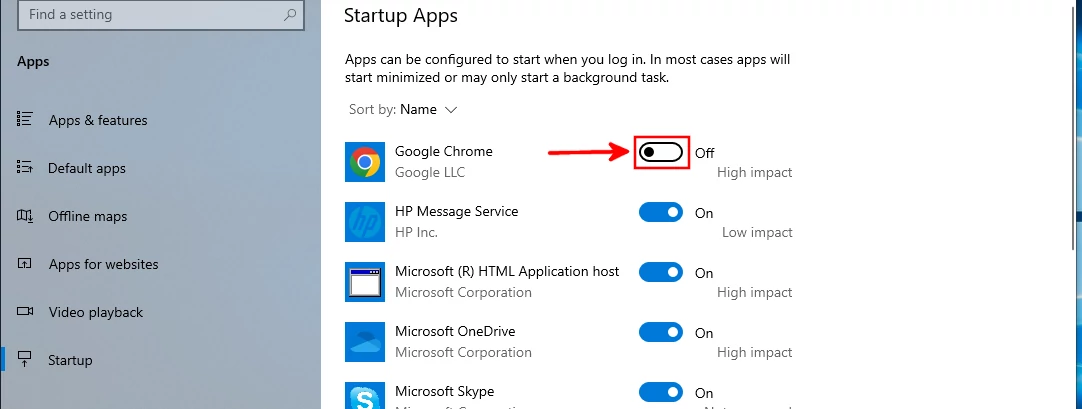
Step 1: Open the Startup Apps System settings.
Step 2: Find the application that you want to turn off and click on the toggle button to turn it off.
How to view Startup Programs using Task Manager
You can also manage Startup programs using the Task Manager.
Follow the steps below:
Step 1: Open the task manager. You can do so by pressing the Windows key or clicking on the start button, then typing "task". Then click on the Task Manager from the search results.
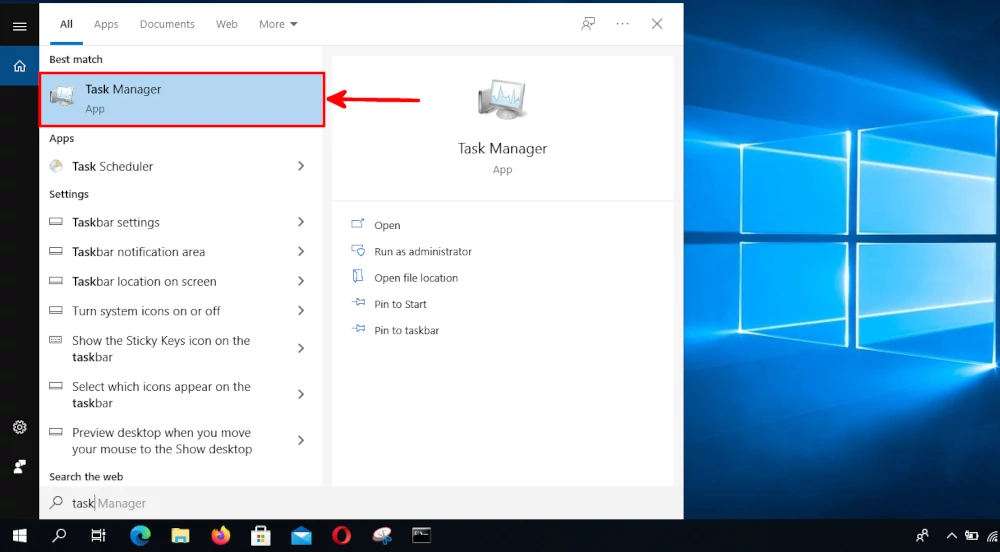
Alternatively, you can open the Task Manager by using the keyboard shortcut Ctrl + Shift + Esc or by right-clicking on the taskbar and selecting Task Manager from the menu.
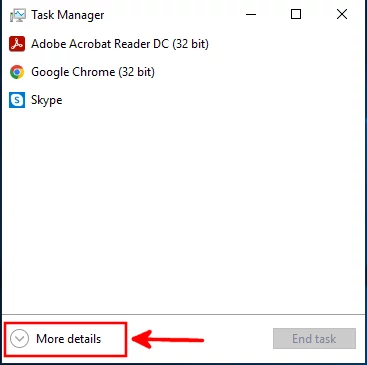
Step 2: The Task Manager will open, showing a list of the currently running programs. Click on the More Details at the bottom to see more options and information.
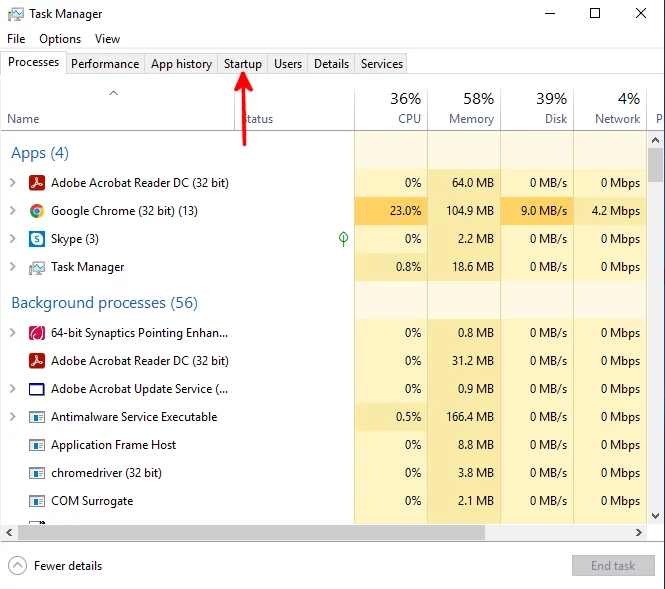
Step 3: A more detailed Task Manager interface will open, navigate to the Startup programs tab by clicking on Startup at the top menu.
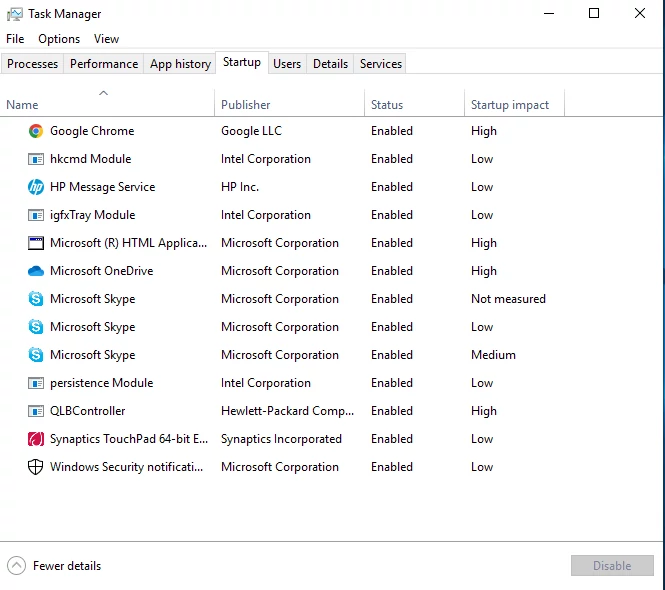
You will see a list of all the Startup programs. The app details displayed include the application name, the name of its publisher, the status (enabled or disabled), and the impact it causes on the startup.
High-impact apps typically slow down the boot time of Windows.
How to Remove Startup Programs using Task Manager
While in the Task Manager's Startup tab, right-click on the app that you want to disable from automatically starting on booting your computer, then click on the Disable option from the menu.
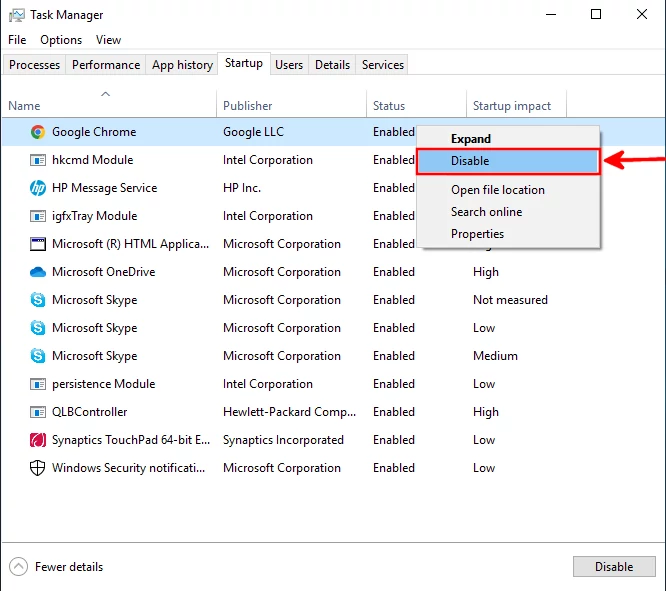
Alternatively, you can click on the app to make it selected and then click on the Disable button at the bottom.
That's all!
Now you know what Startup programs are and how to manage them on Windows 10 using different methods.