
How to find your router’s IP address in Ubuntu Linux
When the Internet is installed at your home or workplace by your Internet Service Provider, they usually leave you with a router.
All the traffic to or from the Internet in your local area network goes through the router. The router acts as the gateway/entrance between the two networks.
The router usually comes with a web interface for the management of the network. As the admin or custodian of the router, you can log in to this interface and manage the devices in the network.
Some of the stuff you can do on this interface include changing the WiFi name and password, blocking some devices, and blocking access to some websites among others.
To log in to this interface, you need to open the router's IP address in your web browser's address bar and use the username and password given to you by your ISP. This information can also be found at the back of the router.
The router's IP address is the default IP in the network and is also commonly referred to as the default gateway IP address.
In this article, I will show you how you can easily find out the default gateway IP address for your network (router IP address) via terminal and GUI in Ubuntu Linux.
How to find out the Gateway IP address in Ubuntu
Checking via terminal command
To check your network's default gateway IP address in Ubuntu via terminal, open your terminal (Ctrl+Alt+T) and run the ip command below:
ip route | grep default
You will be able to see your IP address as outlined below. In my case, it is 192.168.100.1. Yours may be different depending on your router model.
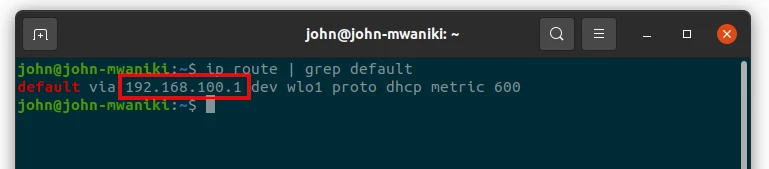
Make sure you are connected to the network first before running the command.
Checking via GUI
In case you are not a fan of the command-line, here is a GUI step-by-step process. Follow the steps below:
Step 1: Connect your device to your home/office network. I prefer you connect via WiFi for this method.
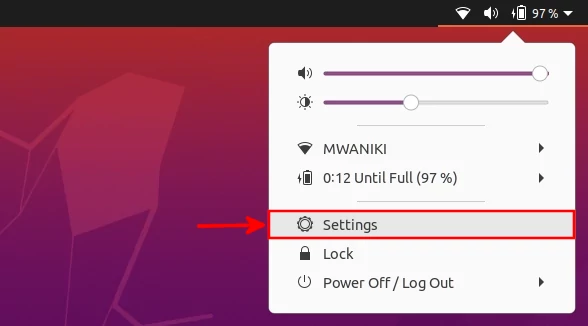
Step 2: Open your PC's Settings
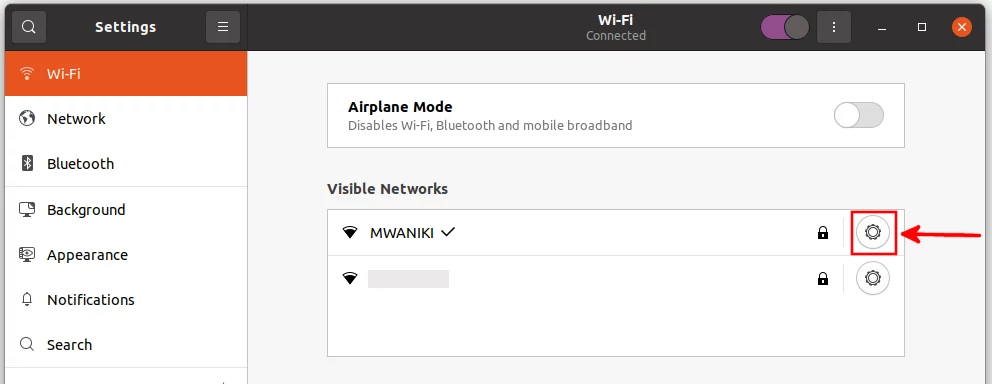
Step 3: Navigate to the Wi-Fi tab of the settings. Then click on the Settings (gear) icon of the network you are connected to.
A dialog box with details about the network will open up. Among those details under the Details tab is the router's IP address, labeled as Default Route.
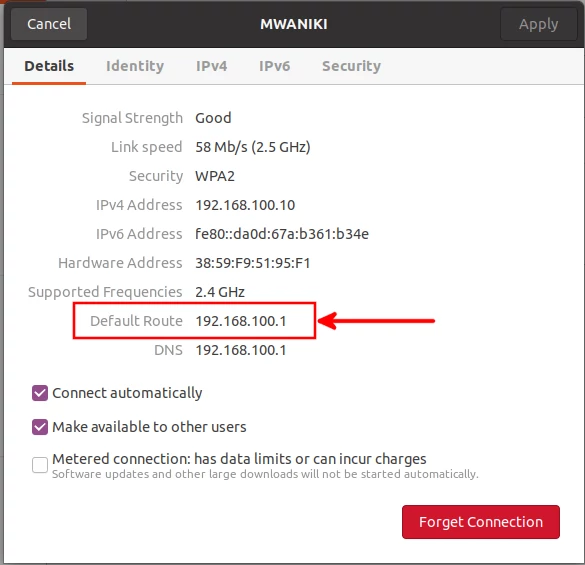
This is the IP address you type in your web browser's address bar to access the router's web interface and manage your network.
Now you know how to check your network's default gateway (router) IP address via both GUI and command-line in Ubuntu Linux. It's my hope that you found this article helpful.