
How to change mouse cursor color & design in Ubuntu
If you like customizing and tweaking things on your PC to your taste and preferences, you may have wondered whether it is possible to change the looks of your computer's mouse cursor/pointer in terms of design and color.
It is possible. In this article, I will show you how to do exactly that. You will learn how to download and install new cursor themes on Ubuntu 20.04 and how to switch between them to have different-looking cursors from the default.
The easiest way to change the cursor theme from the default on Ubuntu is by using the GNOME Tweaks tool.
GNOME Tweaks is a free and open-source app for the GNOME desktop developed and maintained by The GNOME Project team, that allows adjusting advanced GNOME options.
It can install and manage themes and extensions, change power settings, manage startup applications, and enable desktop icons among other settings.
Installing GNOME Tweaks on Ubuntu
If you don't have the GNOME Tweaks tool installed, then the first step should be to install it.
Open the Ubuntu Software app and search for GNOME Tweaks by clicking on the search icon at the top left and then typing "gnome tweaks" in the search box.
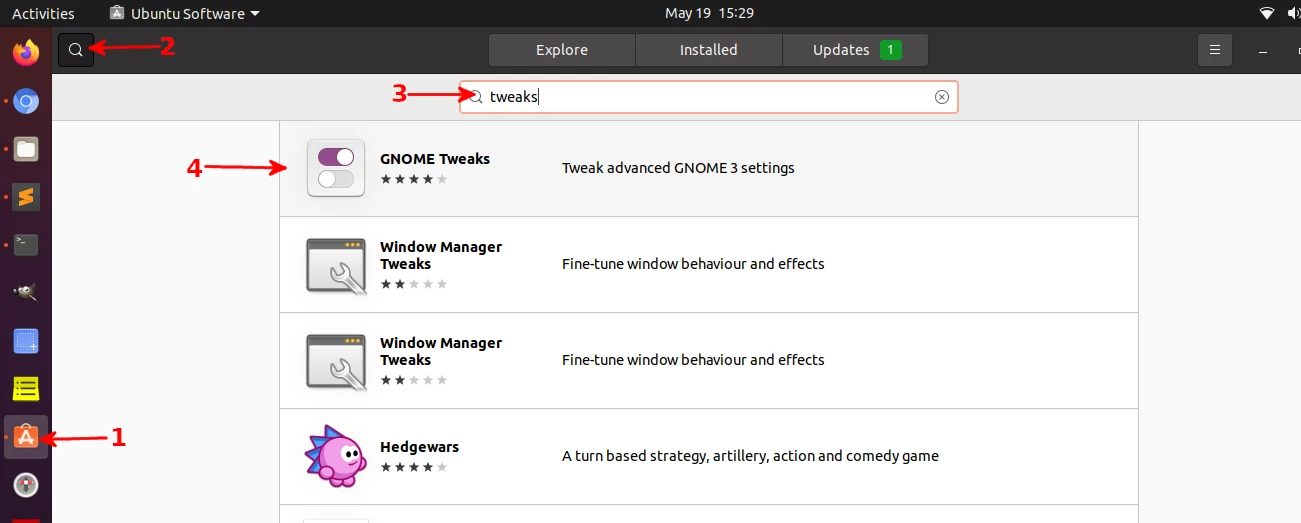
Click on it at the top of the search results and once it's opened then click on the Install button to have it installed.

Alternatively, you can install it through the command line. Just open the terminal (Ctrl+Alt+T) and run the command below.
sudo apt install gnome-tweaks
Changing mouse cursor theme in GNOME Tweaks
Step 1: Open the GNOME Tweaks app. You can do this by searching it and clicking on its icon in the Applications menu.

Or you can open it via the command line using the command below in the terminal.
gnome-tweaks
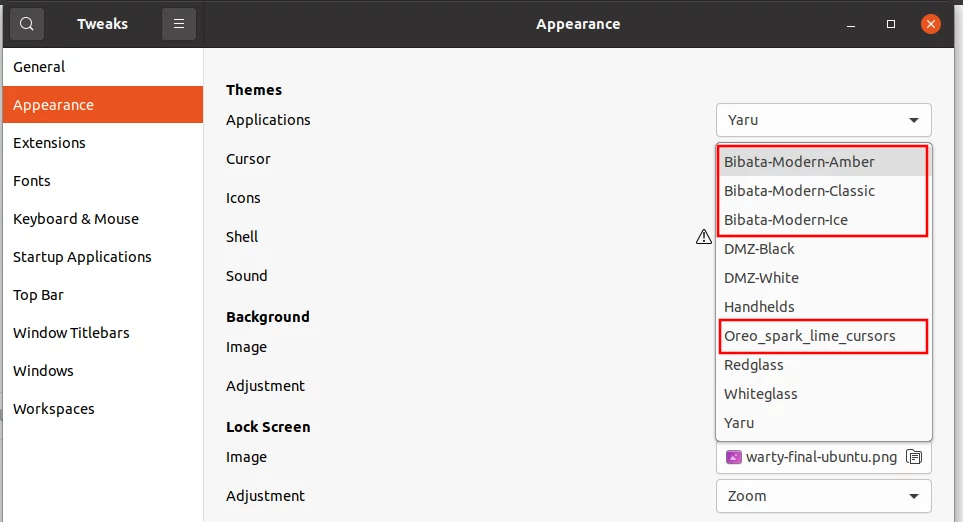
Step 2: Open the Appearance tab in the left pane. Under the Themes section, you will see a dropdown box labeled "Cursor" with the default theme being "Yaru".
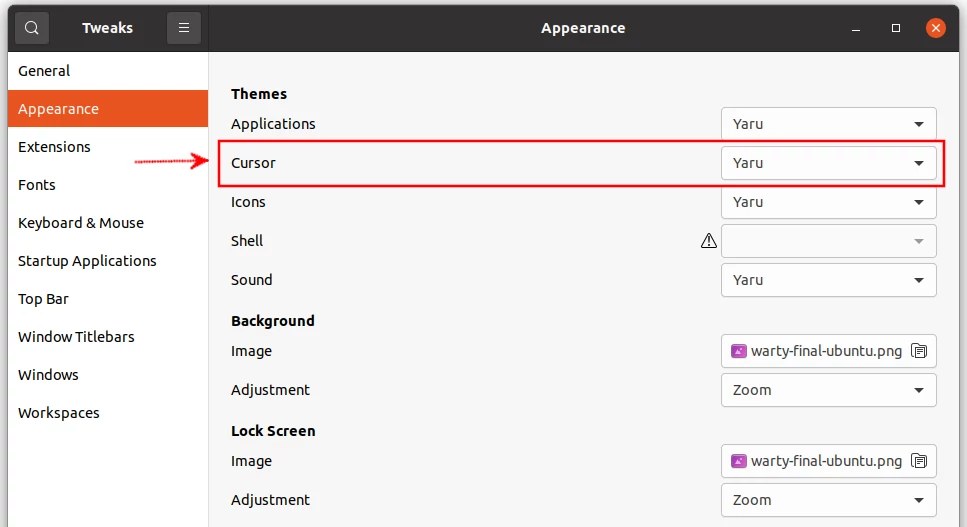
Select a different option from the dropdown list to have a different-looking mouse cursor. The change will apply immediately.
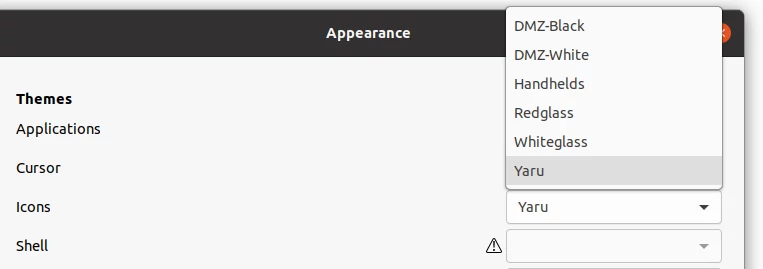
But as you may notice, there are a limited number of cursor themes to choose from. In case none pleases you from the default choices, it is possible to extend the list by installing custom cursor themes.
Installing custom mouse cursor themes in GNOME Tweaks
Follow the steps below to download and install new cursors on your Ubuntu PC.
Step 1: Download cursor theme(s). There are different websites online where you can search and download cool cursor themes for free.
I recommend you download them from the GNOME-Look website which has plenty of nice-looking cursor themes for the GNOME desktop.
Open your preferred one, click on the Download button, and then on your preferred choice from the dropdown list to download it.

Step 2: Extract the downloaded file. The theme files are downloaded as archived files (.targz, .zip, etc). Extract it into a folder by right-clicking on it and selecting the "Extract here" option in the context menu.
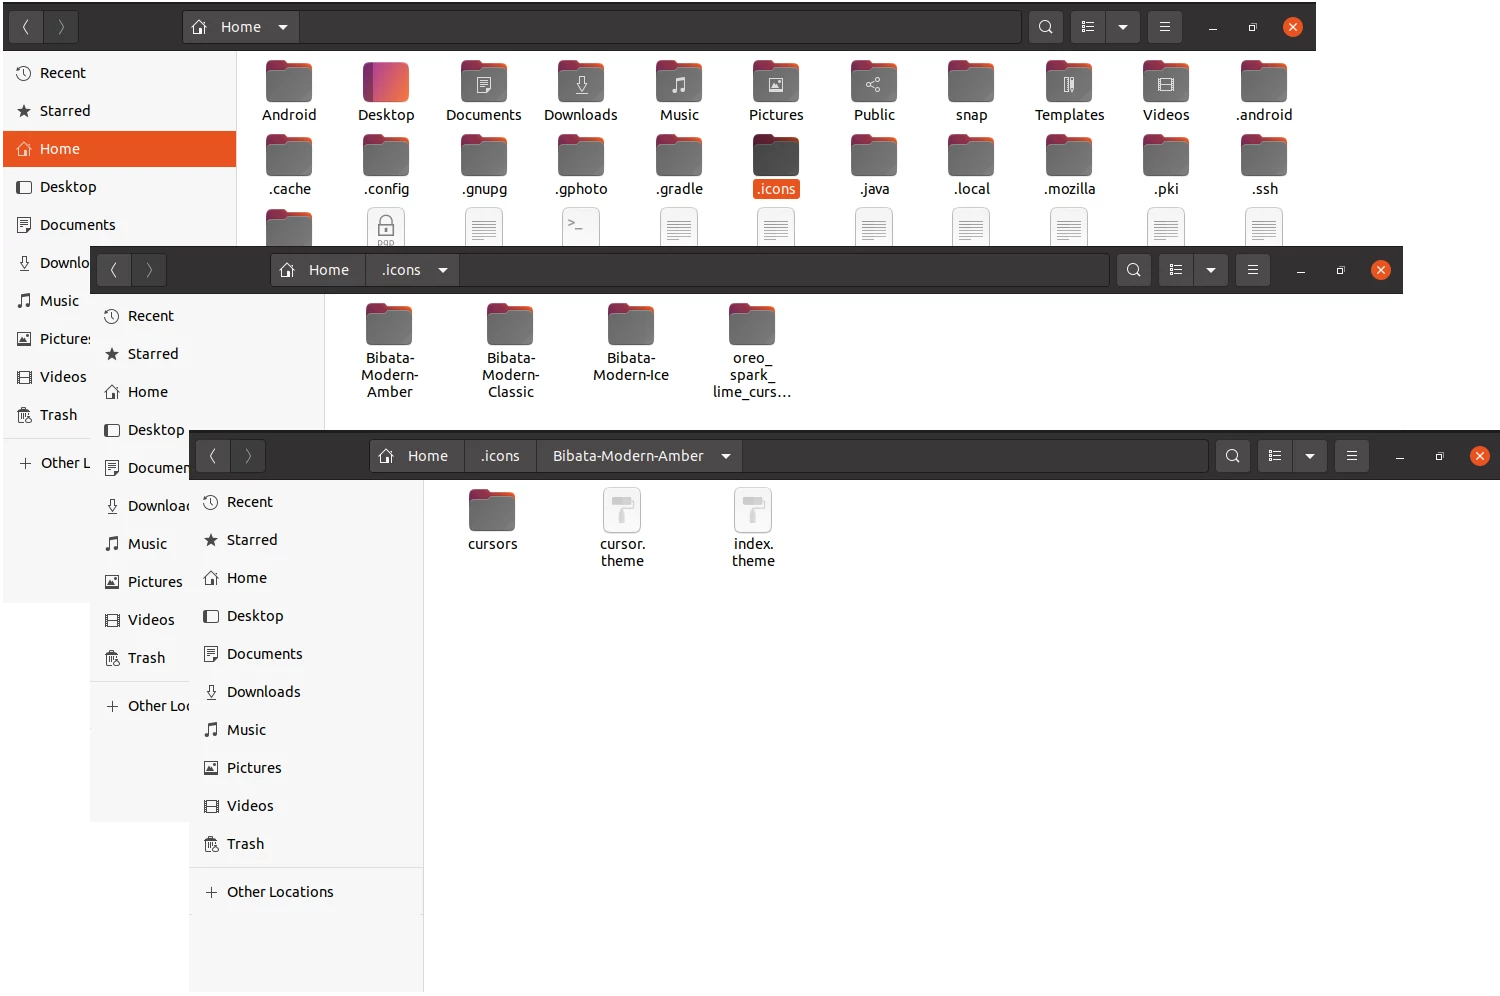
Step 3: Copy and paste the theme folder(s) into Ubuntu's icons folder.
The theme folder could be the entire extracted folder or its subfolders. To know whether the extracted folder is the actual theme source folder or its subfolders are, look at its/their content. Each theme folder contains a file named "index.theme" and a folder named "cursors". If it directly has them in it, this is what you need to copy.
There are two "icons" folders in Ubuntu that you can paste the cursor theme folder into depending on how you want the cursor to be used.
If you would like to install the cursor for use by all the users in the system just paste the theme folder into the "/usr/share/icons" directory.
Else, if you want to install the cursor for only the logged-in user, navigate to the home directory in the Ubuntu (nautilus) file manager and paste the theme folder into the ".icons" folder. This is a hidden folder so you may not view it directly until you enable the showing of hidden folders by pressing the Ctrl+H keyboard shortcut.
If the ".icons" folder is not present (this is very likely because it is not included by default), just go ahead and create it. Make sure it is exactly as it is all in lowercase and starting with a dot.
At this point, the new theme installation is complete and the cursor is ready for use. Close the GNOME Tweaks (if already open) and open it again to reload the new cursor themes.
Repeat the earlier process by clicking on Appearance in the left pane menu and selecting a new option from the Cursor dropdown options.
You will now notice that any of the cursor themes you have installed will be available for selection from the list.
Well done! Now you can comfortably customize how the mouse cursor/pointer of your PC looks on Ubuntu Linux.