
How to make an email signature for Gmail using Google Docs
You most probably already know what an email signature is and have seen one many times before.
In case you don't, an email signature is a personalized block of text, images, and links that is automatically appended at the bottom of an email message.
It basically helps the recipient to better know the sender by including more information about the sender such as the name, title, address, and contact details.
When used well, an email signature can help in spreading brand awareness, driving traffic to your website, gaining more social media followers, and other marketing opportunities.
To have a signature in your outgoing emails, you need first to create one and then add it to the email signature section of the settings in your email client (eg Gmail, MS Outlook, Roundcube, etc).
These signatures are application-specific, ie if you have a custom domain email (eg info@solvetechnow.com) that you access and use on more than one email client (such as on both webmail and Gmail), you will need to add an email signature on both email clients. This means that you can have different email signatures for the same email on each client that you use the email with.
There exist free and paid tools online that you can use to make an email signature.
But did you know that you can use Google Docs to make email signatures?
Yes, you can, using Google Docs you can make a professional email signature and customize it completely to your liking.
In this article, you will learn through a step-by-step process, how to create an email signature on Google Docs and how to add it to your Gmail account so that all your outgoing emails will have one.
How to make an email signature in Google Docs
Follow the steps below:
Step 1: Prepare all the information that you will need in the signature.
What to include in a signature is not carved in stone, so feel free to compile only what you consider important to you.
Commonly used details in an email signature include:
- Your picture or a company logo
- Your name
- Job title and company name
- Company/business address
- Email address
- Phone number
- Website address
- Social media links
You can include all the above or omit some that you don't deem important or that aren't applicable to you. For instance, if you don't have a website you can leave out the website address. If you don't have (or don't want to add) a physical address you can leave it out. Also, instead of adding the same email address that you are using to send, you can omit it because the recipient will still have it anyway.
For the company logo or your profile picture, have it ready as a square image with a transparent (or white) background in your computer storage or upload it to your Google Drive account.
If you prefer to use icons instead of text labels, eg those for email, phone, address, website, and social media links, have them ready as well. Design them in your corporate colors and with a consistent design for uniformity. You can as well upload them to your Google Drive account or have them in your local storage.
Step 2: Open a new Google Docs document in your web browser by entering doc.new in the address bar and hitting Enter key.

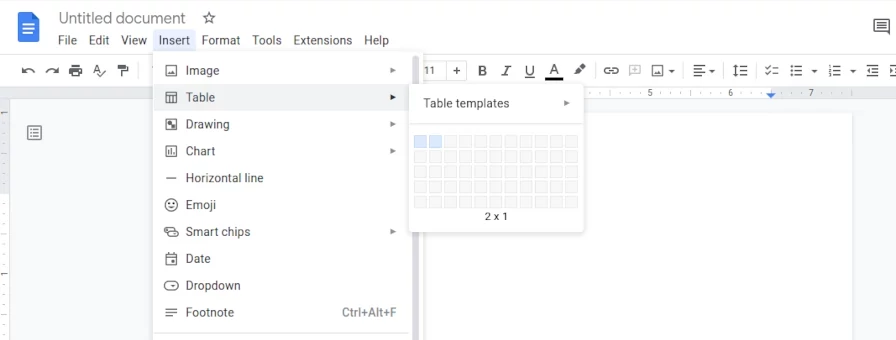
Step 3: Create a table with two columns and one row. To do so, click on the Insert option in the top menu, hover the cursor over the Table submenu, and then select two boxes horizontally. It should indicate 2 x 1 at the bottom.
Step 4: Resize your table cells as mine below by moving the middle border towards the left and the bottom one downwards.
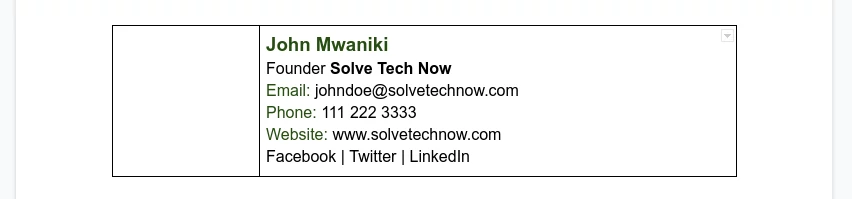
The First table cell will hold your profile picture (or the logo) while the second one will hold your other details.

Step 5: Write all the necessary details about yourself and the business in the right table cell. It's important to consider your corporate colors and fonts when formatting the text.
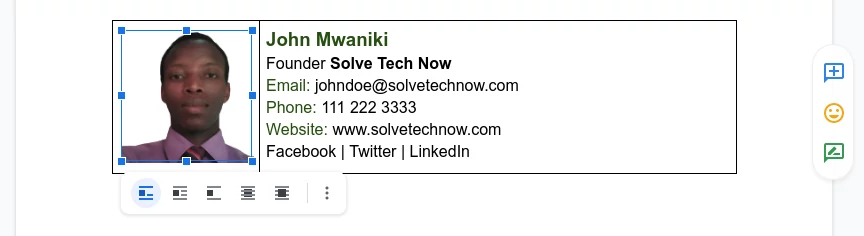
Step 6: Add your picture or your company logo. To do so, click in the left table cell to move the mouse cursor there, then click on the Insert option at the top menu, hover the cursor over the Image submenu, and then select the appropriate method of adding the image. I prefer selecting it from Drive but you can go with your preference.
Step 7: Resize the image by clicking on it and moving its edges inwards or outwards until you are satisfied with it.
Step 8: If you want to add links within the signature details eg for social media such that when the recipient clicks on them will be taken to the various social media pages for your business, select the text that you want to act as the link, open the Insert menu at the top and then scroll down and click on the Link submenu. You can alternatively use the Ctrl+K keyboard shortcut after selecting the text.
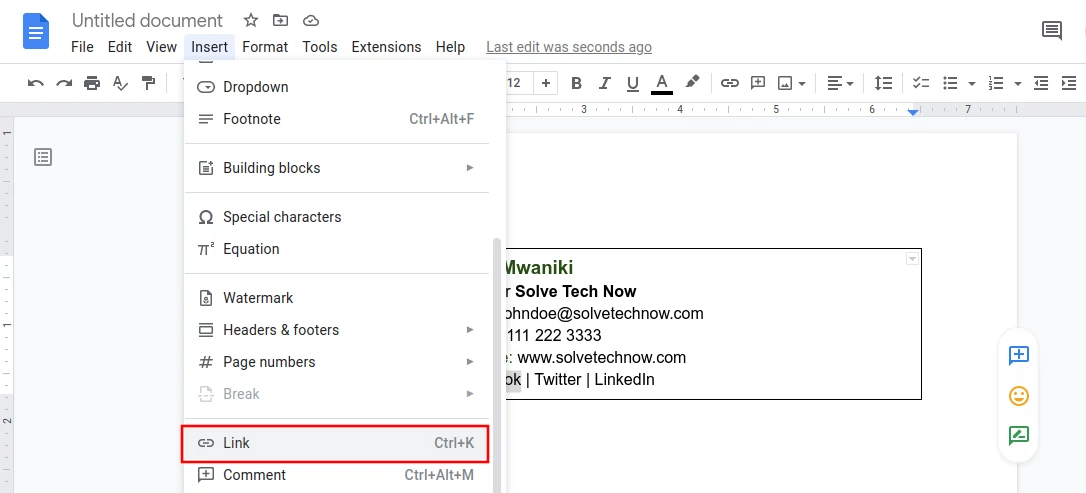
A box will open just below the selected text. Enter the URL of the social media page or of where the link should lead in the input box. Then click on the Apply button on the right side to add the link.
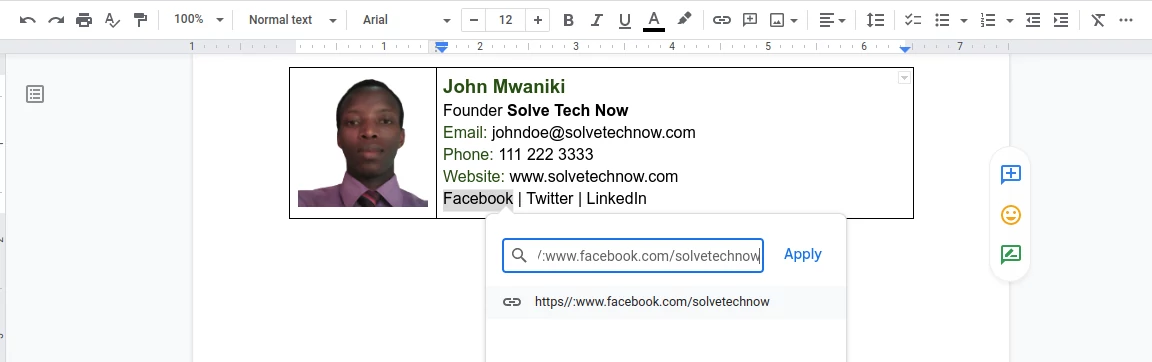
Repeat the same with the respective URLs for all the links.
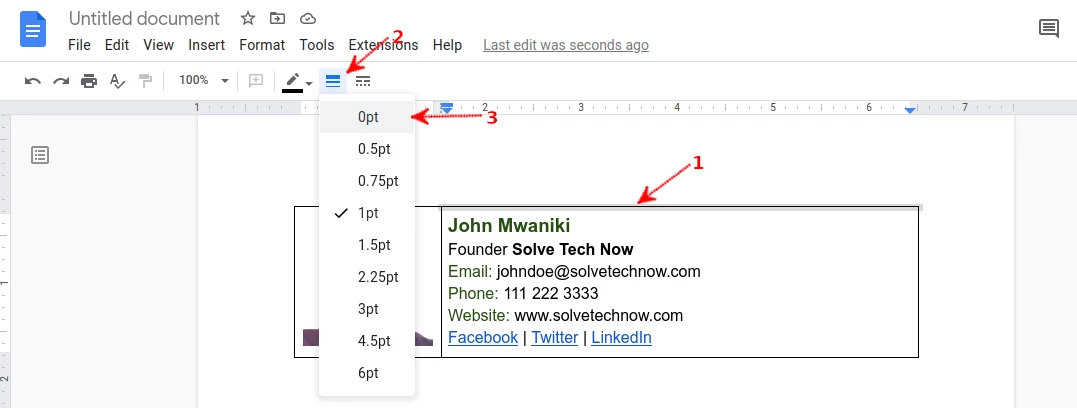
Step 9: Remove the table borders. We don't really need borders in an email signature so you should get rid of them.
Click on the border to have it selected, then at the top click on the border width option and click on the 0pt option in the dropdown menu that opens. The selected border will disappear. Repeat the same with the other borders.
You will be left with a borderless table that looks like a perfect email signature as shown below.

You can alternatively retain the middle border, increase its width to 1.5pt and change its color to have something cooler.

If you would like to have icons instead of text labels or text social media links, just add them as images the same way we did for your picture/business logo.
You can customize the signature design as much as you would like depending on your creativity.
Adding the email signature to your Gmail account
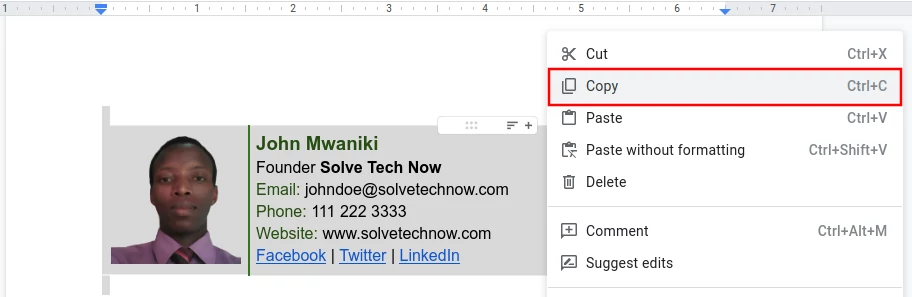
Once you are done designing the email signature on Google Docs and are comfortable with it. Select everything (Ctrl+A) and right-click on it, then click on the Copy option. Alternatively, you can copy by using the Ctrl+C keyboard shortcut after selection.
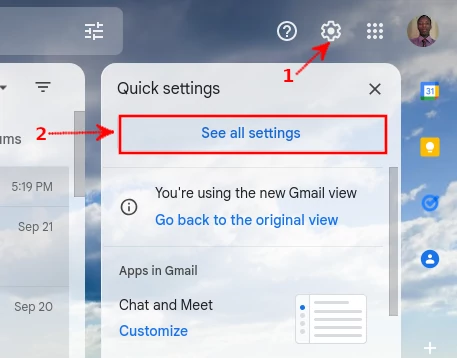
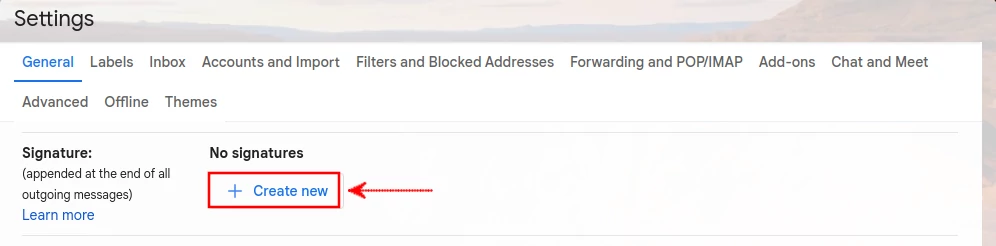
Log in to your Gmail account in another browser tab, click on the settings (gear) icon at the top right corner, and then on the See all settings option in the dropdown menu.
The Settings page will open on the General tab. Scroll down to the Signature section. Click on the + Create New button.
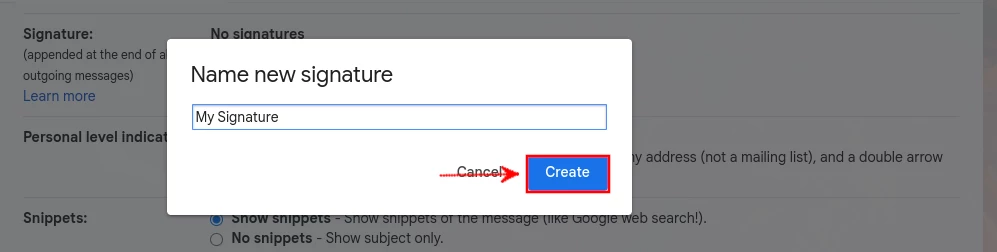
Give your signature a name that you will associate it with. Any name can do. Then click on the Create button.
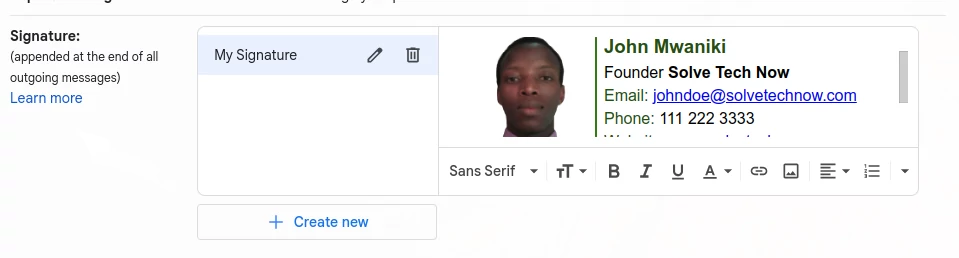
Right-click on the text editor area and select the Paste option to paste the signature contents which you copied from Google Docs.
In this editor, it will look exactly the same way you designed it in Google Docs.
If you have linked one or more additional emails to your Gmail account, you will see an extra option for selecting the email account to add the signature.
Next, select the signature name in the two dropdowns in the Signature defaults section below.

If you would like to remove the "--" in between the email body and the signature or to have the signature inserted before the quoted texts in replies, make sure you check/tick the box.
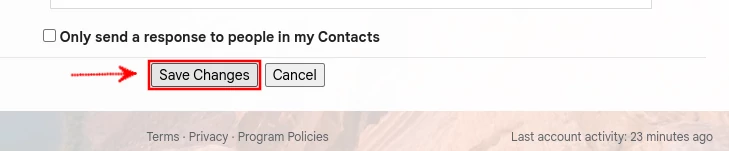
Then scroll down to the bottom and click on the Save Changes button to apply the changes.
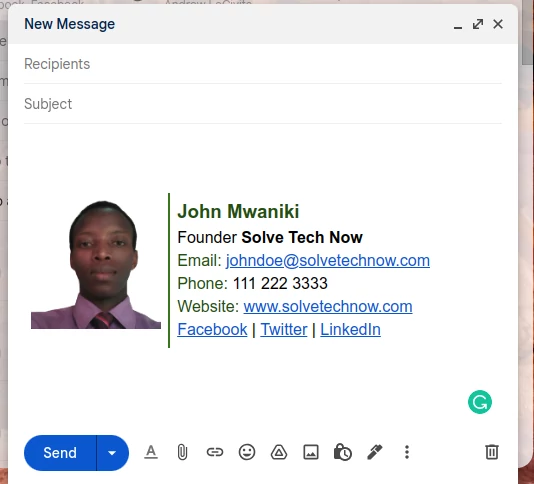
When composing a new message, you will see the email signature already appended. Write your email message on top of it then send it.
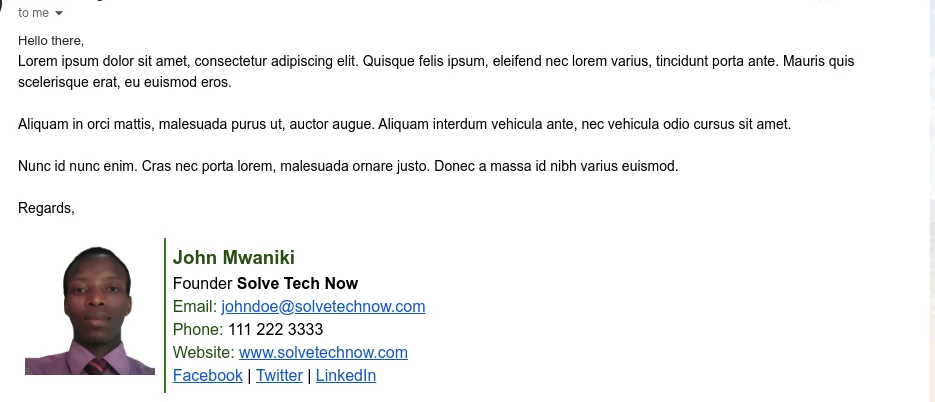
The recipient will see the email signature that we just created as shown below.
That's it!
Now you know how to design professional email signatures using Google Docs and how to add them to your Gmail account. It's my hope you found this article helpful and interesting.