How to install custom brushes in GIMP
A paintbrush is a crucial tool that comes in handy when designing graphics and doing image manipulations in GIMP. It is used in painting, making shapes and various artworks, drawing patterned lines, and many more. It is also used by many other tools such as the eraser tool, dodge tool, clone tool, and others that are applied with a brush.
It is possible to customize the brush to your preference under the Tool Options to achieve various design works. The brush tool also contains a variety of brushes of different shapes and textures to choose from.
In addition to choosing from the brushes available by default, GIMP allows the installation of extra custom brushes which you can make yourself or download from the web.
Such brushes bring flexibility to GIMP and can save you a great deal of time when drawing various objects in your design work. For example, there exist brushes for drawing features such as clouds, smoke, fireworks, etc which could otherwise take a lot of time if you were to draw them manually.
In this article, I will show you how to install brushes in GIMP across different operating systems. We will be focusing on pre-made brushes, so if you want to learn how to make your own custom brushes just click on the link below.
How to create custom brushes in GIMP
Installing brushes in GIMP
Installing brushes in GIMP is as easy as downloading them and copying the brush files into the GIMP's brushes folder. I will explain where and how to get the brushes for GIMP, the supported brush file types, and how to find the GIMP's brushes folder. I will also show you how to test to know whether they were successfully installed.
How to download brushes for GIMP
There are a number of websites where you can find thousands of free and premium brushes for download which are compatible with GIMP.
Examples of such websites include:
Just visit any of these websites and you will find plenty of awesome brushes. For the demo, I will use the Brusheezy website. In it, you can navigate through different brushes using categories or you can just search in the search box.
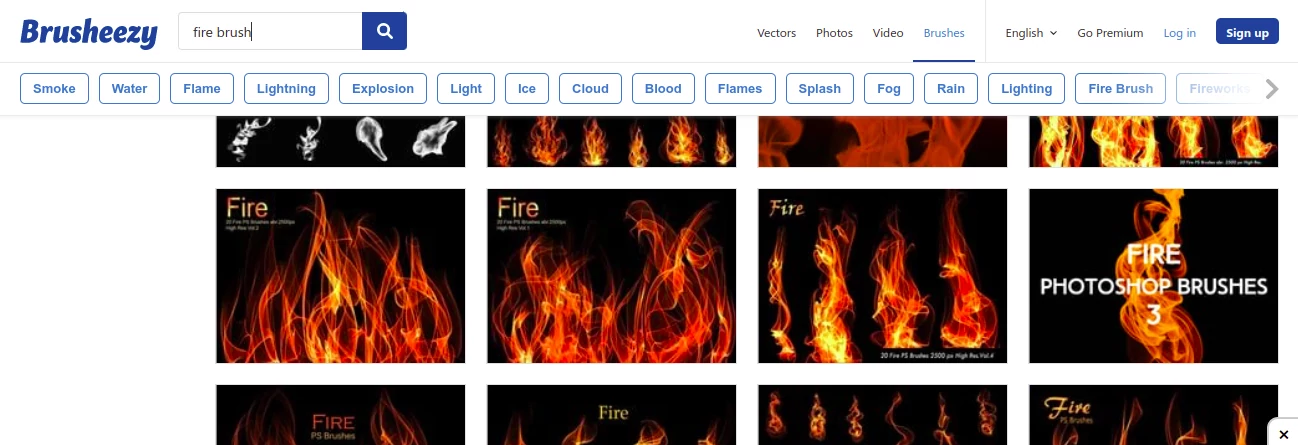
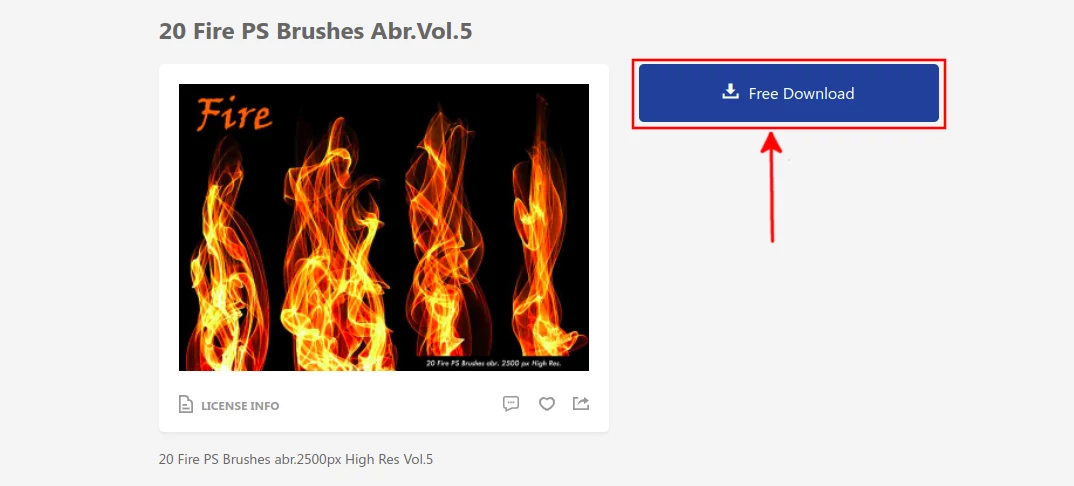
Once you find your preferred brush, click on it to open it on its own page. Then click on the download button to download it into your computer storage.
The download process is quite similar across many websites despite different interfaces. However, on some websites, you will be required to first create an account and log in to download.
The downloaded file will be an archived (.zip) file. Therefore, you will need to extract/unzip it using your unzipping application.
Open the extracted folder and you will find the actual brush file(s) in it. GIMP supports different brush file types as described below:
| Type | Description |
|---|---|
| GBR | This is the GIMP’s standard brush file format. Brush created in GIMP will have an extension ".gbr". |
| GIH | It's the acronym for "GIMP Image Hose". This type is used for GIMP animated brushes. |
| ABR | Brushes with ".abr" extension are created in and for photoshop but are compatible with GIMP. |
| VBR | Brushes with ".vbr" extension are created in GIMP using its Brush Editor (GIMP contains a brush editor that allows the creation of new brushes). |
| MYB | The brushes with ".myb" extension are created in software called MyPaint but are also compatible with GIMP. |
The following steps include finding the GIMP's brushes folder and copying the downloaded brush files into it.
The path to this folder will vary depending on your operating system (eg Windows, Mac OS, Linux, etc) and your GIMP version. This is because the file and folder structure is different across different operating systems. Also, the folders will be named differently for different GIMP versions.
The best way to locate this folder (that works for any OS) is by checking it on GIMP. To do so:
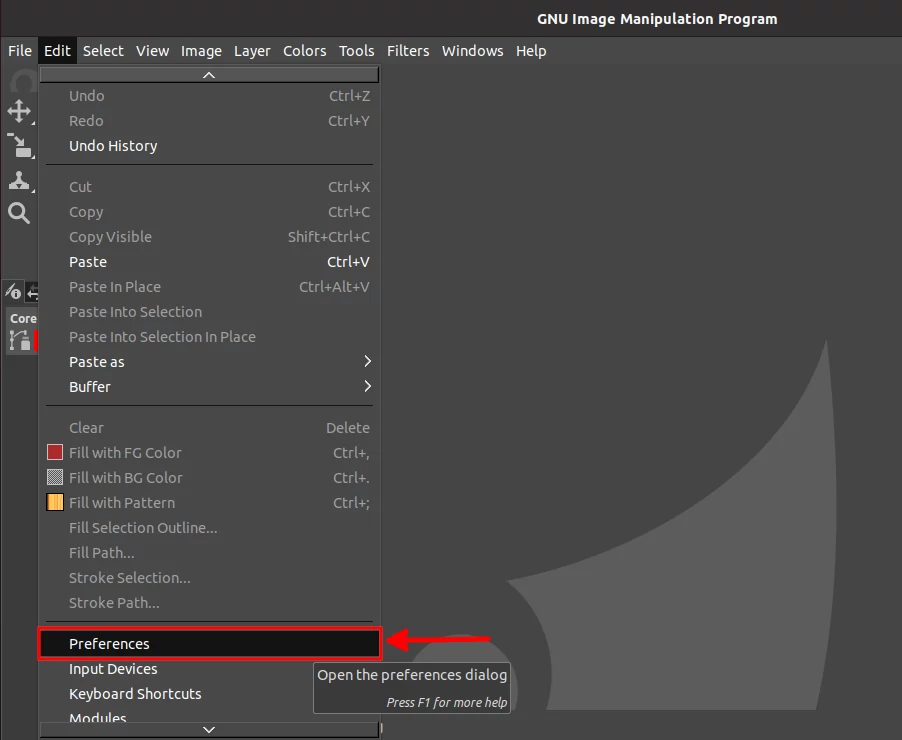
Open GIMP.
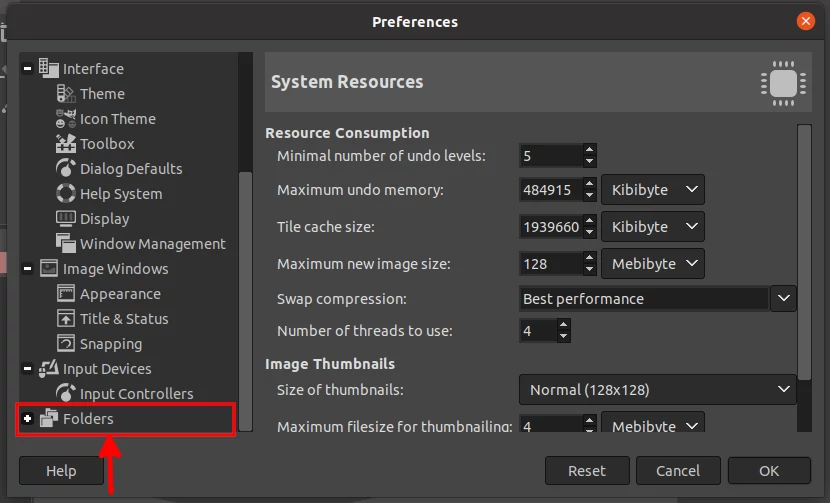
Open the Edit menu and click on the Preferences option.
The preferences dialog box will open. Scroll down on the left pane and click on the small plus next to the "Folders" option to expand the folders menu.
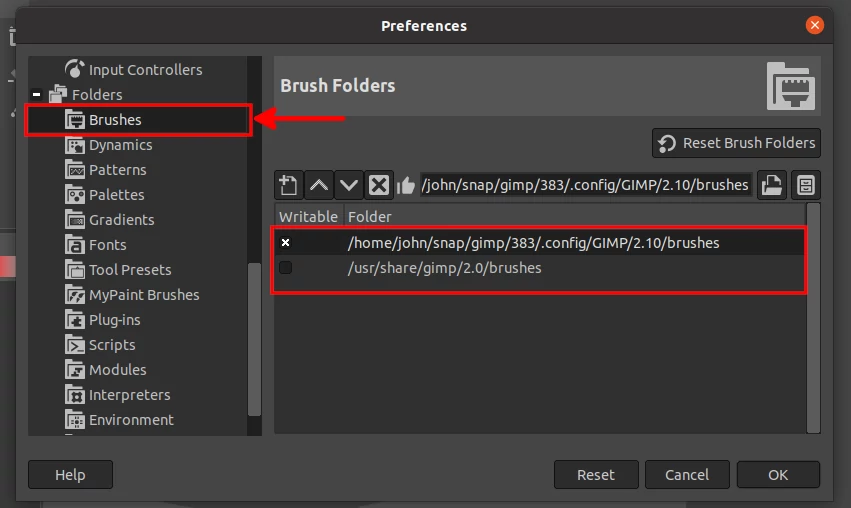
Click on the "Brushes" option from the expanded menu. On the right pane, you will see the current custom directories paths where GIMP will search for brushes when starting. These are the paths where you are supposed to place the brush files.
As I mentioned earlier, these paths may differ depending on your operating system (in my case I'm using Ubuntu Linux) and the GIMP version. Note down the first path somewhere as you will need it and then close the dialog box.
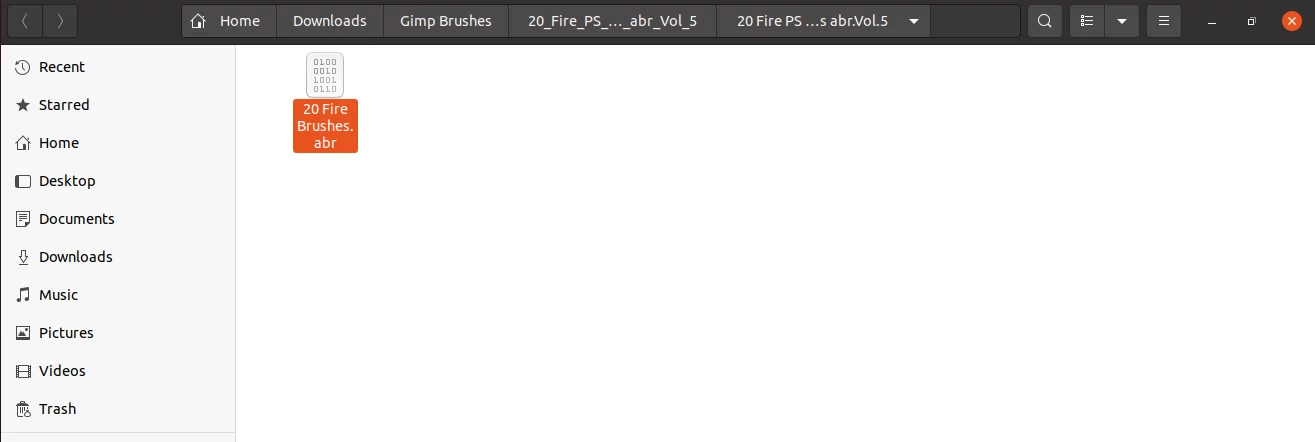
Now open the folder in which you downloaded and extracted the brush file(s) and copy them (ie, .gbr, .gih, .abr, .vbr or .myb files).
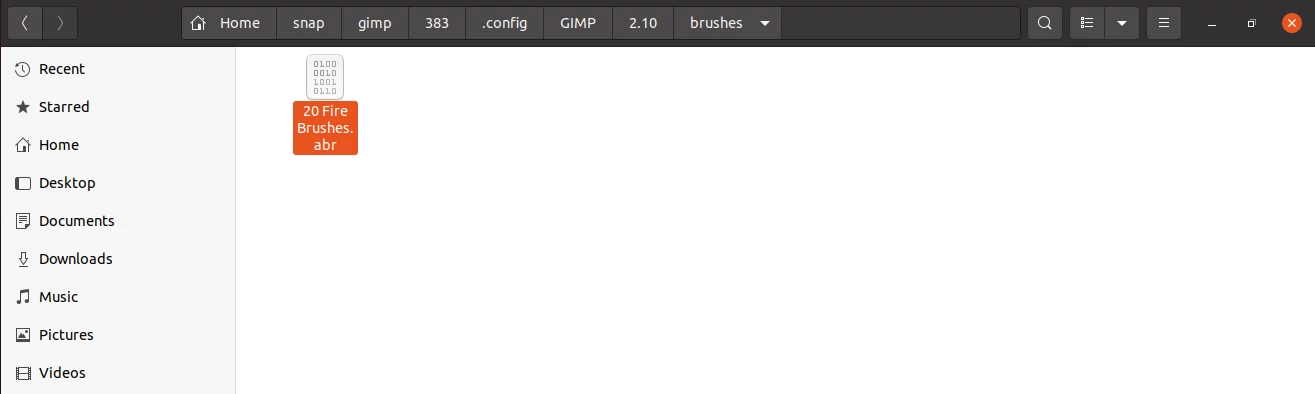
Open the GIMP's brushes folder in the File Manager (Windows explorer) in your PC storage and paste the copied brush file(s) into it. If you are using a Linux distro, you may need to show hidden files in order to be able to open the full path as the ".config" folder in the path is a hidden folder.
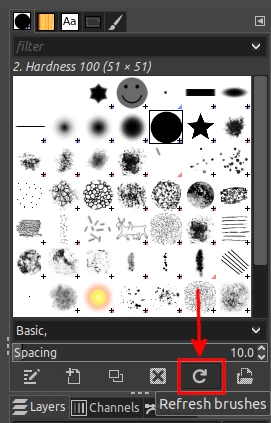
At this point, your new brush is installed. But you will need to refresh GIMP brushes in order to see or use it. To do so, just click on the refresh button at the bottom-right of the brushes tab. The brushes tab is by default located on the top right side of your GIMP interface.
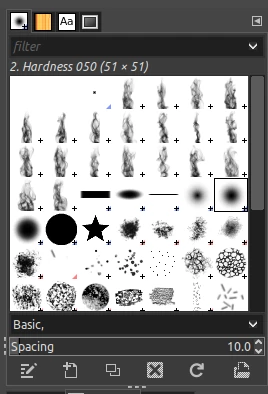
Now you will be able to see the newly installed brushes and can start using them in your designs right away.
That's it.
Now you know where and how to download brushes and install them in your GIMP application.