How to add/install an arrow plugin in GIMP image editor
The arrow tool is an important component in most design works especially for illustration purposes. Unfortunately, this tool isn't available by default in GIMP.
In order to draw arrows in GIMP, you have to first install the arrow plugin.
In this article, I will take you through an easy-to-follow, step-by-step guide on the installation of the arrow plugin in the GIMP image editor.
Open your GIMP application. Under the "Tools" menu option, you will notice that no "Arrow" option is available in the dropdown menu.
The installation process involves downloading the plugin, then copying it to the GIMP 'scripts' folder. Follow these steps to do it:
Step 1: Download the arrow.zip file to your PC storage and extract it.
The path to the 'scripts' folder may vary depending on your operating system and the GIMP version. Let's follow the steps below to find out the applicable path in your case.
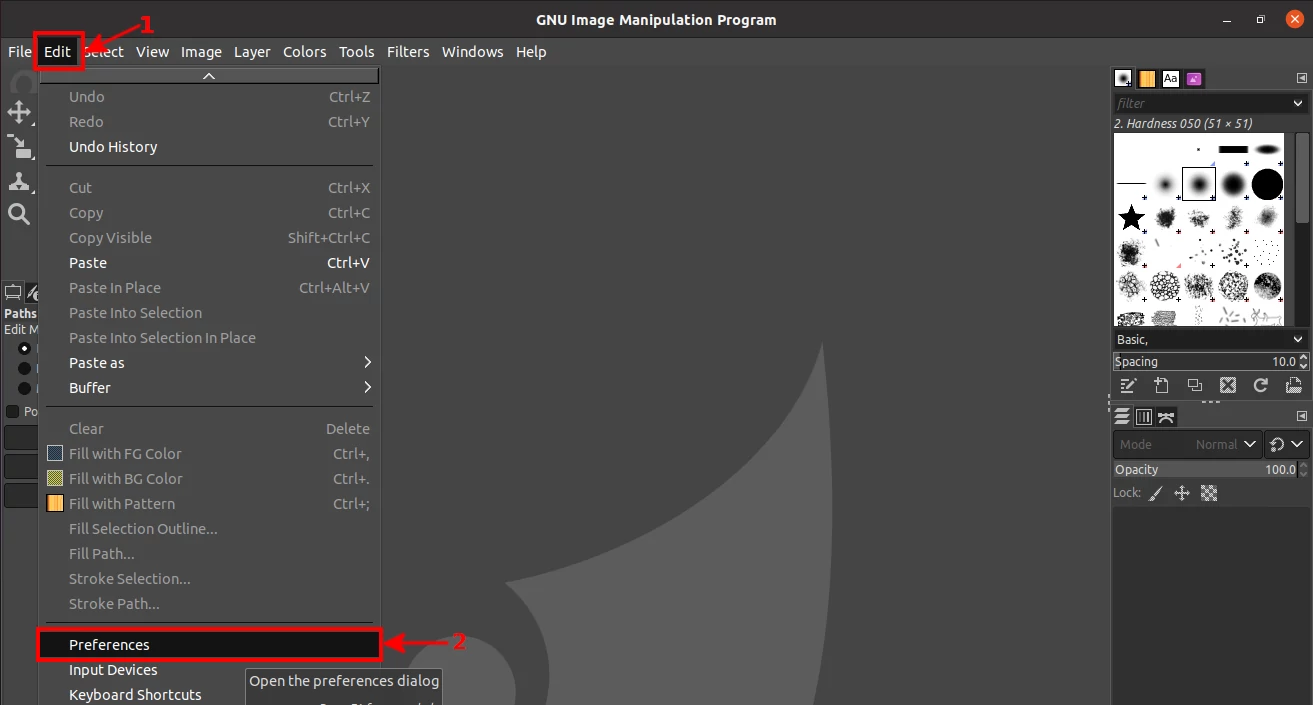
Step 2: Open the "Preferences" option under the "Edit" menu item.
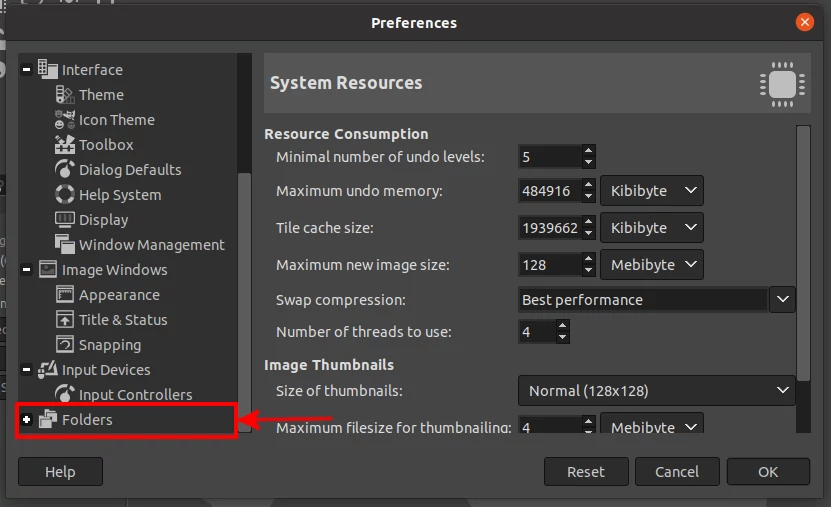
Step 3: Click on the small plus next to the "Folders" option to expand the menu.
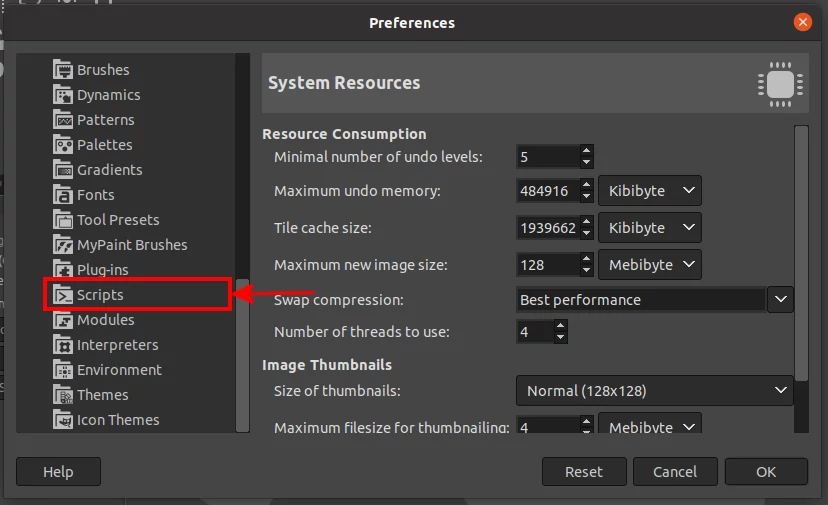
Step 4: You will see menu options with a list of GIMP default folders. Click on the "Scripts" option.
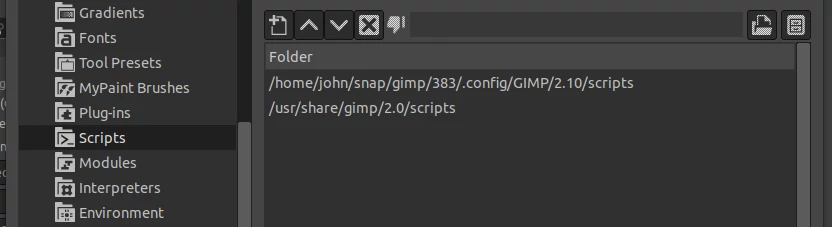
You will see two paths to the scripts folder. These paths may differ depending on your operating system and the method in which GIMP was installed. Note down the paths somewhere.
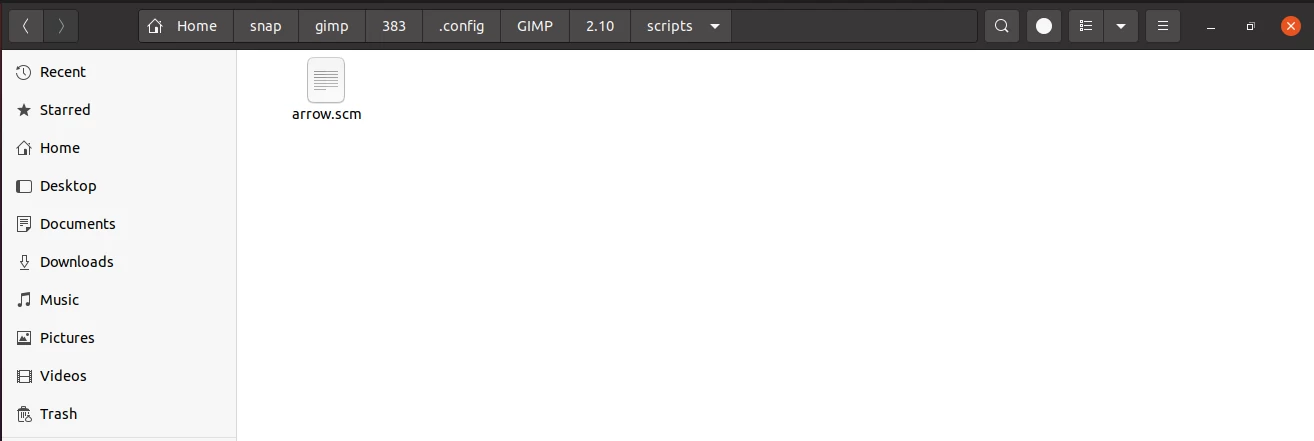
Step 5: Now open the "arrow" folder that you extracted from the downloaded "arrow.zip" file and copy the "arrow.scm" file.
Step 6: Open the GIMP 'scripts' folder and paste the copied "arrow.scm" file into it. If you are on Linux, you may need to show hidden files in order for you to open the path as the ".config" folder in the path is a hidden folder.
In my case, the first path is the applicable one that we will use. The second one doesn't exist in my PC storage.
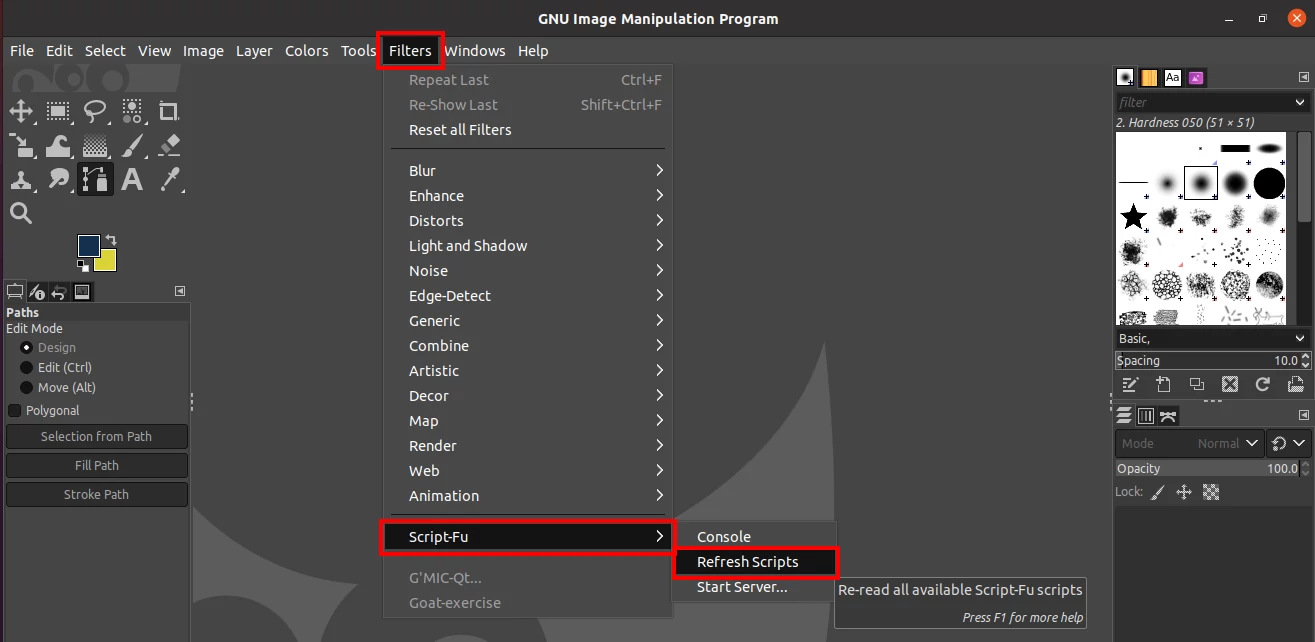
Now at this point, the arrow plugin is installed in GIMP. But in order to use it, you will need to restart GIMP or refresh the scripts from within the application.
To refresh the scripts, navigate through these menu options: Filters -> Script-Fu -> Refresh Scripts.
Now you can start drawing arrows on images in GIMP right away. If you repeat the initial step of checking the available tools by opening the "Tools" menu option, you will notice a new "Arrow" option at bottom of the dropdown menu.
That's it!
Now you know how to install the arrow plugin on GIMP.