How to make a color image black and white in GIMP
If you have a color image that you want to convert to black and white, you can easily do it on your PC using an image editing program.
In this article, I will show you three different ways in which you can convert a color image to a black and white one using GIMP.
Method 1: Converting the image color mode to Grayscale
This is the simplest method of converting an image to black and white. Most digital images are by default in the RGB (Red Green Blue) mode.
Changing the mode of an image from RGB to Grayscale discards the RGB data and converts the three channels into a single channel.
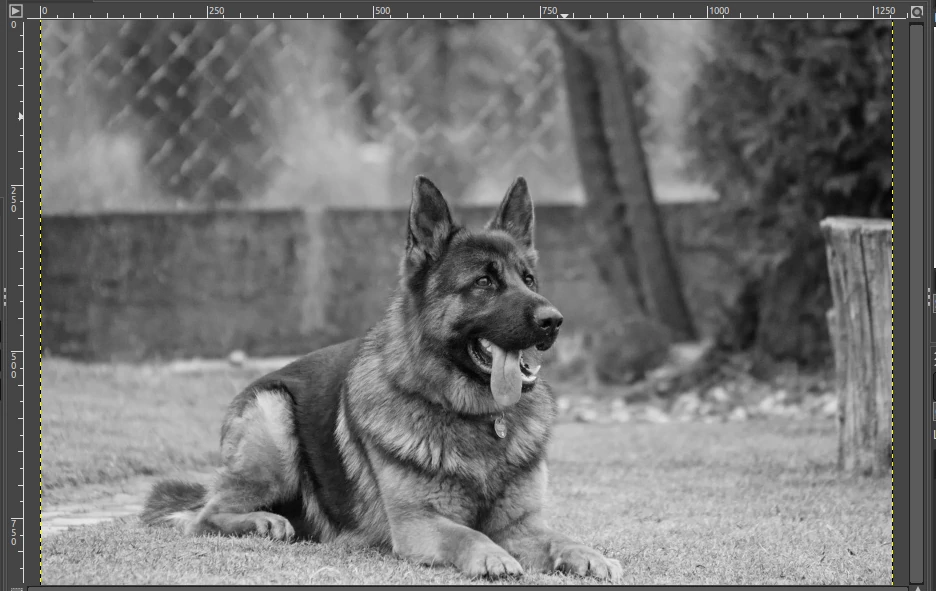
An image with grayscale mode only contains white, black, or shades of gray and is commonly known as a black and white or grayscale image.
This method converts the entire image to black and white and cannot be applied to a selection on the image or to a specific layer.
A grayscale image has no capability of containing color data of any kind.
The result of converting the color mode of an image to grayscale is permanent. Switching back the mode to RGB will only add the ability for the image to contain color data but will not add the original color back.
To change the image mode to Grayscale, open the Image menu, then the Mode submenu, and click on the Grayscale option.
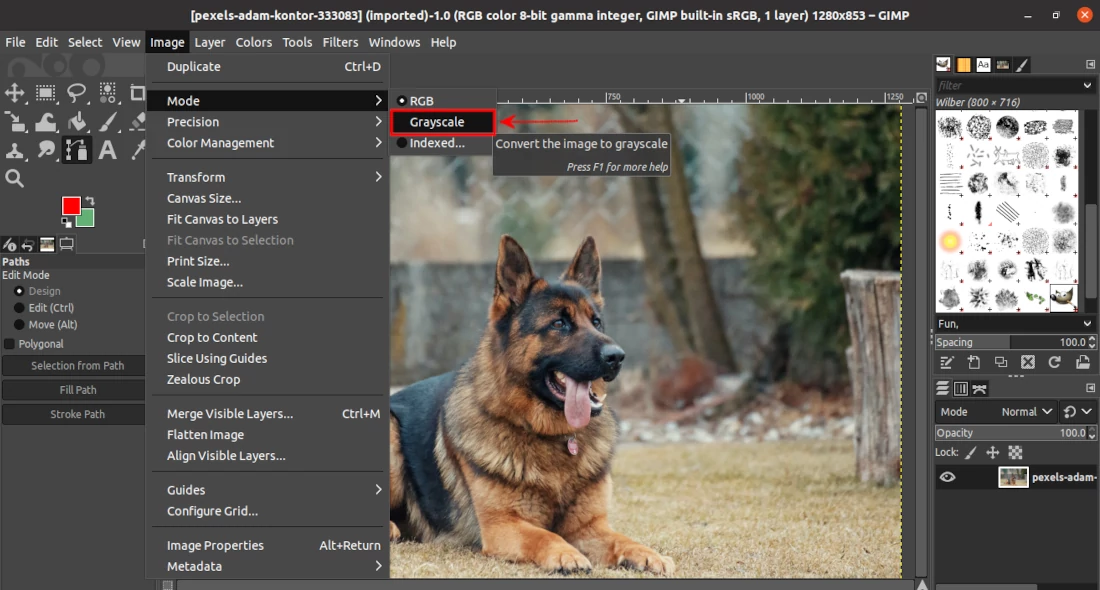
The image automatically becomes black and white.
Method 2: Desaturating the image
Another way of converting an image to black and white is by removing saturation from its color.
The advantage of this method is that it does not get rid of the ability of the image to work with other colors. It also allows you to apply the conversion to black and white on a selection or a specific layer as opposed to the grayscale method above.
The changes will only be applied on the currently selected layer and if you have a selection on the layer then it will be applied to that selection.
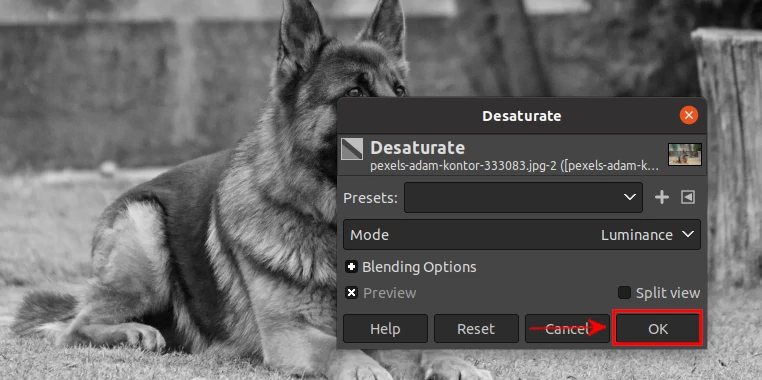
To desaturate an image, open the Colors menu, then the Desaturate submenu, and click on the Desaturate option.
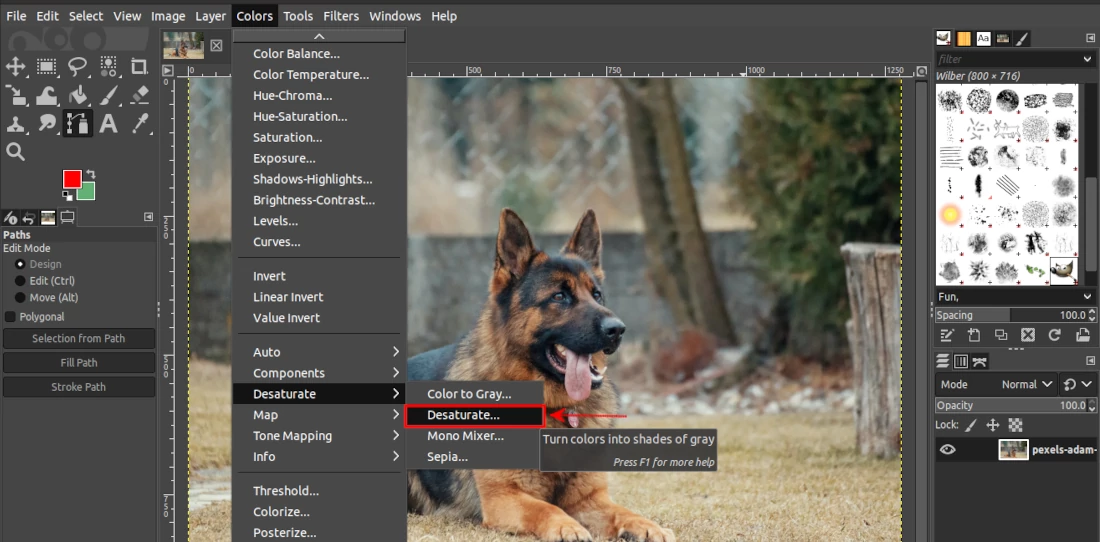
Then click on the OK button of the small window that pops up.
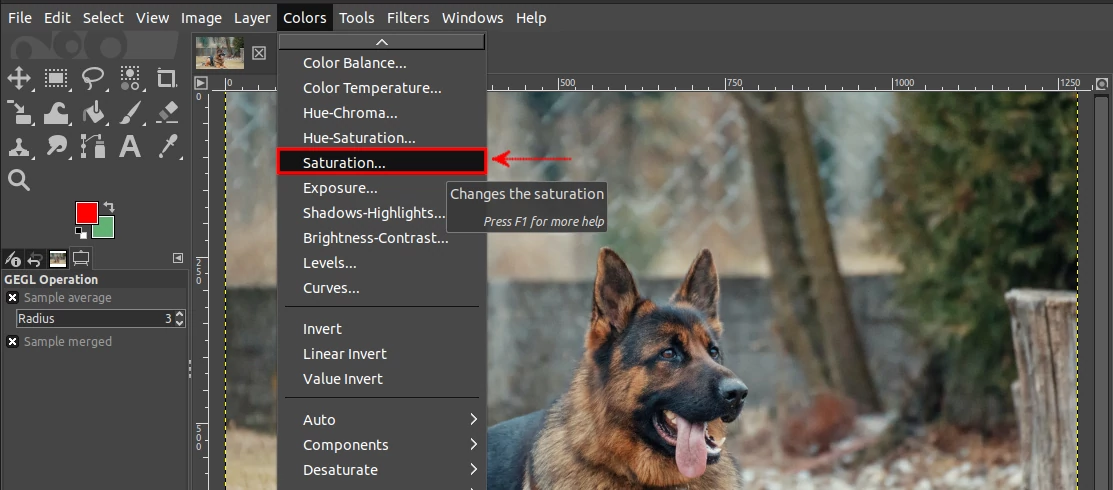
Another method of desaturating an image is by opening the Colors menu and selecting the Saturation option.
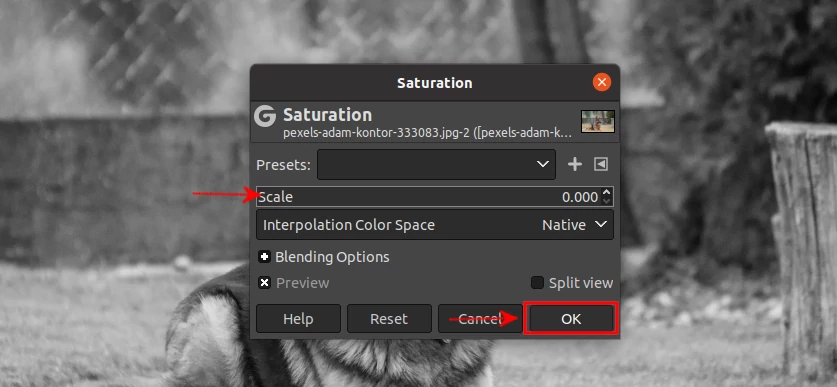
A small window titled Saturation will pop up. Move the scale slider to the extreme left to read 0.00. As you move the slider the image colors will be changing gradually. Once satisfied with the image, click on the OK button to apply the changes.
Method 3: Using the threshold
Although the methods above produce black and white images, they are not truly black and white because they also contain different shades of gray color.
If you want a true black and white image that contains only black and white colors with no gray, then this is the method you should use.
It reduces the image to only two colors (black and white). All the color data is removed and GIMP uses the color contrast to determine what gets converted to black and what gets converted to white.
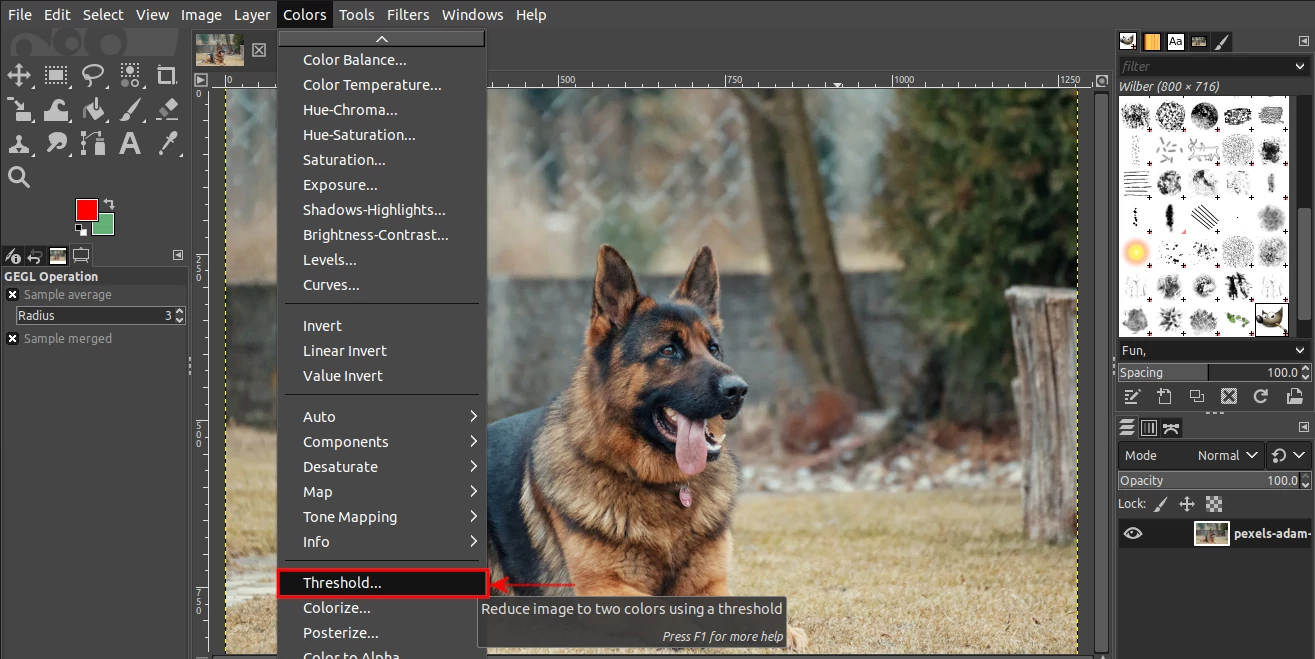
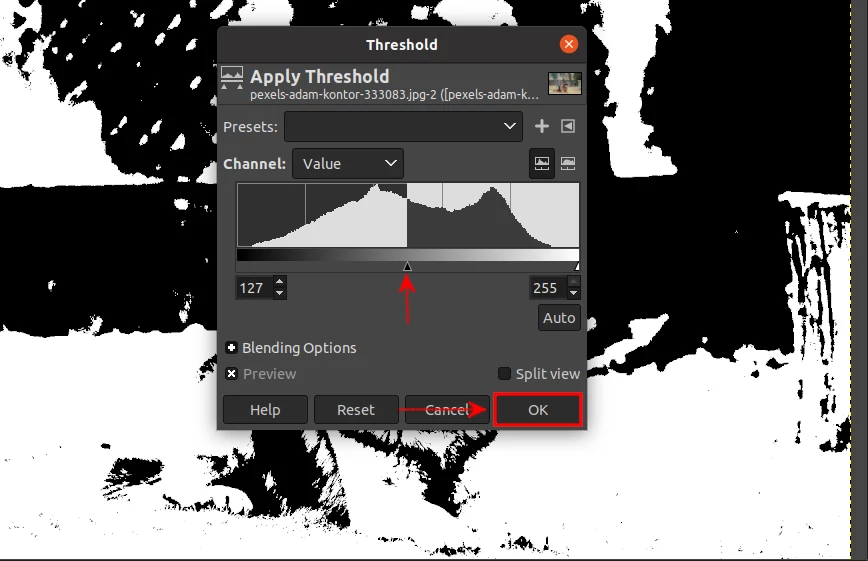
To convert an image to black and white using this method, open the Colors menu and then click on the Threshold option.
The colors in the image will be converted to either black or white and a small window will open. Click on the OK button to apply the changes. You may have to move the Channel slider to the left or to the right to adjust the Threshold to your preference before applying the changes.
This method only applies to the currently selected layer or a selection on the layer.
The image will look as below after making changes to its threshold. A lot of details on the image are lost unlike in the other methods above.
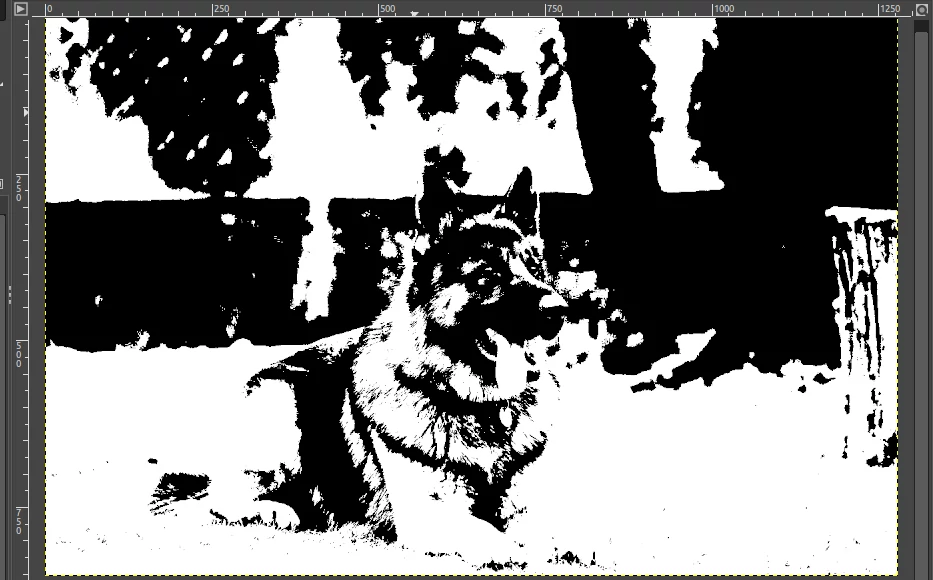
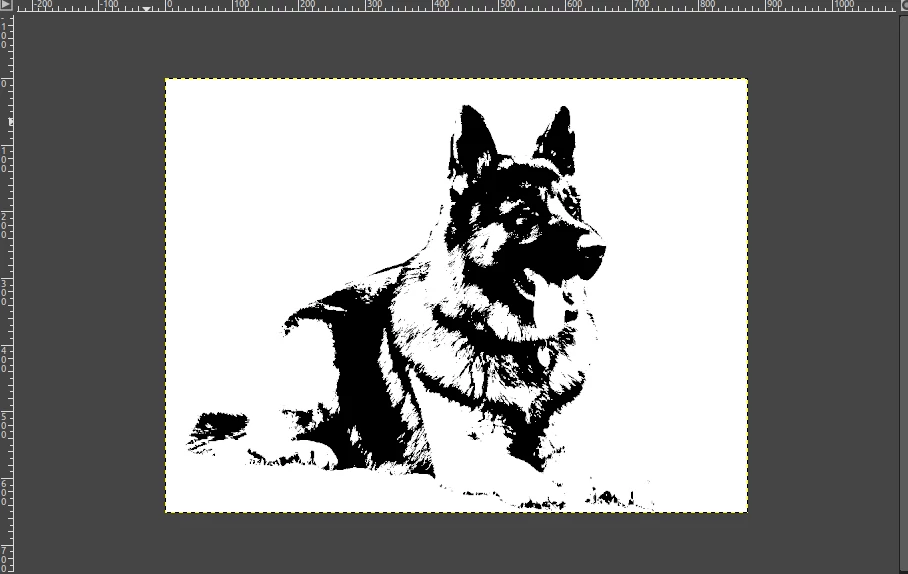
However, as you can see above, the background of the image has completely been distorted and makes no sense in the image. You may need to erase the image background (or areas that won't make sense in black & white) to a background color before converting the image in order to have a more clear black and white image as shown below.
Make sure you save the changes to the image after applying any of the methods above. To do so, open the File menu at the top and then click on the Export As option. Alternatively, use the Ctrl+Shift+E keyboard shortcut.
That's all!
Now you know how to convert a color image to black and white on your computer using GIMP.