How to download and install GIMP on Windows
GIMP (GNU Image Manipulation Program) is a free and open-source software for creating, manipulating (retouching), and editing graphic images.
It is very popular and among the best free alternatives to Photoshop. It was initially released on 2 June 1998 and has since been undergoing updates under the GIMP Development Team.
It is cross-platform and available for Linux, macOS, Windows, and other operating systems.
In this article, you will learn how to download, install and launch the GIMP application on your Windows PC.
GIMP installation on Windows
Follow the steps below to install GIMP on a Windows PC. In my case, I'm using Windows 10.
Step 1: Visit the GIMP download page on the official GIMP website via a web browser. Click on the "Download GIMP directly" button to download the installer/setup file.
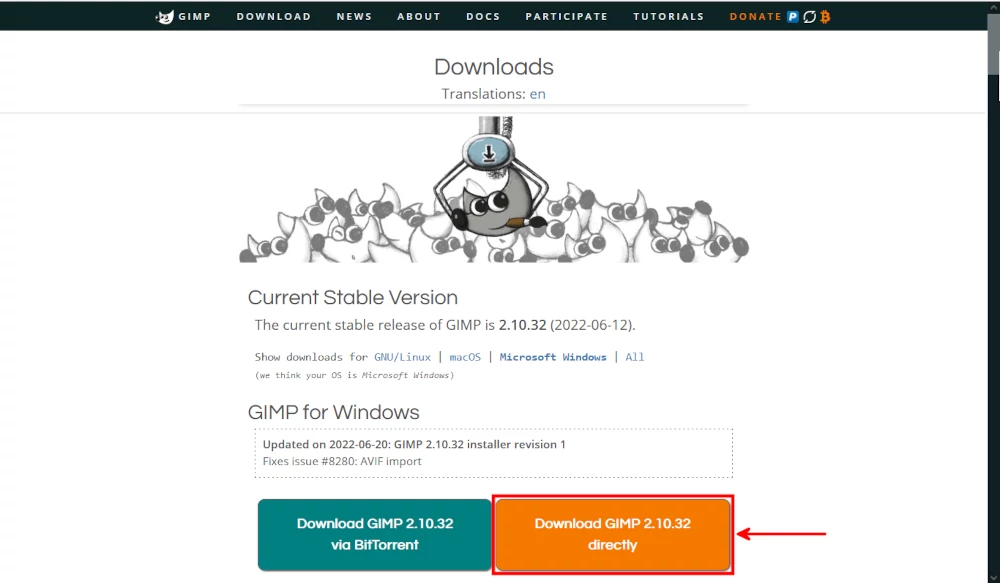
The file will start downloading, which may take a while depending on your internet speed. Give it some time.
Step 2: When it is done downloading, open the downloads folder or the location where it was saved and double-click on it to run it.

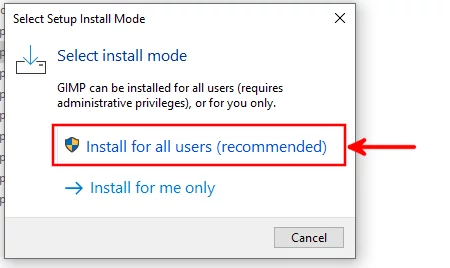
Step 3: You will receive a prompt asking you to select the installation mode, whether for all users or only for the currently logged-in user. It is recommended you click on the "Install for all users".
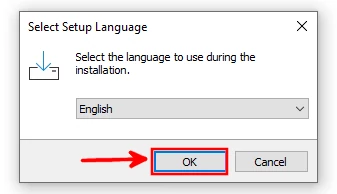
Step 4: Select your preferred language from the dropdown list then click on the OK button.
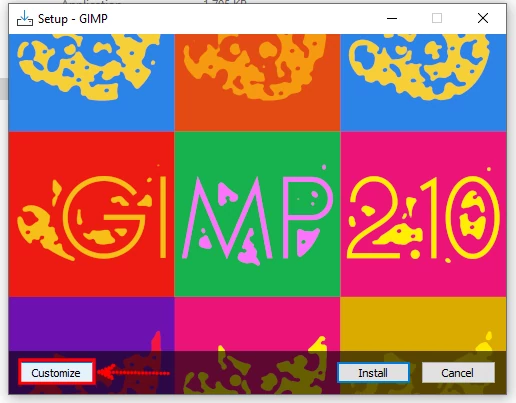
Step 5: Click on the Customize button to be able to add a desktop icon as well as be able to do some more customizations.
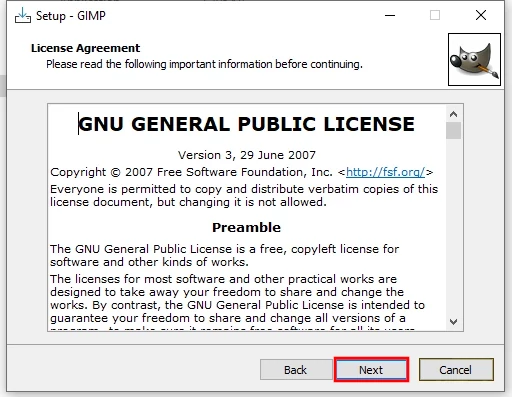
Step 6: Accept the License Agreement by clicking on the Next button.
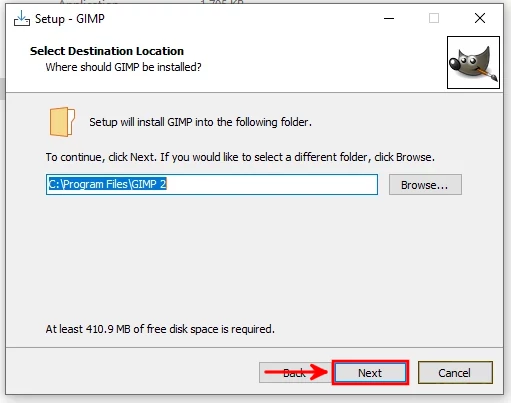
Step 7: The next step requires you to select the folder in which you would like to install GIMP. It's recommended you leave it at default and just click on the Next button to proceed.
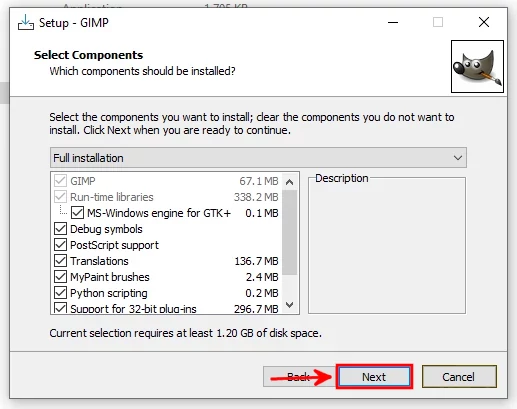
Step 8: Next is to select the components that you want installed. All components are already selected by default. Leave them as they are and click on the Next button.
Step 9: Check/mark the "Create a desktop icon" checkbox and then click on the Next button.
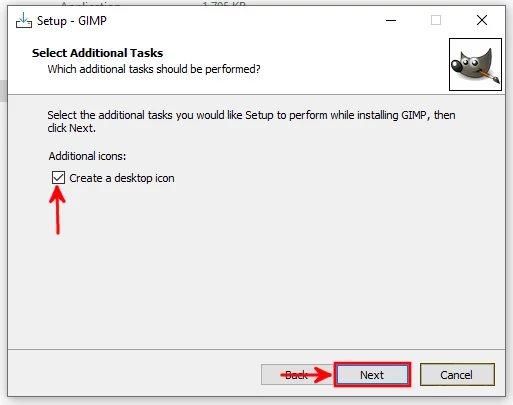
Step 10: Click on the Install button to start the installation process.
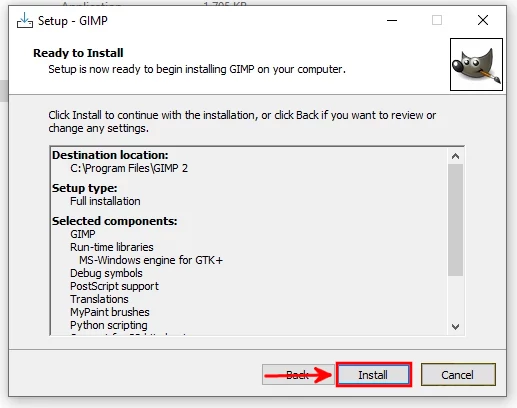
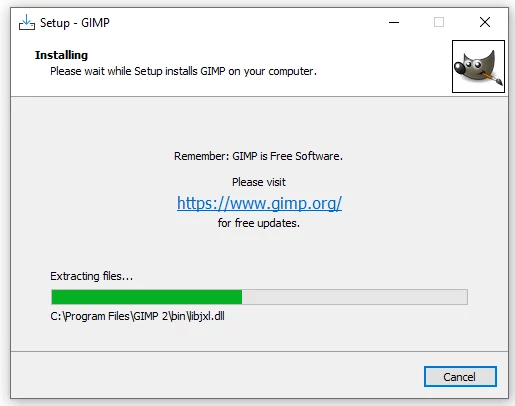
The installation process will begin and may take several minutes to complete depending on your computer speed. Observe the progress bar to track the progress.
Step 11: You will get notified when the installation is complete. Click on the Finish button to exit the installer.
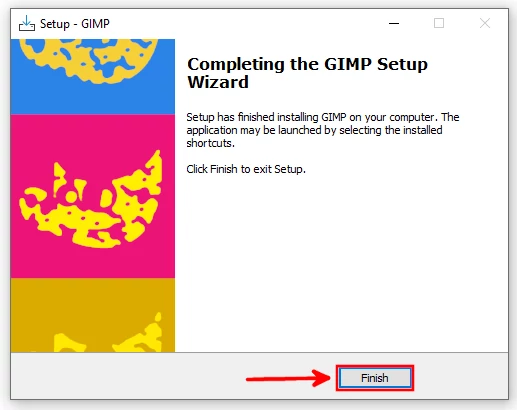
Congratulations! At this point, GIMP has successfully been installed and is ready to use in editing and manipulating your images.
Launching GIMP program
To open the just installed GIMP and use it to edit images on your computer, just click on its desktop icon (if you added it via Customize option) or open GIMP via the Start menu as described below.
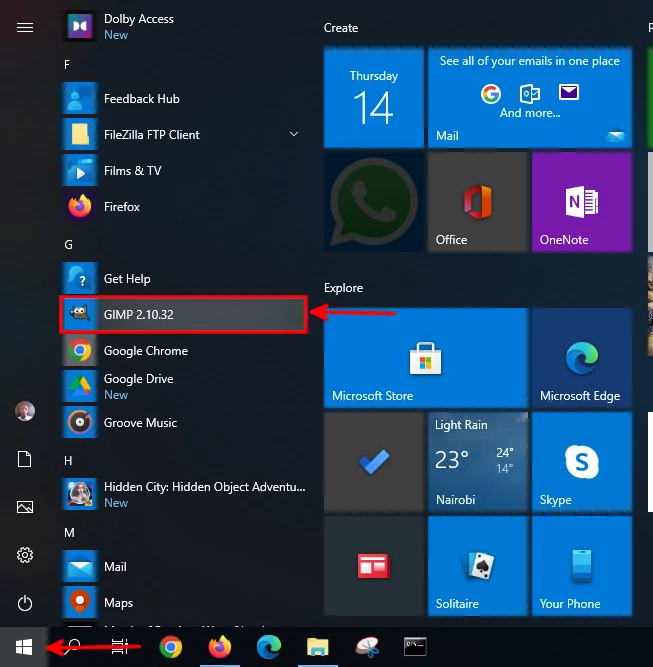
Press the Windows key or click on the Start button at the bottom left corner of the screen to open the Start menu. Then scroll down to the section under letter G and click on GIMP.
You can also add the GIMP icon to the Windows taskbar for easy access by right-clicking on GIMP in the start menu, then hovering the mouse pointer over the "More" option and clicking on the "Pin to taskbar" option.
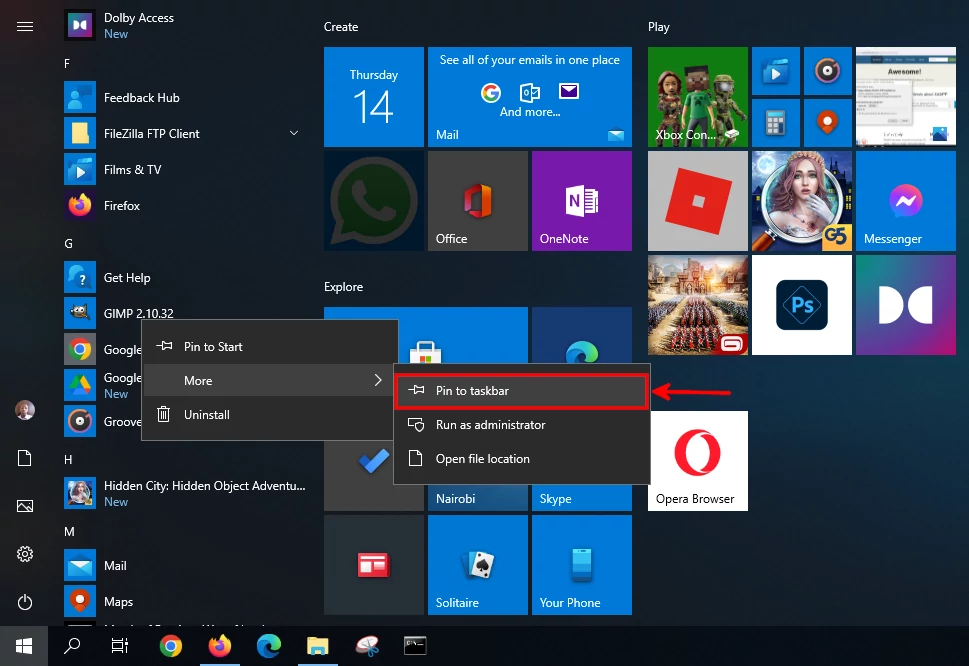
The GIMP's icon will now be pinned in the taskbar where it is easy to see and click it.
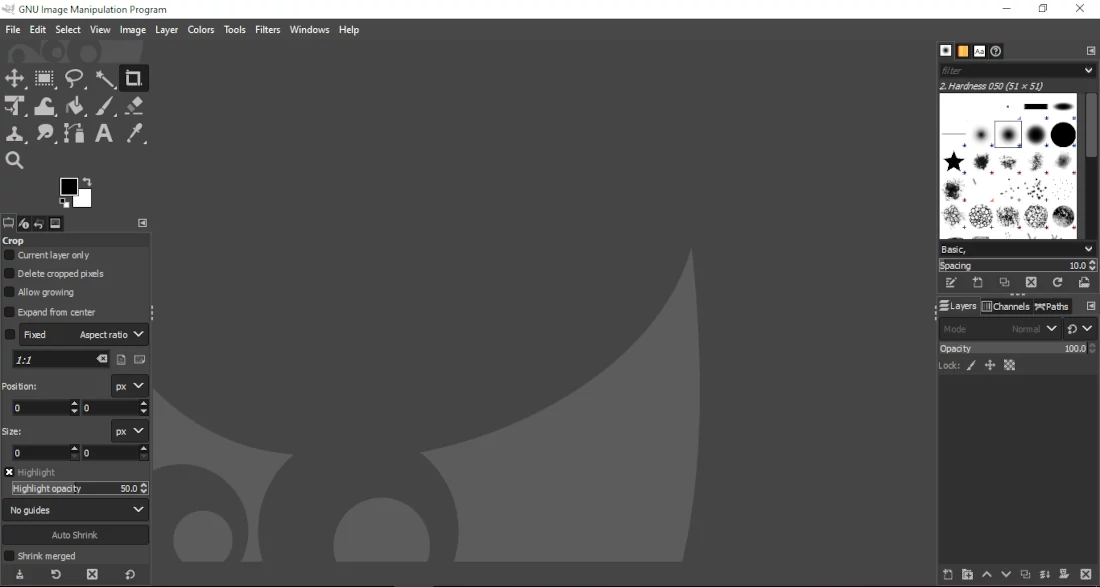
Below is what the GIMP application looks like when you open it. The largest (and empty) space is the workspace where the image will be displayed when working on it. With the help of various tools and menus, you can do wonders with GIMP.
That's it!
Now you know where and how to download and install the GIMP application on your Windows PC for image editing and manipulation. It's my hope you enjoyed and found this article helpful.

