
How to erase/remove image background to transparency in GIMP
Erasing the background elements of images to transparency is very applicable in many instances. For whatever reason, you most definitely have at some point wanted to do it.
For instance, you may have seen pictures of someone in a place where you are pretty sure they have never been. Or a picture of your friend in the company of someone you are sure they have never met. These pictures may look very real but are usually a product of photo editing/manipulation.
This involves combining two or more images into one, where the background of one or more images has been erased to transparency. This makes the image take the background of the other image it is placed on.
Images with transparent (see-through) backgrounds can easily be placed on different backgrounds and locations. This makes them easily edited and improved which makes them great for marketing purposes.
Among many other applications of such images is in improving the user interface (UI) in web, mobile, and desktop applications development.
In this article, you will learn how to erase the images' backgrounds to transparency using the GIMP image manipulation program.
Erasing image background to transparency in GIMP
There are tons of tools in GIMP that can be used to remove the image background to transparency in GIMP such as:
- Eraser Tool
- Fuzzy Select
- Select by Color Tool
- Paths Tool
- Free Select Tool
- Foreground Select
The choice of the tool to use basically depends on the nature of the image you are working with, or what part you want to remove or retain.
I will demonstrate to you how to do it with each of the above tools.
Regardless of the tool you use, the first two steps are always the same.
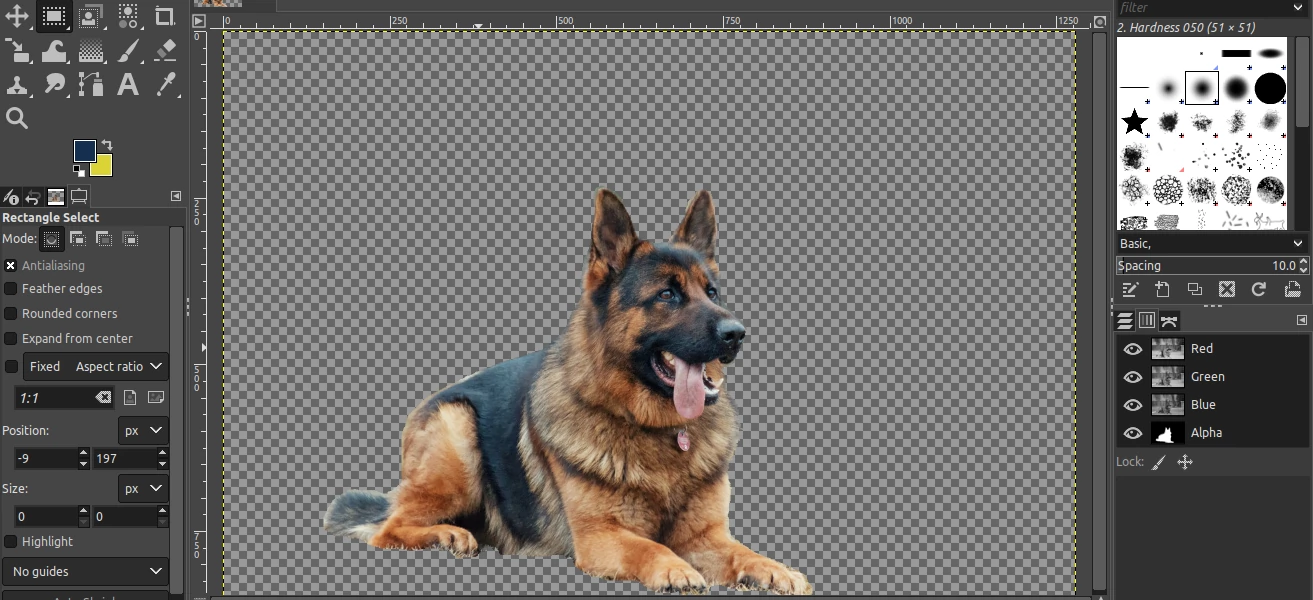
Step 1: Open the image in GIMP.
To open the image whose background you want to remove in GIMP, click and drag it from its folder to GIMP.
Another way is to open the File menu and then click on the Open option to select the image file from your PC storage.
Alternatively, you can right-click on the image in its folder and select the option to open it with GIMP.
Step 2: Add an alpha channel to the image layer
Add an alpha channel to the image layer (if it hasn't already been added). To do so, open the Layer menu, then the Transparency submenu, and click on the "Add Alpha Channel" option.
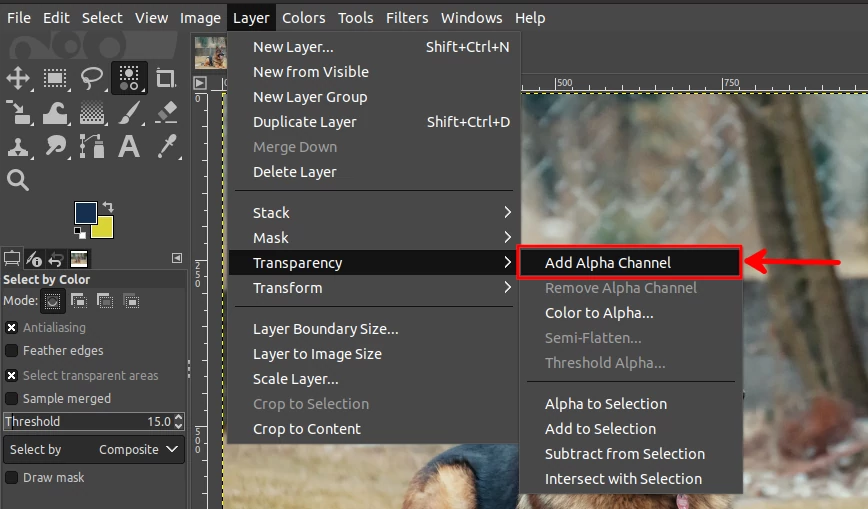
If the "Add Alpha Channel" option is greyed out, then it means that channel has already been added to the image so you can't/don't need to add it again.
If there is more than one layer, make sure the layer whose background you want to remove is the selected one when adding the alpha channel.
By default, if you erase any area on the image, it will take the selected background color instead of becoming transparent. To prevent this and remove the background completely to transparency, that's why we add an alpha channel. The alpha channel allows GIMP to track which areas of your image are transparent and which are opaque.
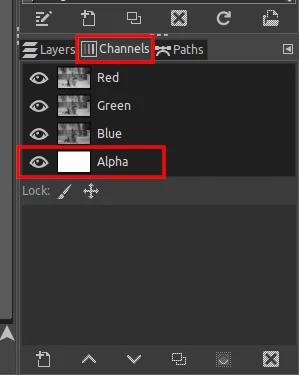
Another way of knowing if the image already has an alpha channel added to it is to check on the Channels tab next to the Layers and Paths tabs in the bottom right of GIMP. If it is already added, you will see "Alpha" as the fourth entry after Red, Green, and Blue.
Method 1: Eraser Tool
Select the eraser tool under the toolbox. Then click on the image and drag the eraser over the areas you want to remove. This will automatically erase those areas to transparency.
You may need to resize the eraser brush size to larger when erasing further from the image subject (the area that you want to retain) and to a smaller size when closer to it so as not to accidentally remove unintended parts.

This method is time-consuming compared to others and will require you to have a good level of precision.
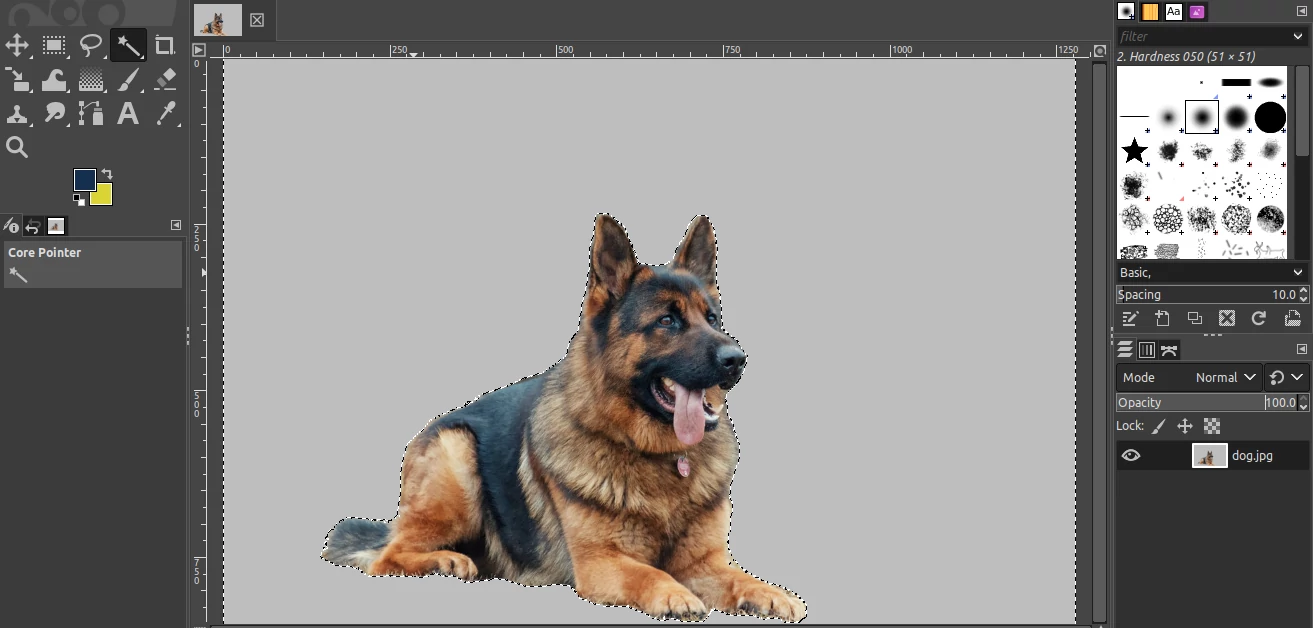
Method 2: Fuzzy Select
This method works on the basis of color similarity or difference. It is best suited for images with a clear contrast between the subject and its background.
Either the subject or its background should be uniformly colored.
Select the Fuzzy Select tool by clicking on its icon under the toolbox. You can alternatively press the keyboard U key.
Click anywhere on the area that you want to erase to have it selected. In cases where the background comprises more than one color (is not uniformly colored), click on the different areas that you want to erase while holding the Shift keyboard key.
Press the keyboard Delete key to erase the selected area to transparency.
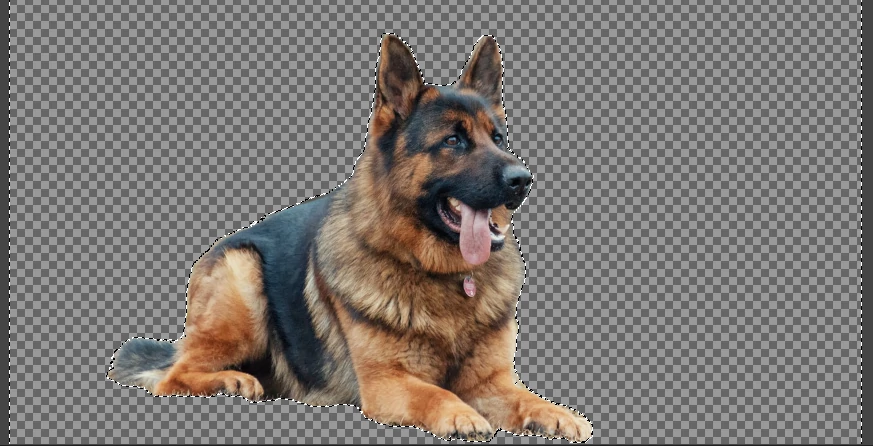
Note: In case you made the selection around your subject (the image area that you want to retain), open the Select menu and click on the Invert option before pressing the Delete key.
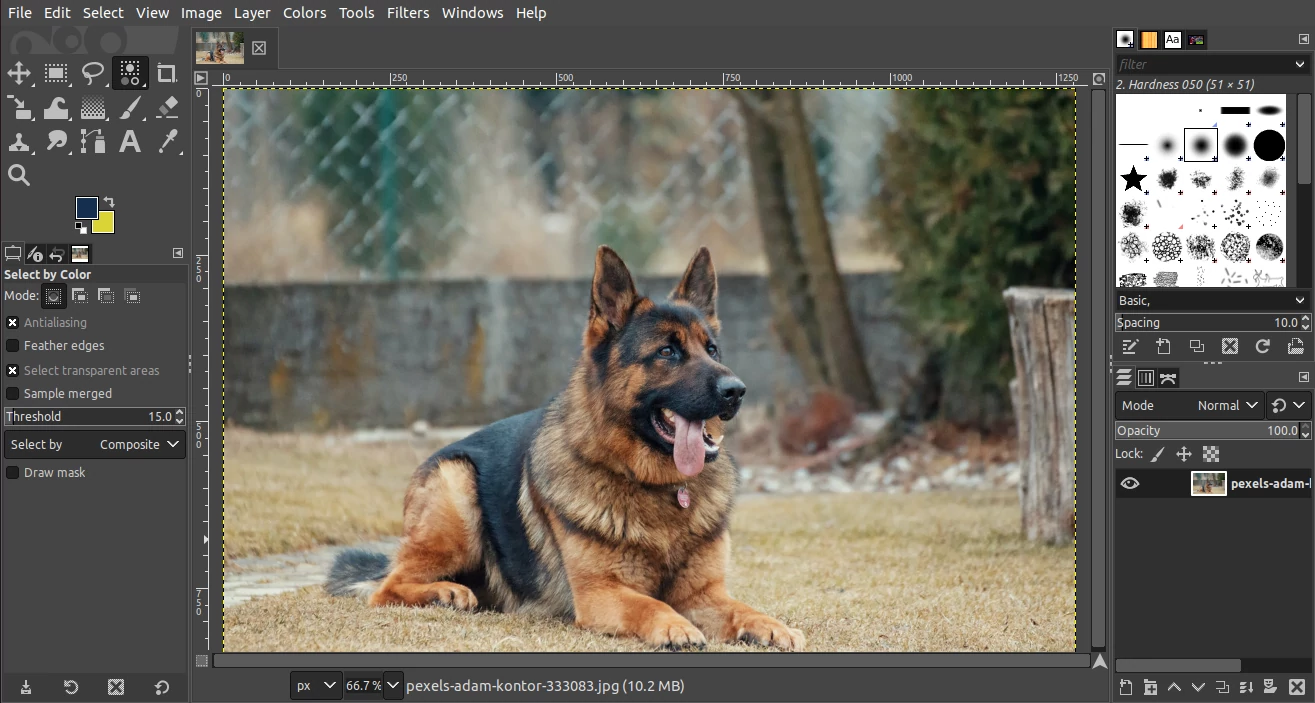
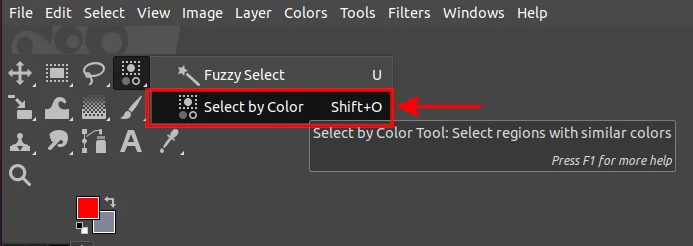
Method 3: Select by Color Tool
This method is closely similar to the above Fuzzy select tool. It is best suited to images where the background consists of a single color and where that color is not part of your subject.
Click on the Select by Color Tool icon under the toolbox to select it. You can alternatively use the shortcut Shift + O on the keyboard.
In a similar way to the fuzzy select, click on an area with the color that you want to erase. All the instances of that color in the image layer will be selected.
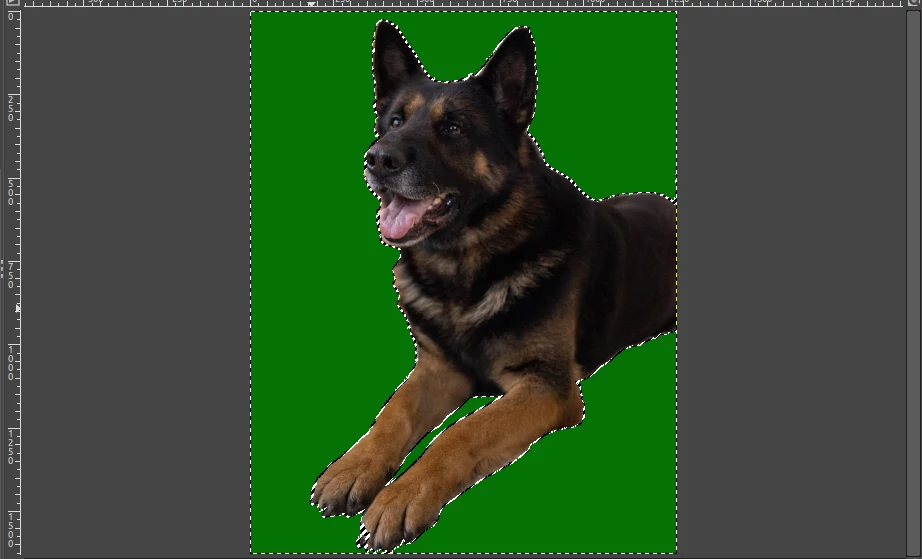
Press the keyboard Delete key to erase the selected area.
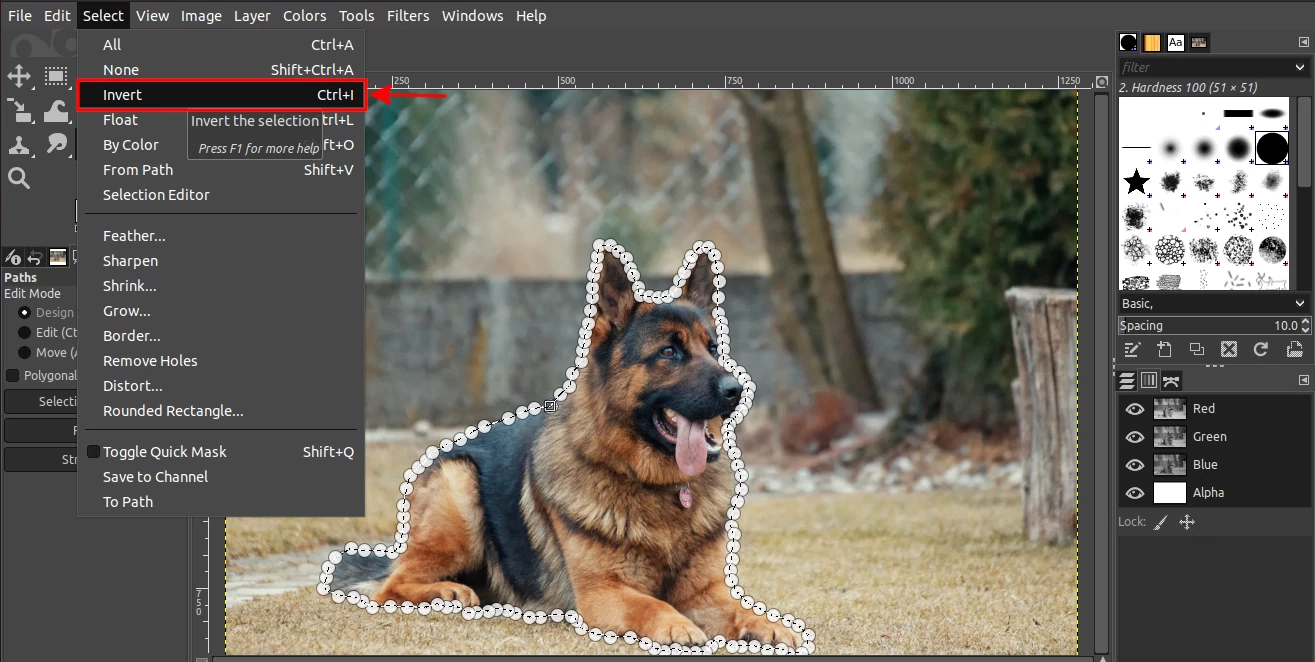
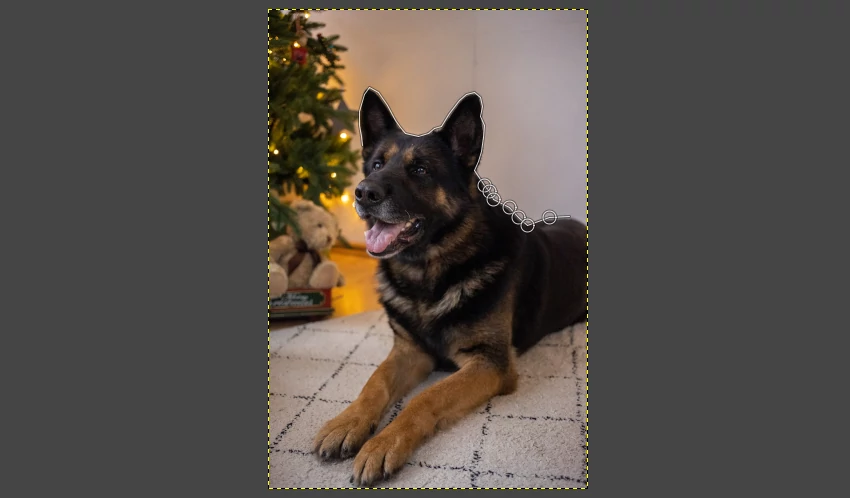
Method 4: Paths Tool
This method is the best applicable where the background is not uniformly colored and no clear contrast between your subject and the background elements.
It involves manually making a selection around the subject or around the area you want to erase by placing smooth lines and curves.
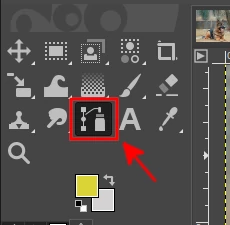
Select the Paths Tool by clicking on its icon under the toolbox.
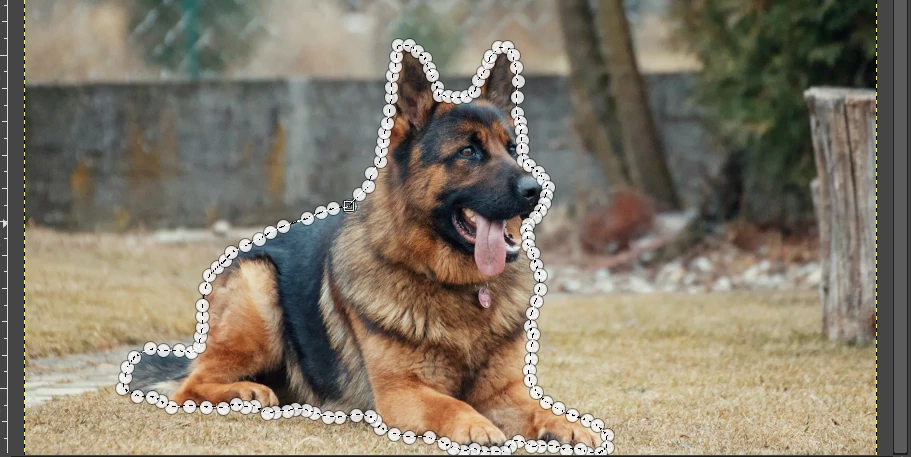
Click on an edge of the image subject to make a starting point (dot). Continue clicking tightly along its edges to make a boundary/selection of dots and lines around it.
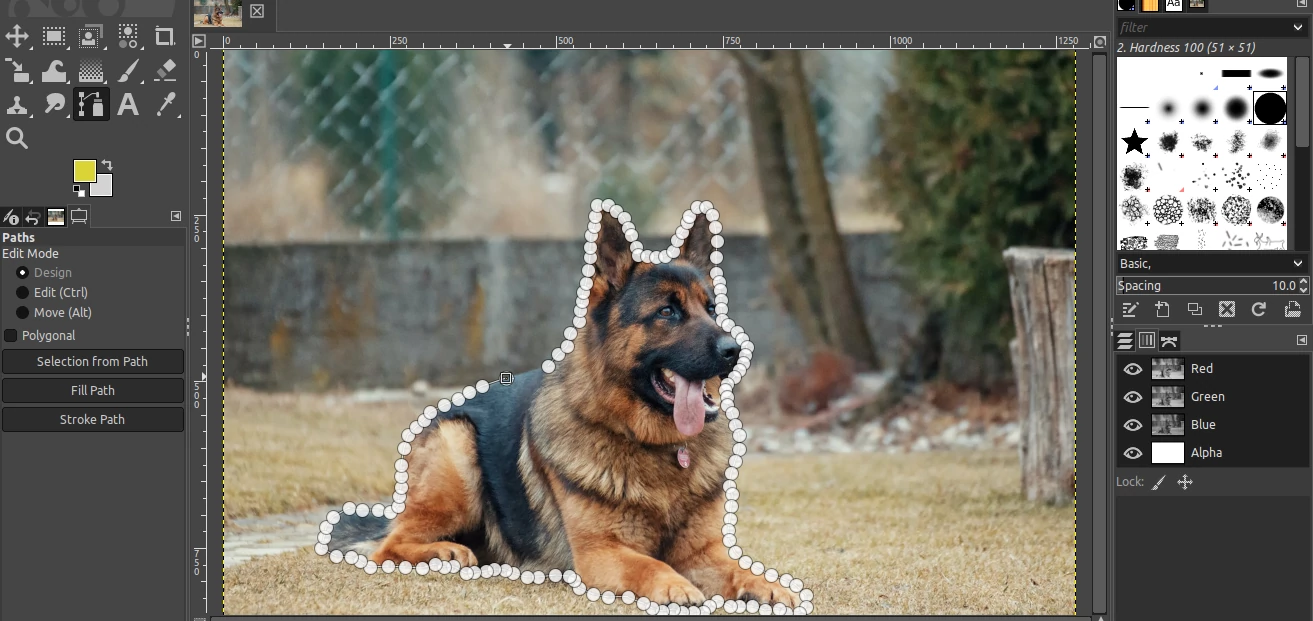
Make the dots all-around back to the first dot and press the Enter key to complete the boundary.
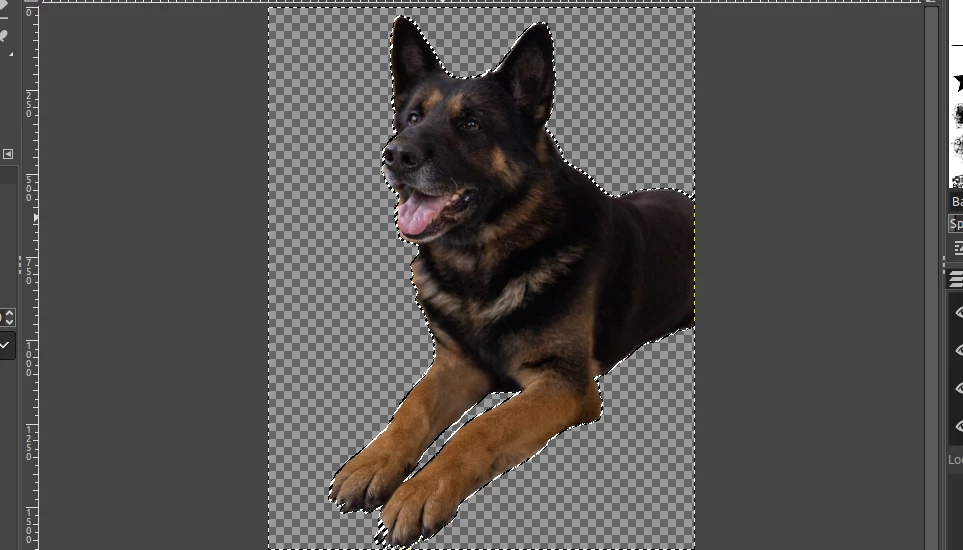
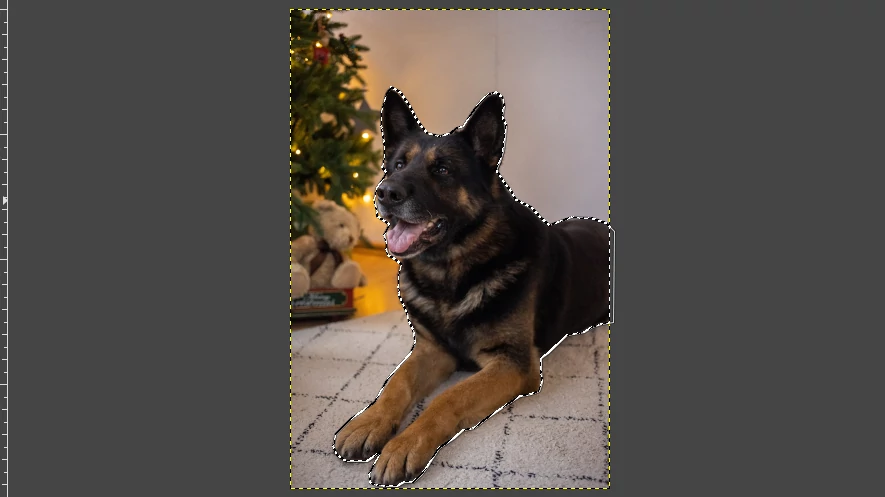
If you want to get rid of (make transparent) the selected area, just press the Delete key to erase it to transparency.
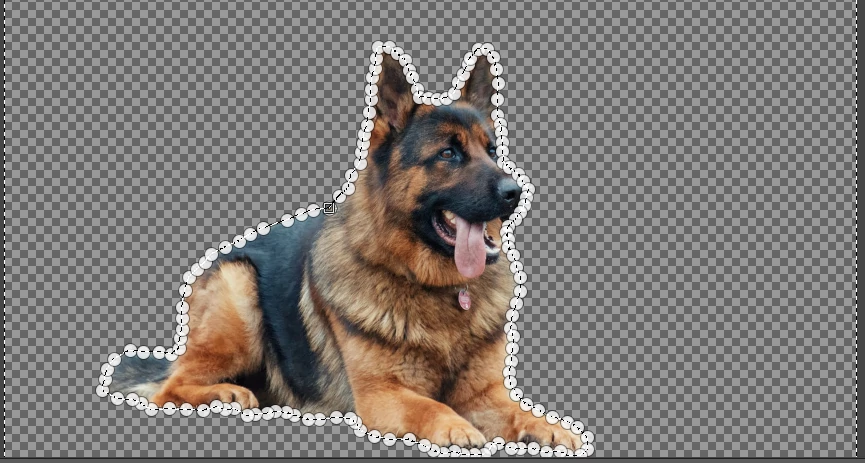
Else, if you want to remove everything else and retain the selection as in my case, you need an extra step. That's, open the Select menu and click on the Invert option to invert the selection.
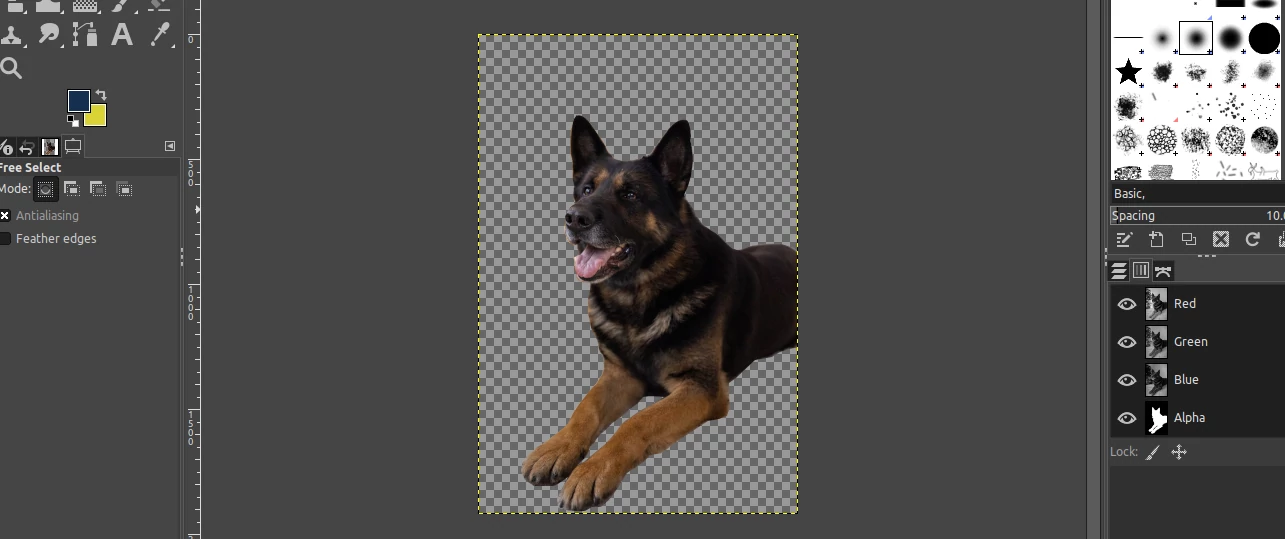
Then press the Delete key to delete the background to transparency. The result will be as shown below.
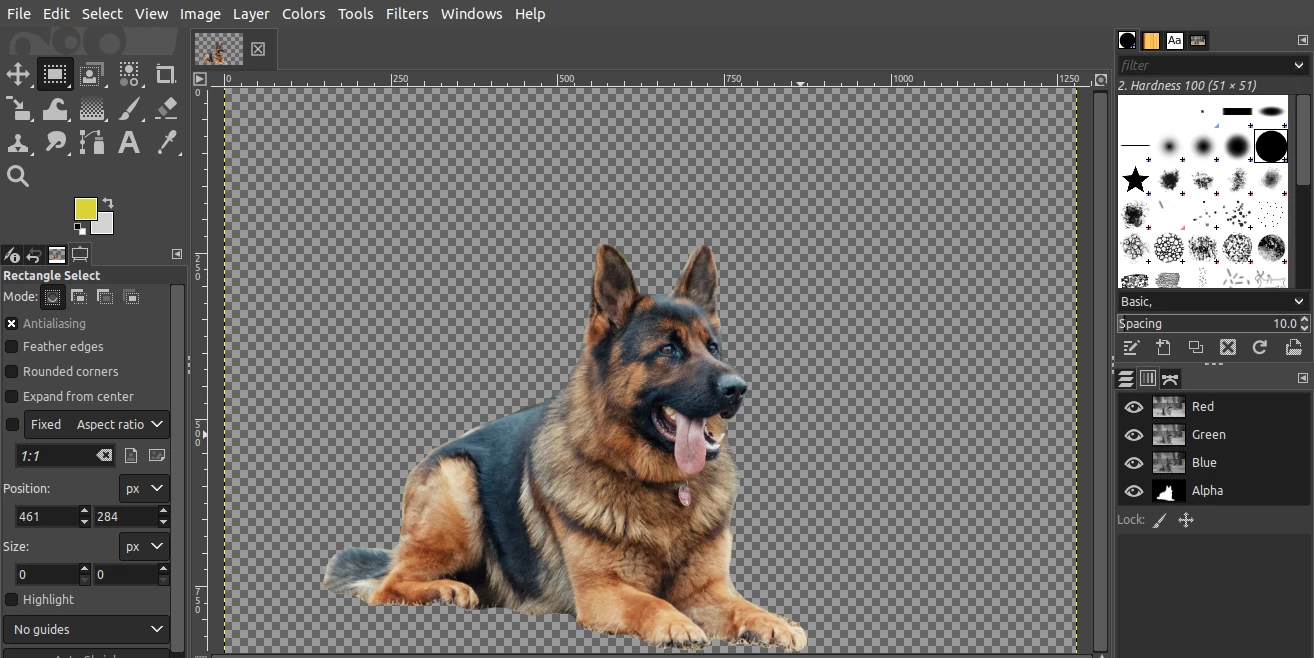
To get rid of the dotted selection/boundary, open the Tools menu and click on the Paths option. Then open the Select menu and click on the None option and it will disappear.
To have more clear and sharp edges, it is recommended to zoom in on the image before making the selection and also make dots closer to each other.
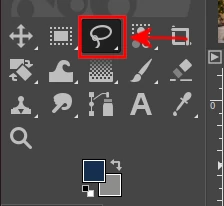
Method 5: Free Select Tool
This method is very similar to the Paths tool method above. The difference is, as the name suggests, that the boundary is made through freehand selection. You cannot make curved paths between two dots/joints like with the paths tool.
As opposed to the paths tool where you can go back and make a correction to the selection (without affecting the progress), with the free select tool you can only start making the selection afresh in order to correct an error to the boundary. It does not allow even undoing.
So in order to work with this tool, you need to be extra careful when making the selection so that it is perfect all-around from the very start.
To use this tool:
Click on the Free Select Tool icon under the toolbox to select it.
Click on a point at the edge of your subject to mark a starting point then proceed to click tightly around it.
Click around it back to the starting point to join the last and first dots and then press Enter. A complete dashed boundary around the subject will be formed.
Open the Select menu and click on the Invert option in the dropdown menu. Then press the Delete keyboard key. The background will be deleted to transparency.
In case you want to delete the selected area instead, then skip the Select > Invert option and press the Delete key directly.
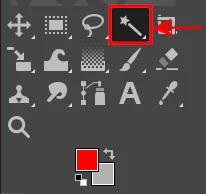
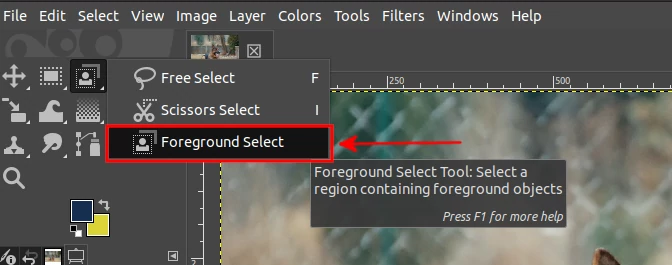
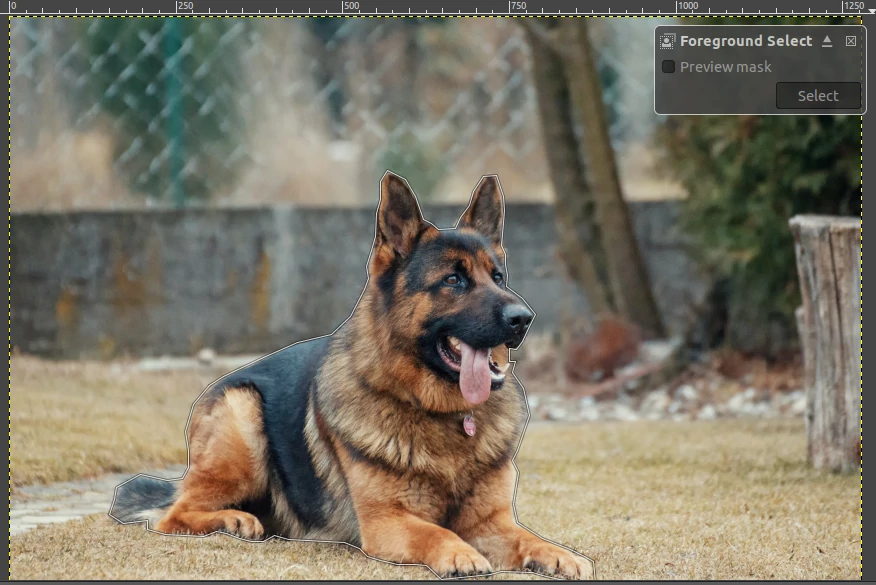
Method 6: Foreground Select
Select the Foreground Select tool under the toolbox.
Make a selection by clicking around your image subject and joining the last and the first dot. An outline will be drawn as shown below.
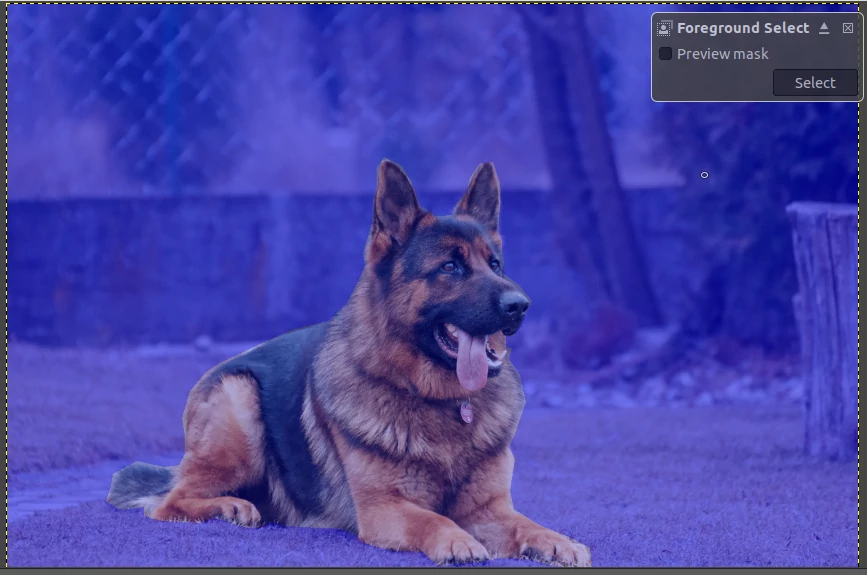
Hit the Enter key. The background will be covered by a darker blue and the selected area (your subject) with a lighter more transparent blue.
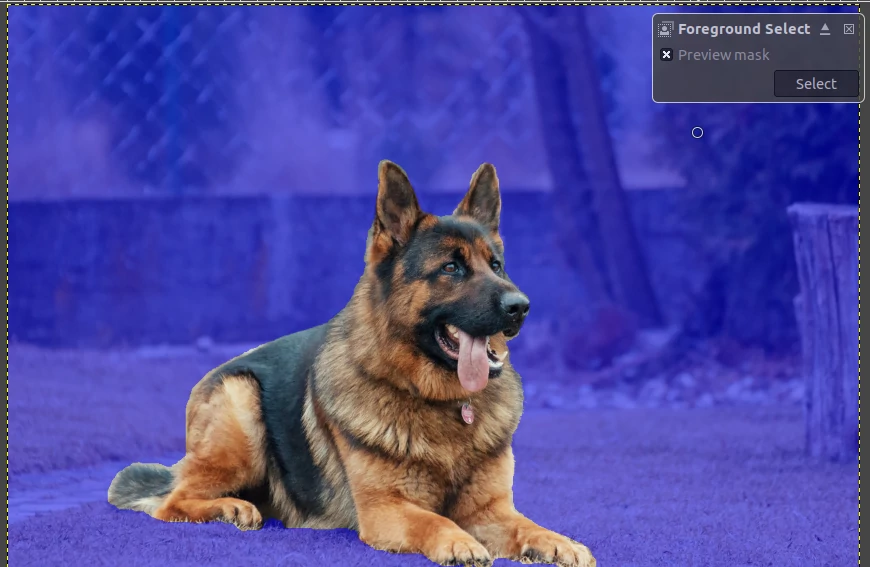
Brush the areas within your selection to remove the bluish color over them. You can increase and decrease (when near edges) the size of the brush so as to quicken the process while preventing brushing beyond the selection.
Once done, just check/tick the Preview mask checkbox and then click on the Select button.
A clear dashed outline around your subject will be seen as shown below.
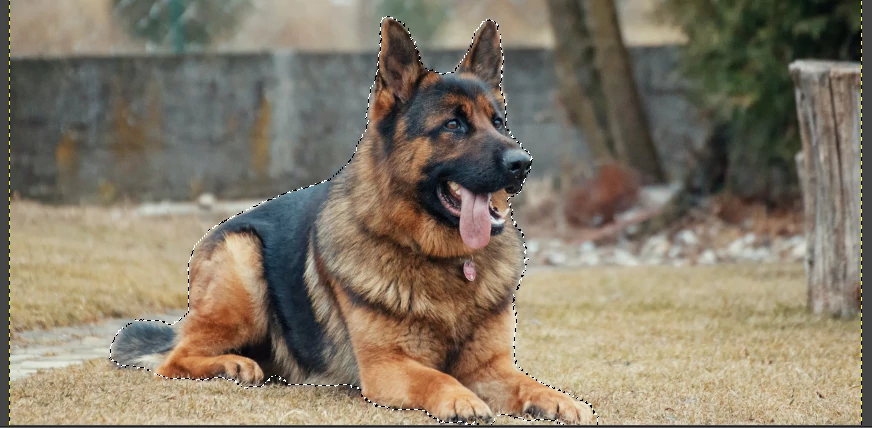
Invert the selection by opening the Select menu and clicking on the Invert option. Then click on the Delete keyboard key to remove the background.
Saving/Exporting the transparent image
All is not done until you have exported the changes to the image. There exist many image formats but not all support transparent backgrounds. You should save the image either as a ".png" or ".webp".
The .webp format is for the web and occupies far less space as compared to .png with the same quality. Therefore, use the .webp format only if you intend to use the image on the web (in web pages). Else, save the image as a .png.
To save the image after the changes, open the File menu and click on the Export As... option. Alternatively, you can use the Ctrl+Shift+E keyboard shortcut.
A dialog box to export the image file will open. Write your preferred image name in the Name field ending with ".png" or ".webp". Then select the folder/location where you want to save it and click on the Export button at the bottom right.
GIMP will then give you a few options about how to save your PNG file. Just click on the Export button again.
That's it!
Your exported image is now without a background and it will take whatever background you put it on.
Do not send an image with a transparent background via WhatsApp.This is because it converts the image to ".jpeg" format which replaces the transparency with a white background.
Erasing the background to transparency not working?
Sometimes you may find yourself in a scenario where:
- You are not able to erase the background
- Erasing sets the background to the selected background color eg. white, grey, etc instead of transparency.
- You are able to erase to transparency but after exporting/saving the image it gets a background color.
- The transparency disappears when you send the image to someone.
If using the eraser or pressing the delete key (after making a selection) is not working, the chances are that you have the wrong layer selected. This scenario occurs only if you are working with multiple layers. Make sure you have the correct layer selected.
The Layers panel is located at the bottom right section of GIMP next to the Channels and Paths tab.
Another cause could be that you have made a selection on the image but are trying to erase segments outside of that selection using the eraser tool. Make sure that there is no active selection enabled or else erase inside the selection.
Erasing may also not work if you have the eraser's opacity set to zero (0). Check under the Tool Options panel to ensure that the eraser's opacity is set up all to 100%.
If erasing makes the background take the selected background color instead of becoming transparent, then it means that you either have not added an alpha channel or you have added it to the wrong layer. Just add an alpha channel by opening the Layer menu, then opening the Transparency submenu and clicking on the Add Alpha Channel option, and try erasing again. It should now be fine.
If you are able to erase the background to transparency but after saving it gets a background color, that means you have saved it to a format that doesn't support transparency. Always save images with transparent backgrounds in ".png" or ".webp" formats.
Some applications change the formats of images when sending. Eg, images sent via WhatsApp are converted to ".jpeg" format which does not support transparency. So the sent image will have a background color. To avoid losing transparency, send the images via email or other applications that do not do conversions.
Conclusion
You may at some point want to delete an image's background and transform it to transparent so that you can easily place the image on different backgrounds or use it for different design works as per your needs.
It's possible to achieve this through the help of the GIMP image manipulation program.
In this tutorial, you have learned in detail how you can remove the image background to transparency through six different methods. You have also learned how to troubleshoot if it doesn't work as expected. It's my hope you have followed well along and found the tutorial helpful.