How to resize an image in GIMP
It is common to want to resize some images from time to time for certain use cases. This may involve enlarging an image or reducing its size.
If you are in such a scenario where you need to resize an image but don't know how to do it, then this article is for you.
GIMP is an ideal image manipulation software that comes in handy when resizing images. With it, you can resize any kind of image whether for use on your website, for social media usage, for printing, or for use in any media.
In this article, I will show you how to resize images using GIMP.
Follow the steps below to resize an image in GIMP:
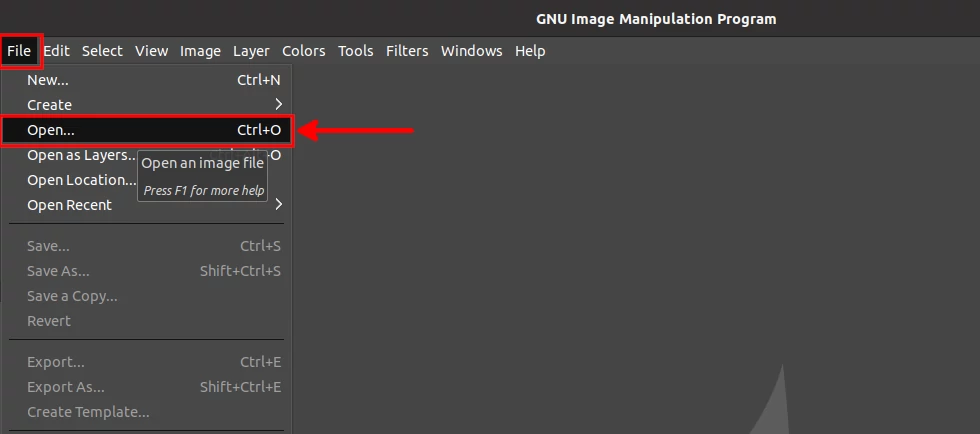
Step 1: Open your image in GIMP. To do so, open the File menu and click on the Open option.
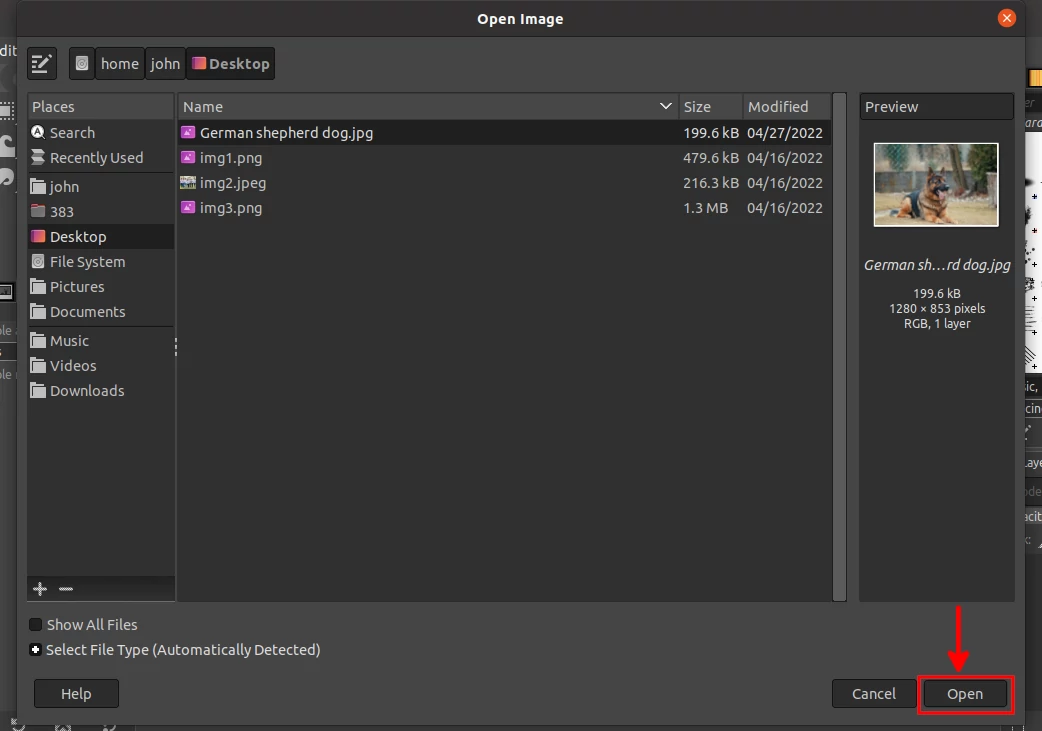
A dialog box will open. Navigate through your PC storage to the location of the image you want to resize. Click on the image to select it (it will be previewed on the right side) and then on the Open button at the bottom right of the dialog box.
Alternatively, just click on the image from where it is stored and drag it into the GIMP's workspace.
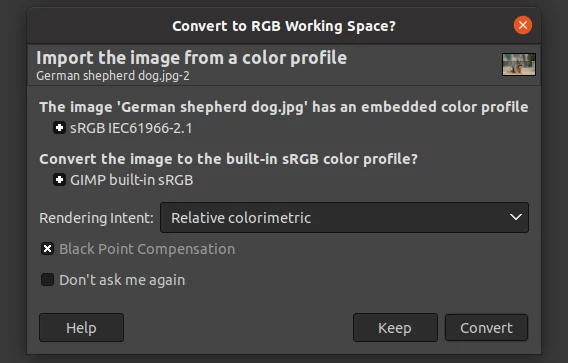
In some instances when opening an image, you may get a dialog box as below titled "Convert to RGB working space?". Just click on the Convert button.
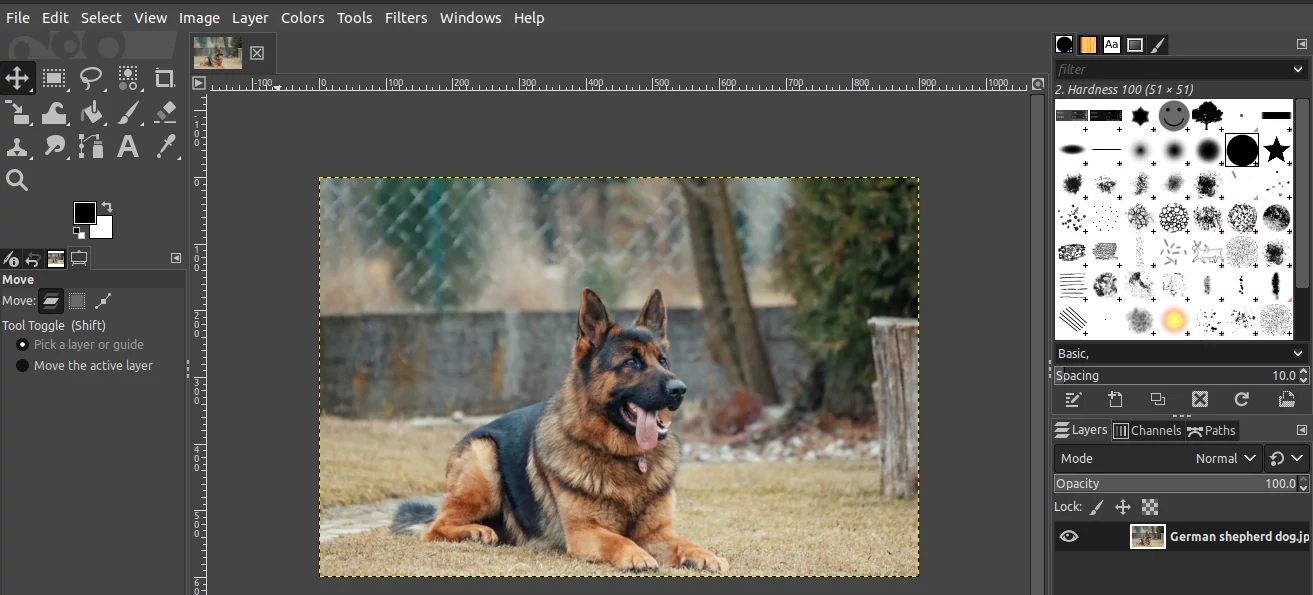
The image will be opened and displayed in the GIMP's workspace and you can do the various editing to it.
Step 2: Open the image scaling option. To do so, open the Image menu, then click on the Scale Image option.
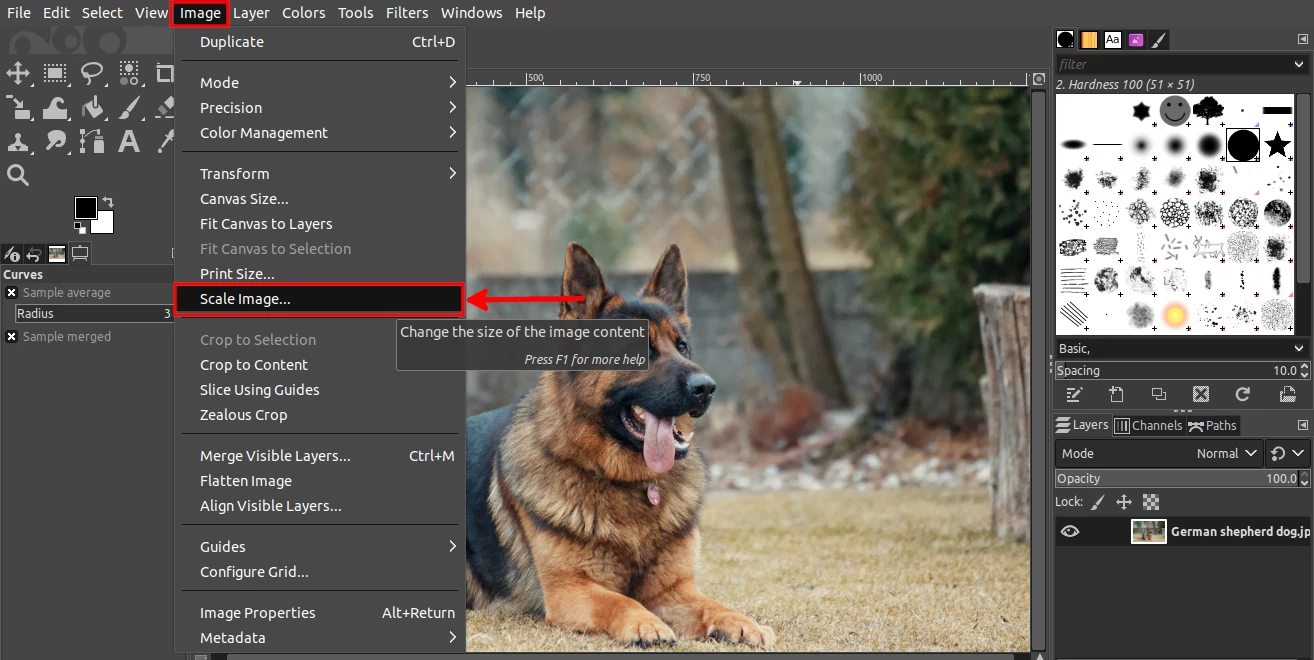
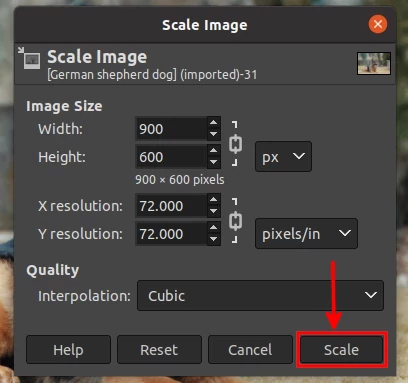
A dialog box titled "Scale Image" with a number of options will open as shown below:
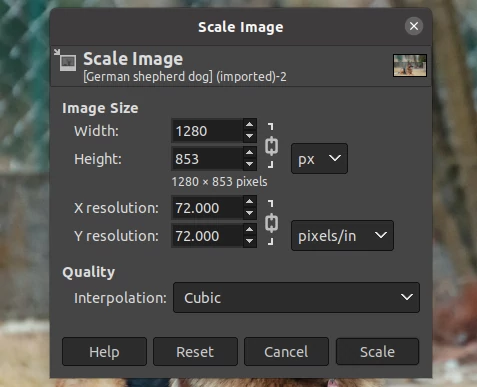
Step 3: Make changes in the various scaling options given.
The image width and height will be shown under the Image Size section. The default units of measurement for them are in pixels(px).
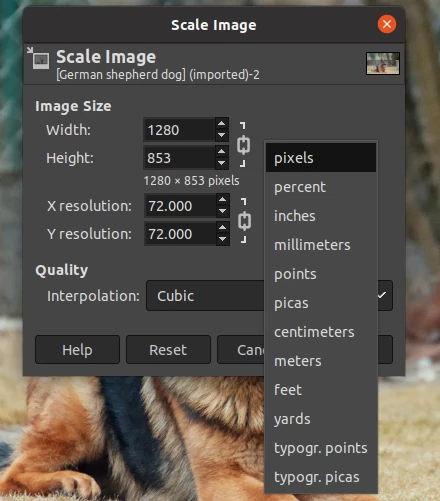
In case you are not comfortable with pixels, you can change these units of measurement by clicking on the px on the right side and selecting your preferred one from the dropdown.
To change the size of the image, just enter the cursor in either the width or height field and replace that value with yours. You can also click on the "arrow up" or "arrow down" icons on the right side of the values to change them.
Once you change the value of the width and hit the tab key or put the cursor into the height input field(or any other field), a new value of the height will be updated for you automatically and vice versa. This is because the feature to retain the image's aspect ratio has been enabled for you by default.
If you would want to do away with retaining the aspect ratio when changing the image size, then click on the chain-link icon next to the height and width input fields. This will allow you to enter a new width and height independently of each other. Changing one of the values won't affect the other value.
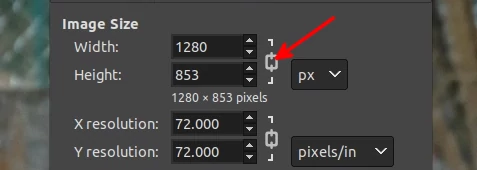
Disabling the aspect ratio changes the chain link icon to a broken chain. To re-enable this feature again after disabling it, just click on the chain icon again.
However, I won't advise doing this as it will result in a distorted stretched or compressed image. Avoid this unless you really have to (eg if the image is already distorted and you want to correct it back to the right aspect ratio).
I would also advise avoiding enlarging images when resizing them. While this works and makes them as large as you wish, it reduces their quality.
The X and Y resolution values are always by default set to 72pixels/inch.
If you only want to use your image on digital media eg on websites, social media, various applications, in soft copy documents, etc, I recommend you retain the X and Y resolution as 72.
Else, if you want to print the image, only then should you change the X and Y resolution and set them to 300. 300px/in is the photo-quality print resolution and therefore it will ensure the printed image will have a higher resolution while retaining document size.
Changing the resolution does not change the actual dimensions of the image but only the print quality.
For the interpolation under the Quality section, just leave it as default (cubic).
You can always click on the Reset button to undo all the options back to their default options in case you are not sure the changes you have already done are right.
Step 4: Once you are satisfied with the changes you have made to the image size, click on the Scale button at the bottom of the dialog box.
Your image will be resized to match the new dimensions (height and width) that you scaled it to. You will also notice the increased or decreased image size as displayed in the GIMP's workspace.
You can always undo the resizing by using the Ctrl+Z keyboard shortcut (Option+Z on macOS) in case you change your mind.
Step 5: Save your resized image. To do so, open the File menu and click on the Export As option.
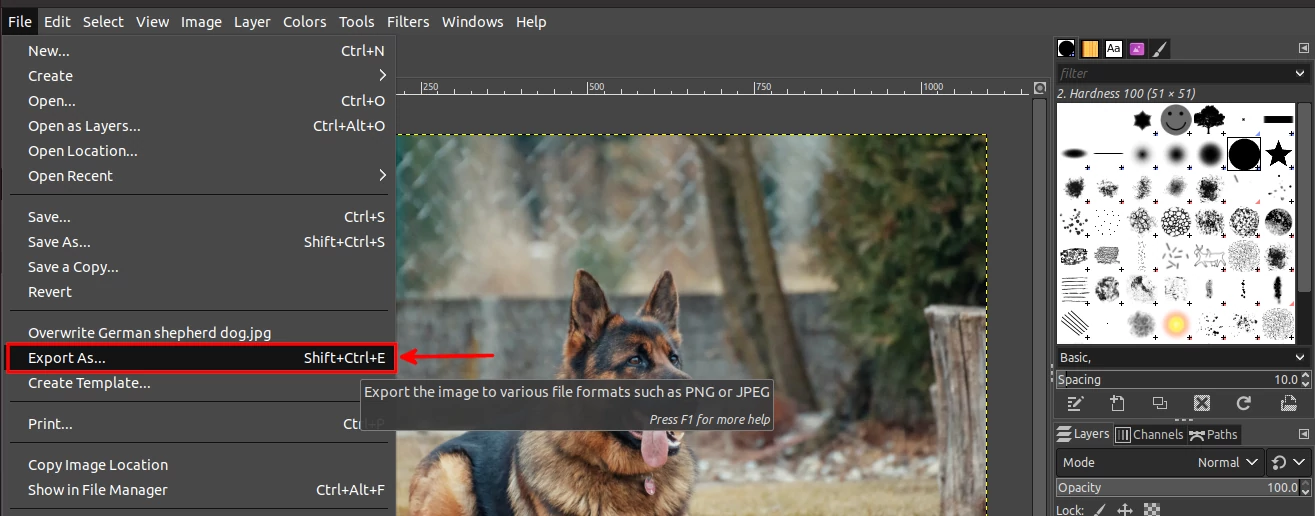
Alternatively, you can use the Shift+Ctrl+E keyboard shortcut.
An "Export Image" dialog box will open up. By default, the name of the image is already pre-filled for you. This is the current name of the image file. If you want to overwrite the original image with the new size, just skip every option and click on the Export button.
In case you want to save the resized image as a separate file, just type in the Name field your preferred new name ending with your preferred file extension. Examples: ".jpg", ".jpeg", ".png", ".webp", etc. If you are not sure of this just leave it with the current file extension. Then if you want to save it in a different location, navigate through your computer storage and select the directory/folder in which you want to save it. Then click on the Export button.
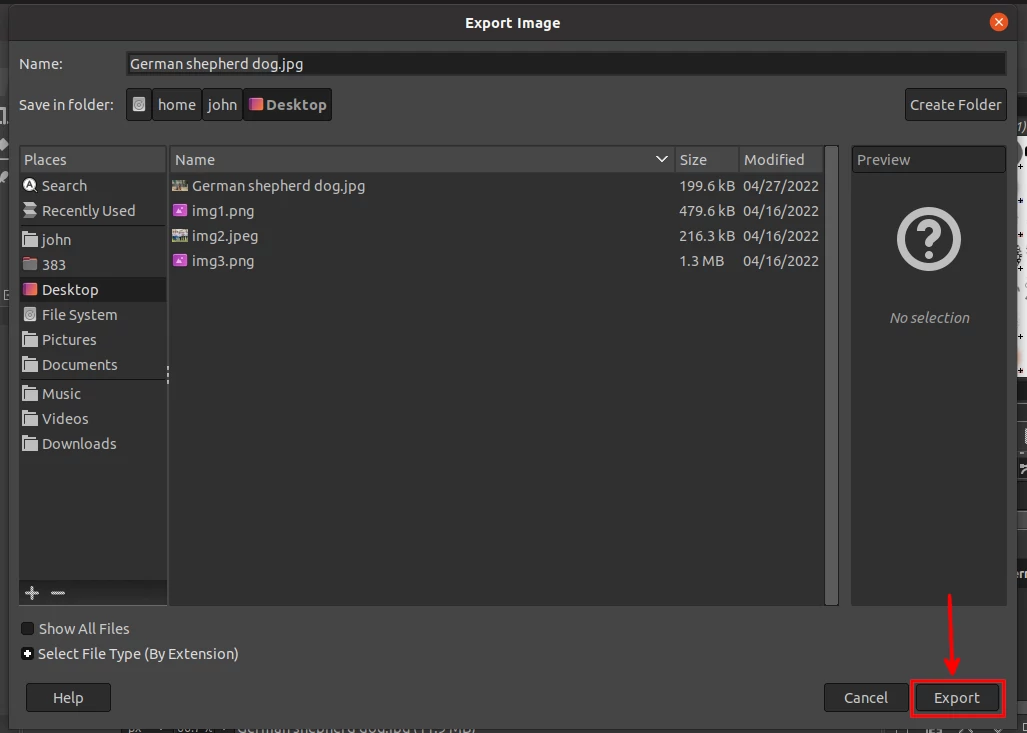
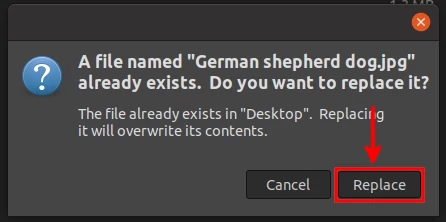
If you choose to retain the same name and location (ie to overwrite it), you will be prompted to confirm that you are sure of your action. Just click on the Replace button.
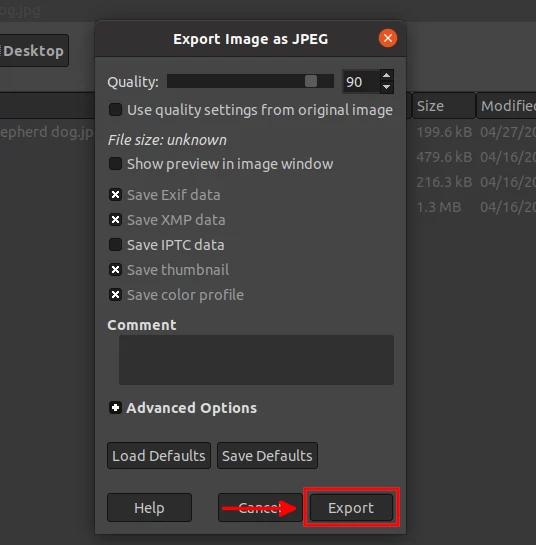
In the next dialog box, just click on the Export button.
Now you can comfortably resize an image for any type of usage (whether for use in the digital media or for high-quality printing) in GIMP.