
How to add/install new fonts in GIMP
GIMP (GNU Image Manipulation Program) is a free open-source software for creating and editing images that have a comprehensive set of tools.
It is easy to install and use it.
GIMP doesn't come with any additional fonts upon installation but uses those already installed on your computer.
Fonts act as an important component of the overall design. It is a determinant of how readers perceive information from the text. The choice of color, font, and text size plays a vital role in communicating to the target audience. Different brands also have their select choice of fonts across all their branding materials.
Due to any of these reasons, you may find yourself in a scenario where you want to use fonts that are not available in GIMP.
Luckily, you can add new fonts to GIMP. You can do this by installing them directly to GIMP or by installing them to your operating system (Windows, Linux, MAC).
When you open GIMP, it checks its own custom fonts folder as well as the default fonts folder on your operating system to generate a list of the available fonts.
It is easier and more convenient to install your fonts directly into your operating system's default fonts folder. By doing so, these fonts can be accessed by all the applications on your computer (GIMP included), which is more convenient.
If for your own specific reason you still want to install new fonts to GIMP directly, then this article is for you. You can use this guide to install fonts on GIMP across different operating systems. For demonstration purposes, I am using Ubuntu Linux.
Installing fonts to GIMP involves two main steps:
- Getting the new custom fonts
- Adding the fonts to the GIMP fonts folder
1. Getting the new custom fonts
The easiest way to get new fonts is by downloading them online. There are typically hundreds of websites with an unlimited number of stylish fonts, which are free and easy to download.
Just search for your preferred font on Google and you will be amazed to find many sources where you can download it for free.
To just list a few, below are sites in which you can get a huge number of awesome fonts.
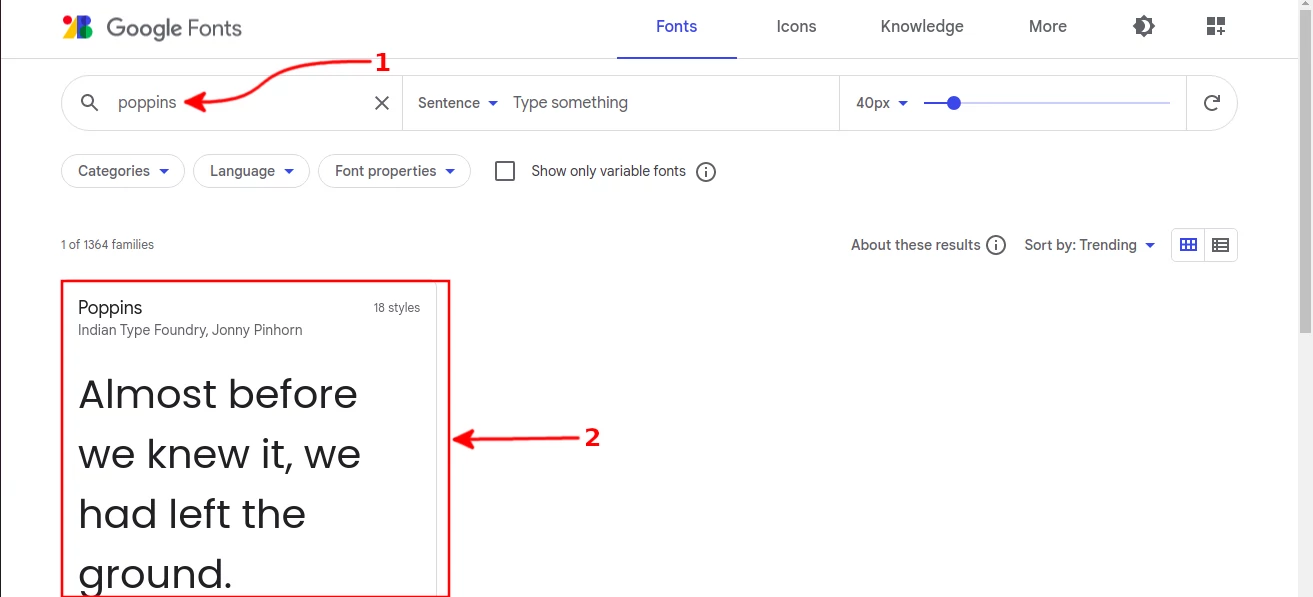
These font files are downloaded just like any other files from the web. For example, the image below shows how to search for a font on Google Fonts. Write the font name in the search box and click on the font in the results below.
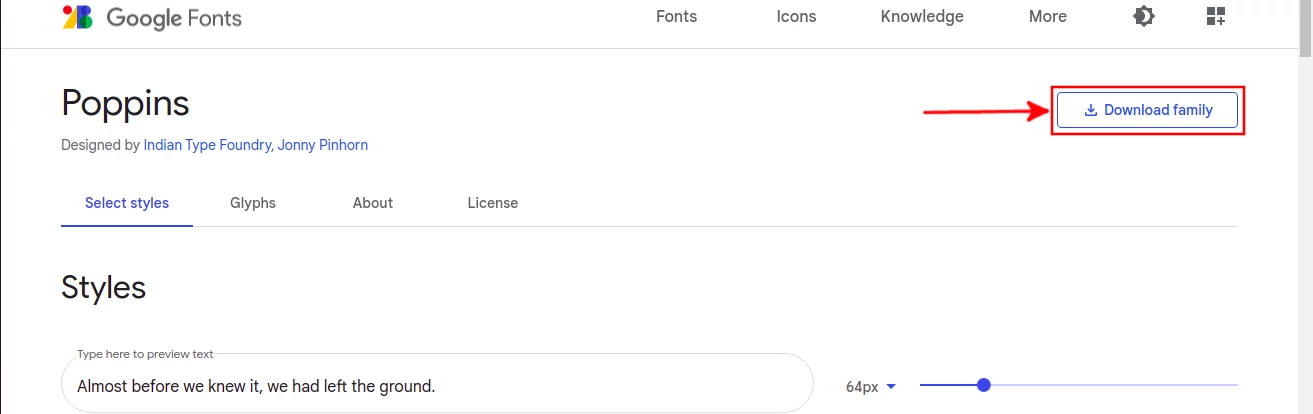
Click on the "Download Family" button to download it. This is very similar to any other fonts' site.
The downloaded file will either have a ".zip", ".ttf" or ".otf" extension. The ttf and otf files are the actual fonts while a zip file is an archive, which may comprise of a single or a group of related(same family) fonts.
If you download a zipped/archived file, then you have to extract it to a folder to get the font file(s) inside it.
The .ttf and .otf files are what should be copied into the GIMP fonts folder.
2. Adding the fonts to the GIMP fonts folder
The location of the GIMP fonts folder may differ from one device to another. This will depend on your operating system and the Gimp version among other factors.
Instead of telling you where my fonts folder is located only for you to find it's different in your case, let's go through a standard process of finding it.
Finding the fonts folder in GIMP
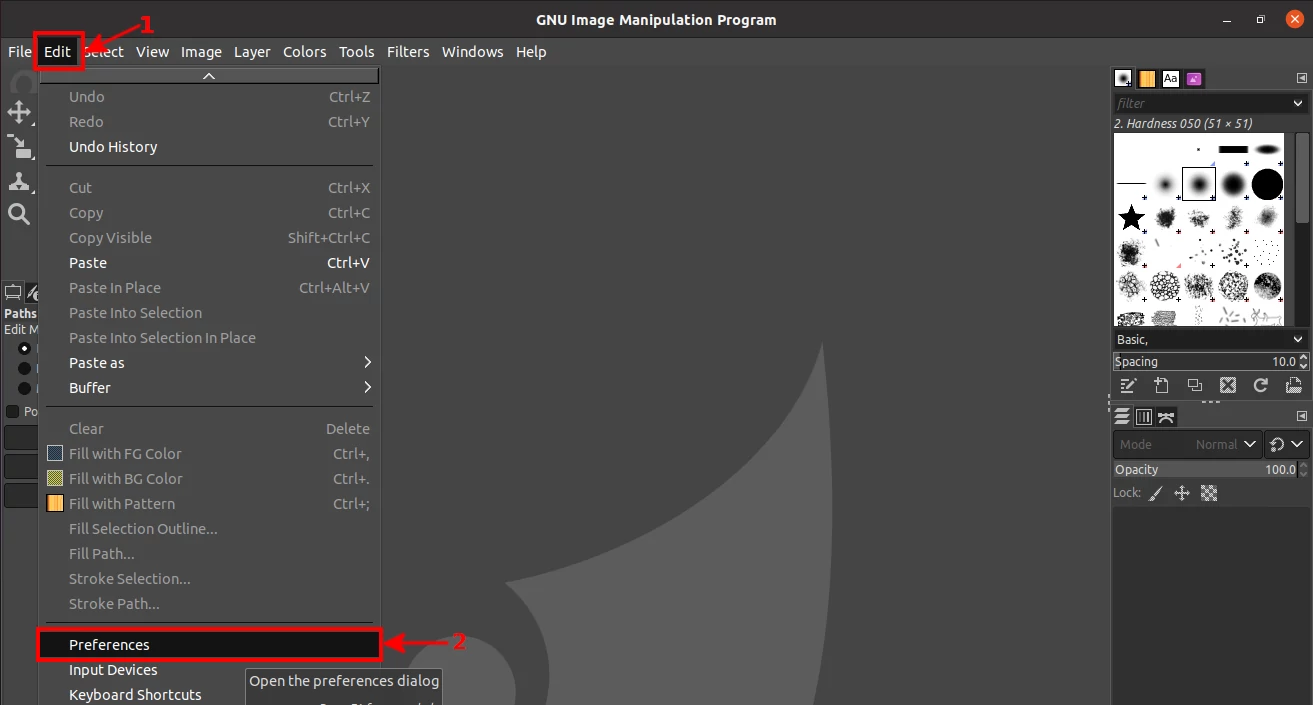
Step 1: Open the "Edit" menu and click on the "Preferences" option.
Step 2: Click on the small plus next to the "Folders" option on the left pane to expand the menu.
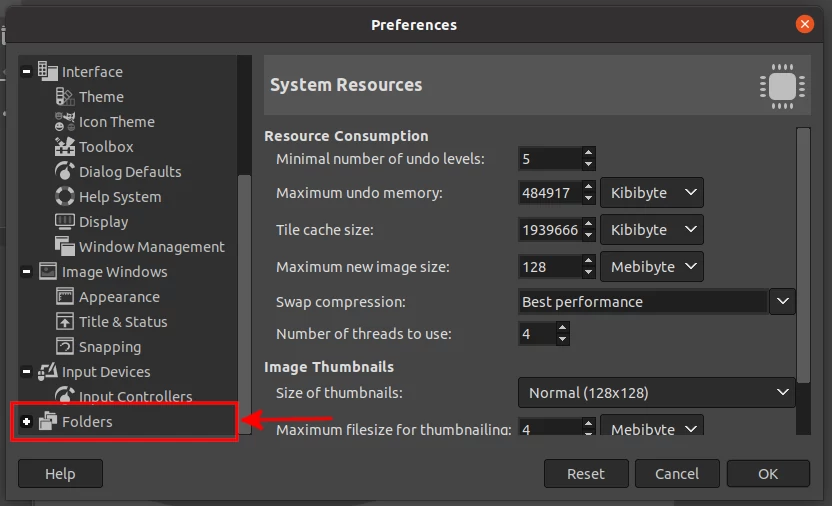
Step 4: Click on the "fonts" option.
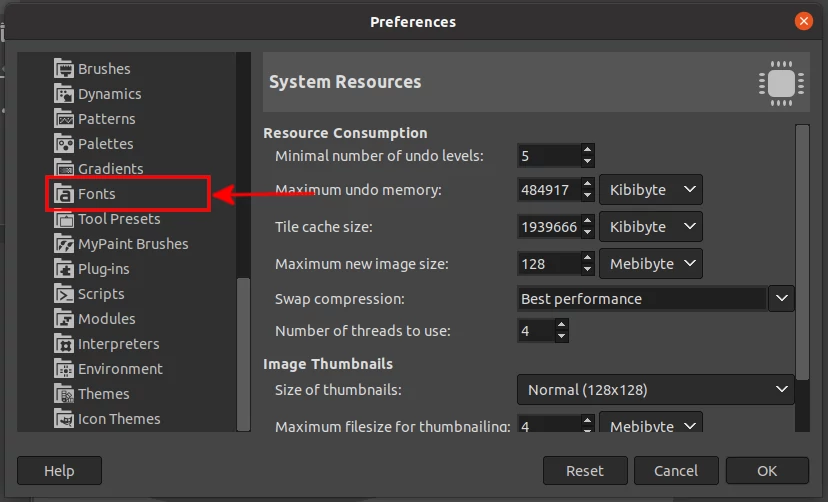
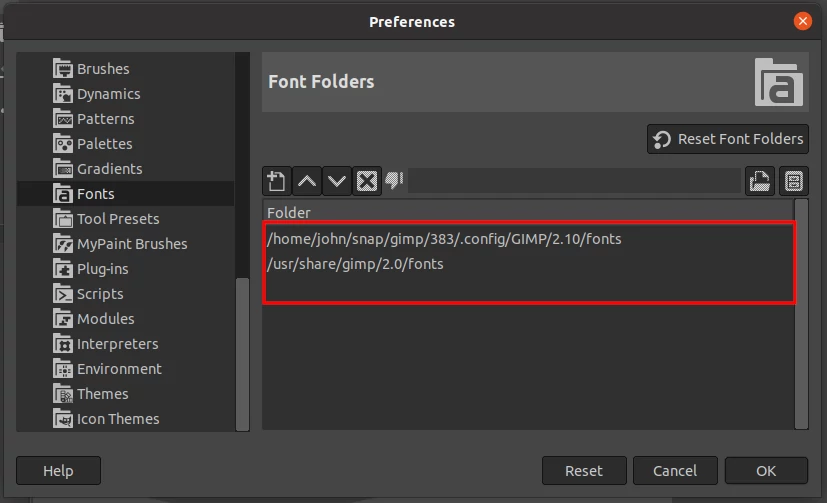
On the right pane, you will see the current custom directories paths where GIMP will search for fonts when starting. These paths will differ across different operating systems and GIMP versions. Note these paths down somewhere.
Copying font file(s) into GIMP fonts folder
Now that you managed to find out which directories GIMP looks for custom fonts when starting, the next step is copying the fonts into it.
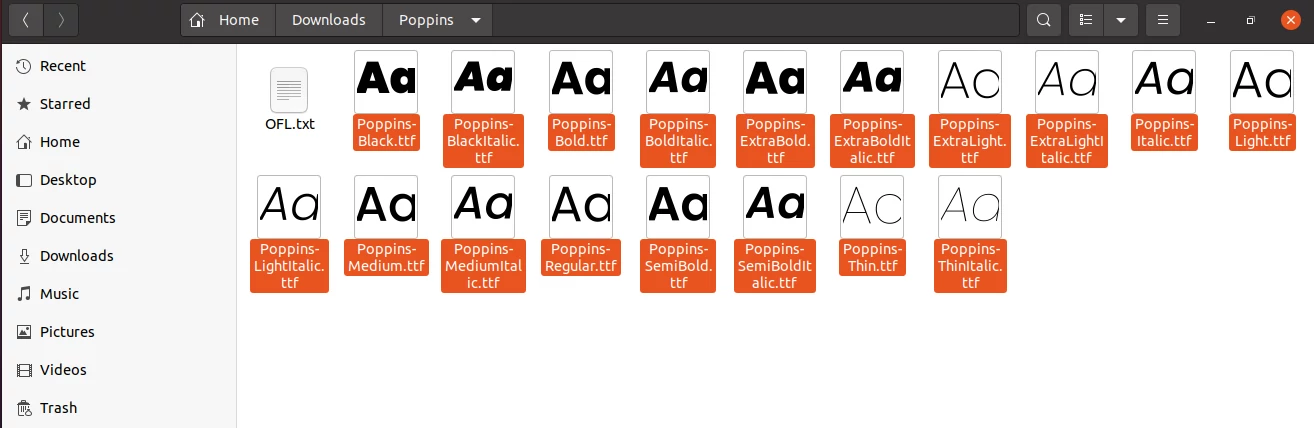
Open folder where you downloaded the font(s) and copy the ".ttf" or ".otf" file(s).
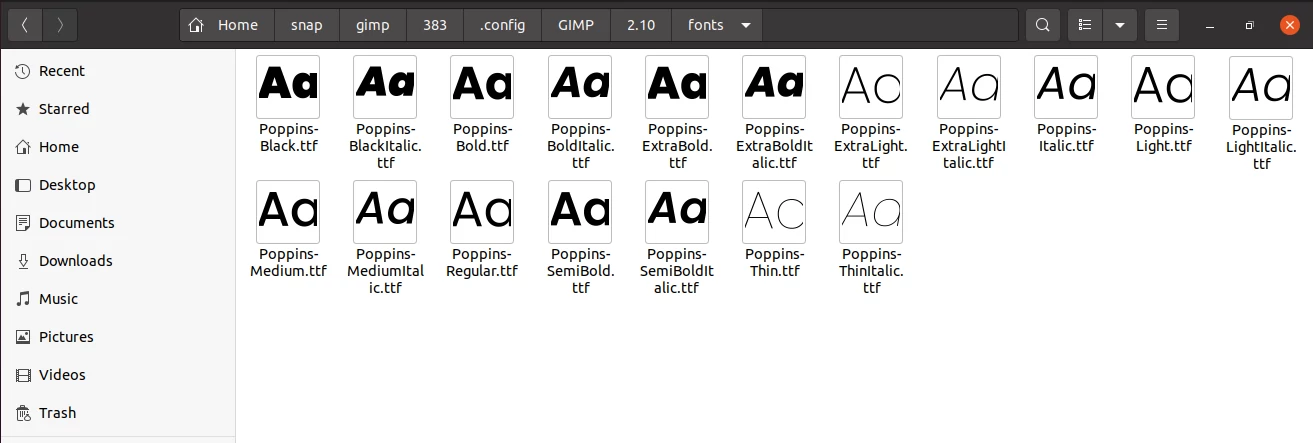
Open one of the GIMP fonts folders that you noted down and paste the copied font file(s) into it. If you are on Linux, you may need to show hidden files in order to open the full path as the ".config" folder in the path is a hidden folder.
Alternatively, you can store your fonts on any directory/folder of your choice and then point GIMP to be checking from it. To do this, click on the folder icon as shown below and select the location where your fonts are stored then click OK.

Now at this point, the new font(s) is installed in GIMP but you have to restart GIMP in order to use it.
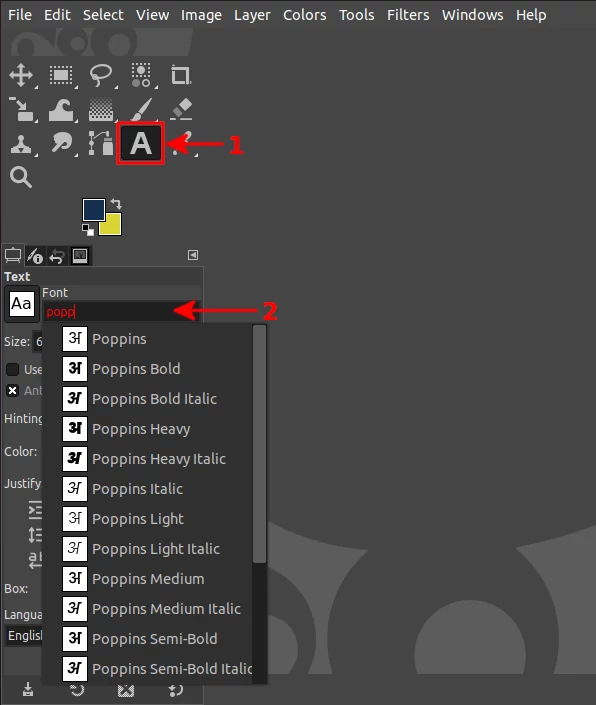
To test if the font was properly installed, click on the Text Tool at the tools section on the left sidebar. Then search the name of the new font in the Font textbox next to Aa under the Text section. You will see the new font(s) listed down. If you don't see it then the font wasn't properly installed.
Below is an image with a list of texts styled with different custom installed fonts in GIMP.

That's it!
You can now comfortably install and use new custom fonts on GIMP. It's my hope enjoyed the article and found it useful.