How to make your own custom brushes in GIMP
The paintbrush tool is very crucial and basic for any design work in GIMP Image Manipulation Program. When you install GIMP, it comes packed with a variety of already pre-installed brushes which you can use across a wide range of designs.
To make things better, GIMP allows the installation of new custom brushes. You can download them from the web or make them by yourself and then install them in GIMP.
In this article, I will show you through an easy-to-follow step-by-step process, how you can create various types of GIMP brushes all by yourself using GIMP.
Let's first have a quick understanding of the different types of GIMP brushes before going further.
Types of GIMP brushes
Below is a table outlining the different types of brushes that you can make in GIMP.
| Type | Description |
|---|---|
| Ordinary brushes | These are the most commonly used brushes. They are perfect for all kinds of painting and editing tasks. Most have the file extension of ".gbr". |
| Parametric brushes | These are brushes created using the built-in brush editor in GIMP. They have ".vbr" file extensions. All parametric brushes are also ordinary brushes. However, not all ordinary brushes are parametric brushes. |
| Color brushes | These are basically images that have been converted into brushes. Unlike other types of brushes, they do not take the foreground color when painting but retain the colors of the images they were formed from. They have ".gbr" file types. |
| Animated brushes | Also known as image horse, animated brushes are dynamic with multiple brush heads thus more possibilities compared to the other types. They have a ".gih" file extension. |
The GIMP's brushes folder
This is a folder in your computer created (at the time of GIMP installation) specifically for storing GIMP custom brushes. GIMP will search for brushes in this folder every time when starting or when brushes are refreshed within the GIMP's brushes tab.
You will need to know the path to this folder as you will need it when saving your brush files after creating them through the various methods explained below.
The path to this folder varies depending on your operating system and GIMP version. Therefore, the best way to locate this folder (in any OS) is by checking it through GIMP. To do so:
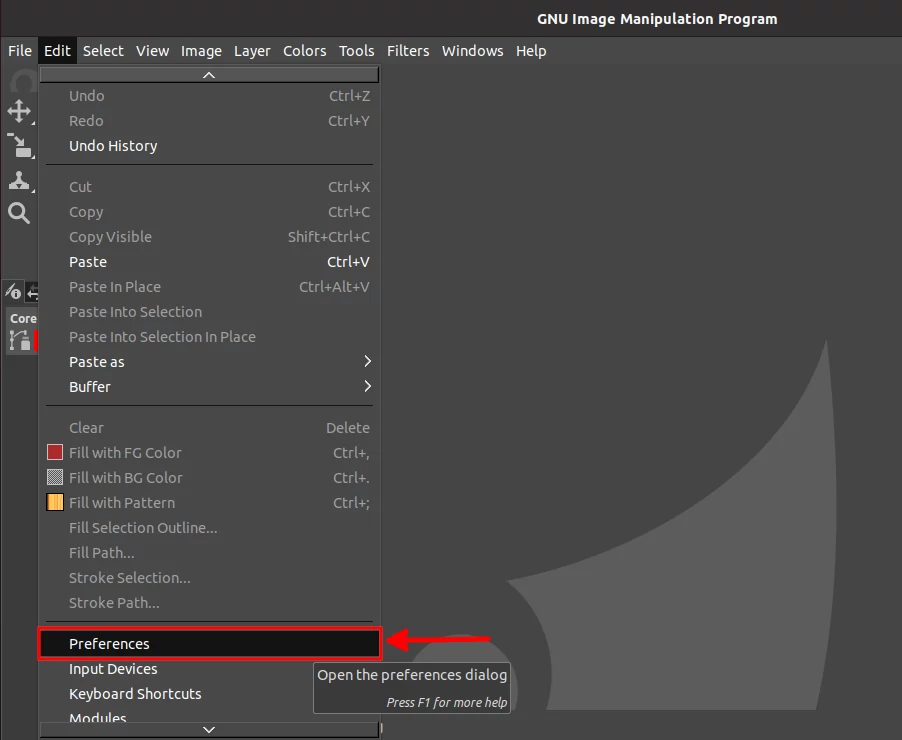
Open the Edit menu and click on the Preferences option.
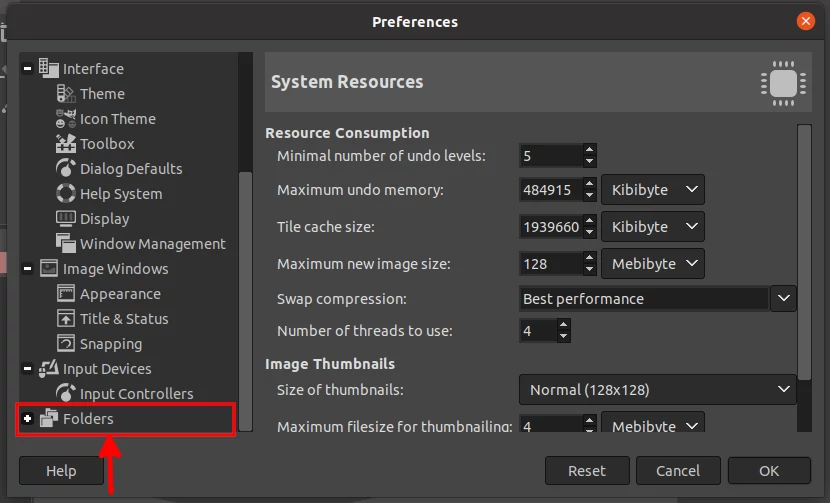
In the preferences dialog box that opens, scroll down on the left pane and expand the folders menu by clicking on the small plus next to the "Folders" option.
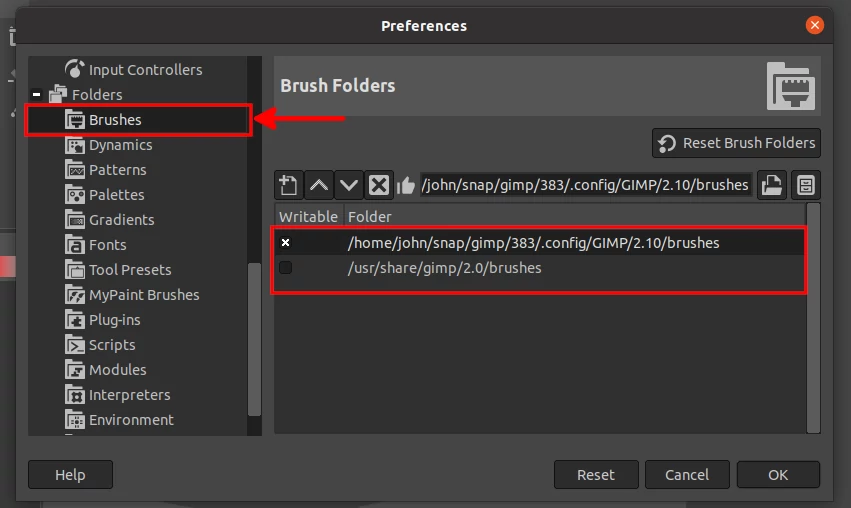
Click on the "Brushes" option in the expanded menu. On the right pane, you will see the current GIMP brush folders. Note down the first path somewhere.
How to create custom brushes in GIMP
Now that you know the types of brushes in GIMP, let's dive into how each of them is created.
Making a parametric brush in GIMP
All parametric brushes are ordinary brushes and are created using the inbuilt GIMP's brush editor. They are the easiest to make.
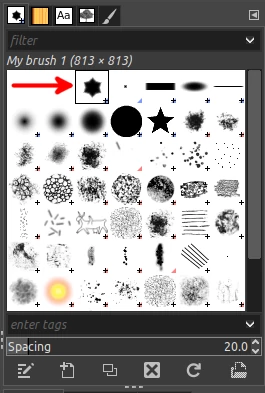
As a differentiator in the GIMP brushes tab, all parametric brushes have a blue triangle at the bottom right of the brush.
To create a parametric brush, follow the steps below:
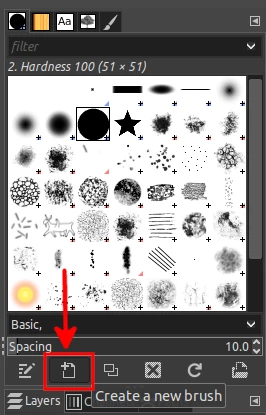
Click on the "Create a new brush" button at the bottom of the brushes tab.
The brush tab is by default located in the top right area of your GIMP interface. If you have accidentally closed it, you can open it by opening the Windows menu, then the Dockable Dialogs submenu, and clicking on the Brushes option.
A brush editor with a white background and a black circular dot will open. This is where a preview of what your brush will look like.
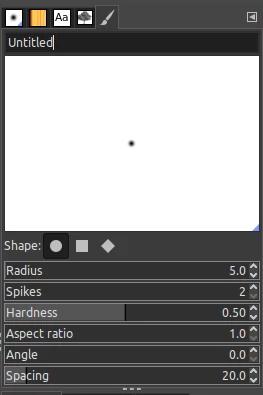
To give your new brush a name, replace the "untitled" text at the top with your preferred name.
Below the preview is a set of parameters to customize the design of the brush.
- Shape - You can choose between a circle (default), square, or diamond.
- Radius - Changing this value adjusts the size of the brush.
- Spikes - This is applicable for a square or diamond shape. By default, the square and diamond shapes have four spikes for each corner. Increasing the value of the spikes field increases the number of spikes and vice versa making it look like a star or four-cornered.
- Hardness - By default, the brush is soft with blurry edges. Increase the hardness value to make it more solid with defined edges or vice versa to make its edges fuzzy.
- Aspect ratio - This is set to 1 by default to have a perfect circle, square, or diamond shape. Changing this value will alter the shape.
- Angle - Changing the value of the angle simply rotates your brush.
- Spacing - The spacing sets the space between each instance of the brush when painting. You can change this value later when painting with the brush.
You can keep playing around with these parameters until you have your perfect brush.
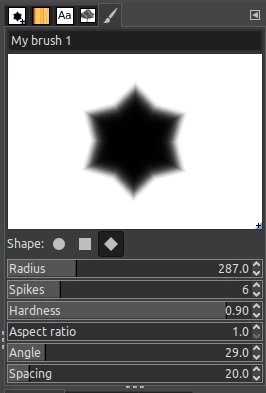
The brush is automatically created by the GIMP's brush editor and so you will not have to save or export it after editing. Just close the brush editor and you will be good to go.
You should now be able to see your new brush in the Brushes tab and can use it right away.
Below is a sample image with drawings from the parametric brush we just created above. As you can see, it takes the selected foreground color. You can adjust the spacing and size among other settings under the tool option to have more customization of how the brush paints.
Creating an ordinary brush by painting
Making a brush by painting it from scratch by yourself gives you the creative freedom to design your brushes exactly as you want them to be. No limitation at all.
To create an ordinary brush, follow the steps below:
Step 1: Set the GIMP foreground color to black and background color to white in the toolbox section.
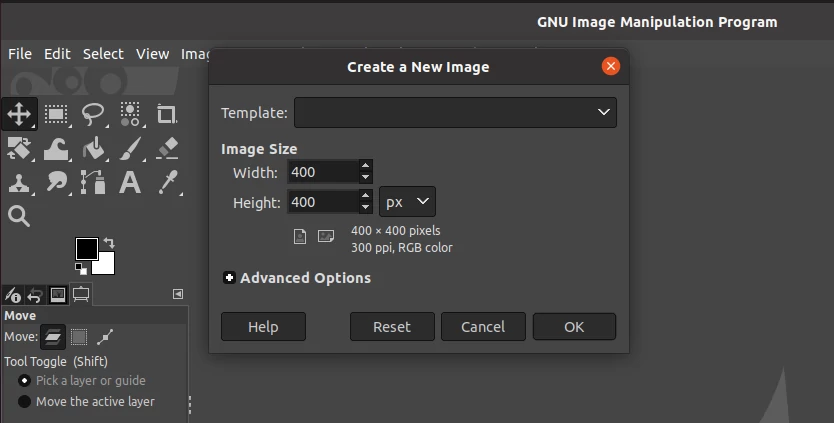
Step 2: Create a new image. To do so, open the File menu and then click on the New option. Set the image size depending on your preferred brush size. You may need to expand the advanced options to confirm that fill with background color is selected.
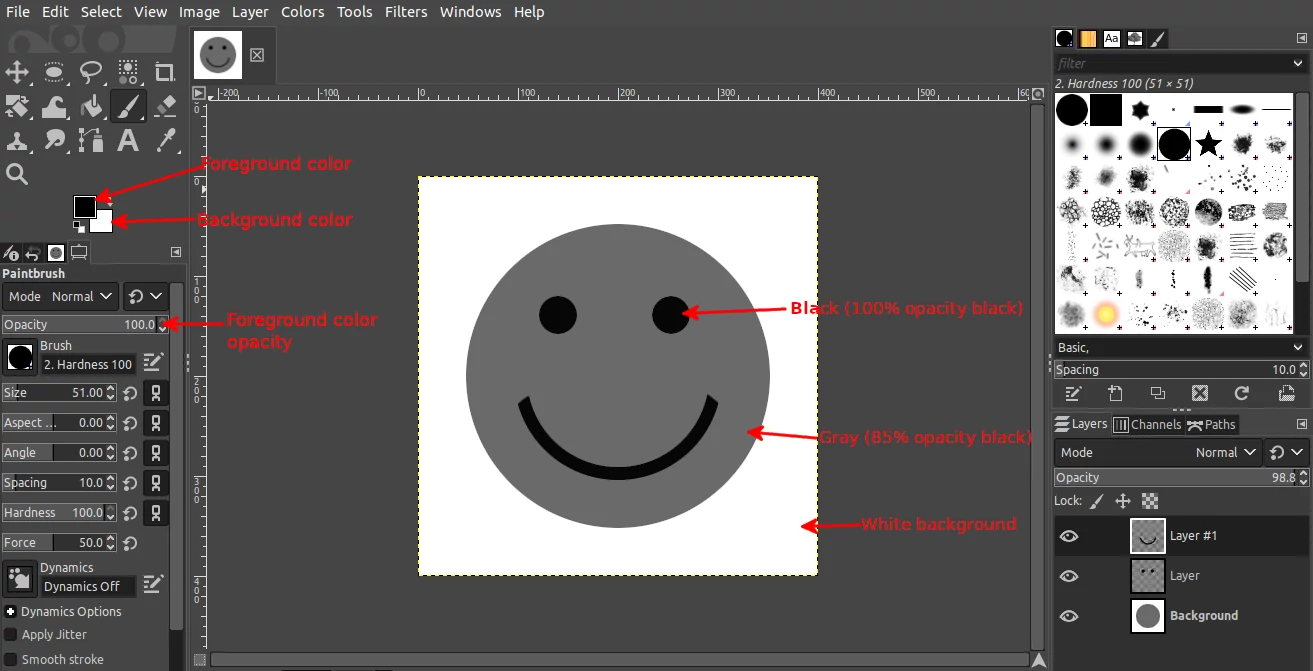
Step 3: The created image will have a white background. Now make a painting of whatever you want your brush to look like. You can use the paintbrush and pencil for free-hand painting, rectangle, and ellipse select to make shapes or the paths tool to make custom shapes, and the bucket or gradient tool to fill a selection with color. Just use your imagination and creativity.
Only use black, gray, and white colors in the painting. To paint in gray color, just reduce the opacity of the black color under the tool options section.
When using the brush (after we have created it), the black areas will be replaced by the selected foreground color(eg green, red, purple, etc), the white areas will be completely transparent, and the areas in gray will be partially transparent.
Step 4: Once you are satisfied with your painting, crop the image to remove any extra spaces around the painting.
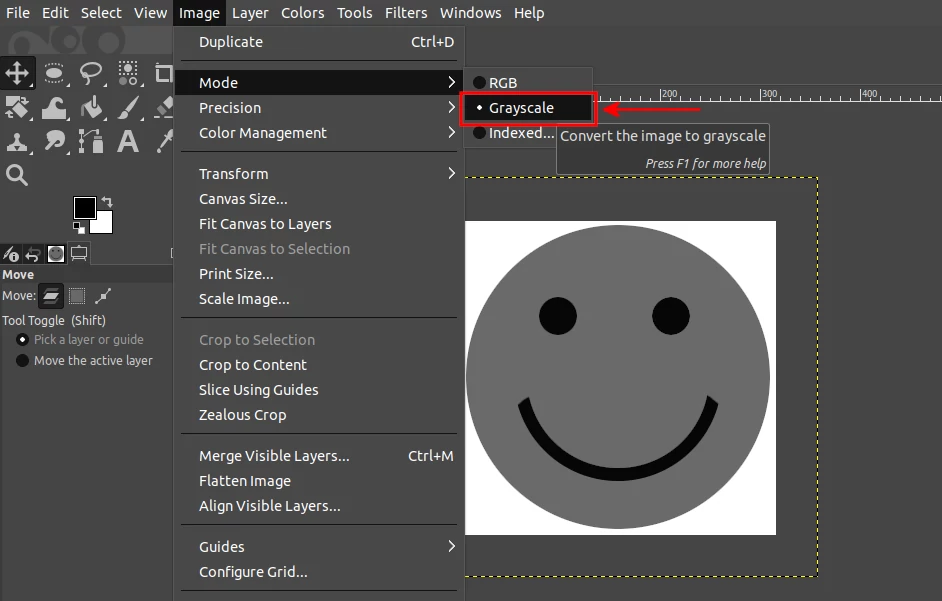
Then change the mode of the image from RGB to Grayscale. This discards the RGB data and makes it a single-channel image. This is what makes GIMP treat it as an ‘ordinary’ brush ensuring that the black color will be replaced with the foreground color when using the brush.
To change the image mode to Grayscale, open the Image menu, then the Mode submenu, and click on the Greyscale option.
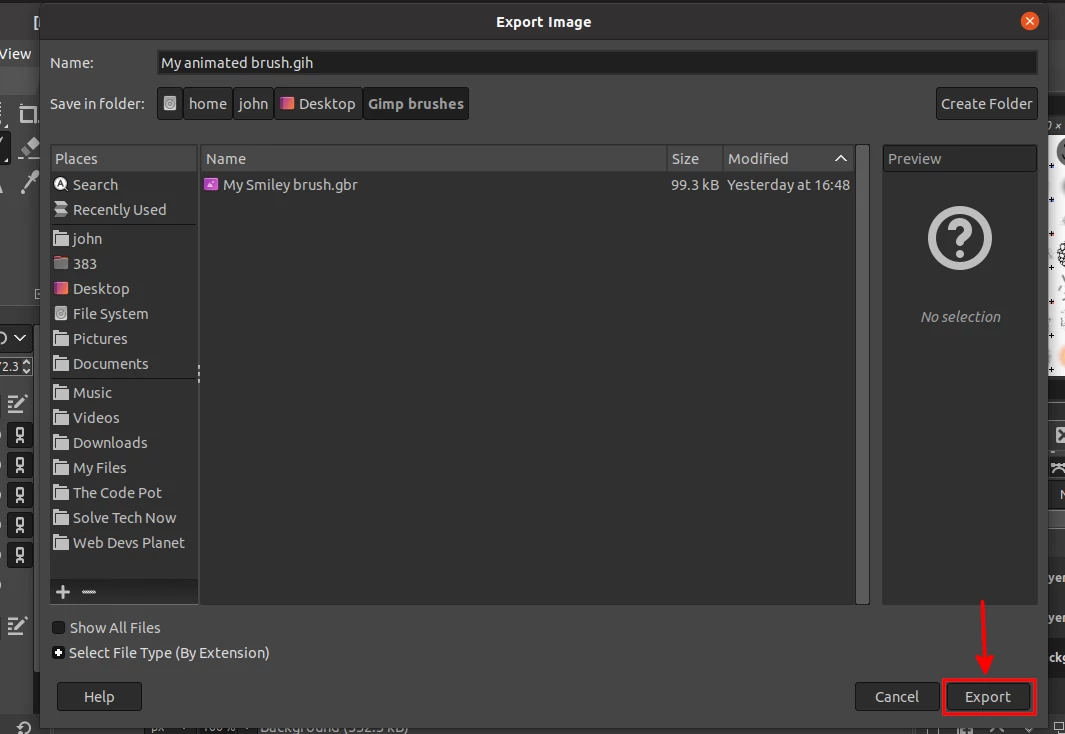
Step 5: Export the file by opening the File menu and clicking on the Export As option. Alternatively, use the shortcut Ctrl+Shift+E.
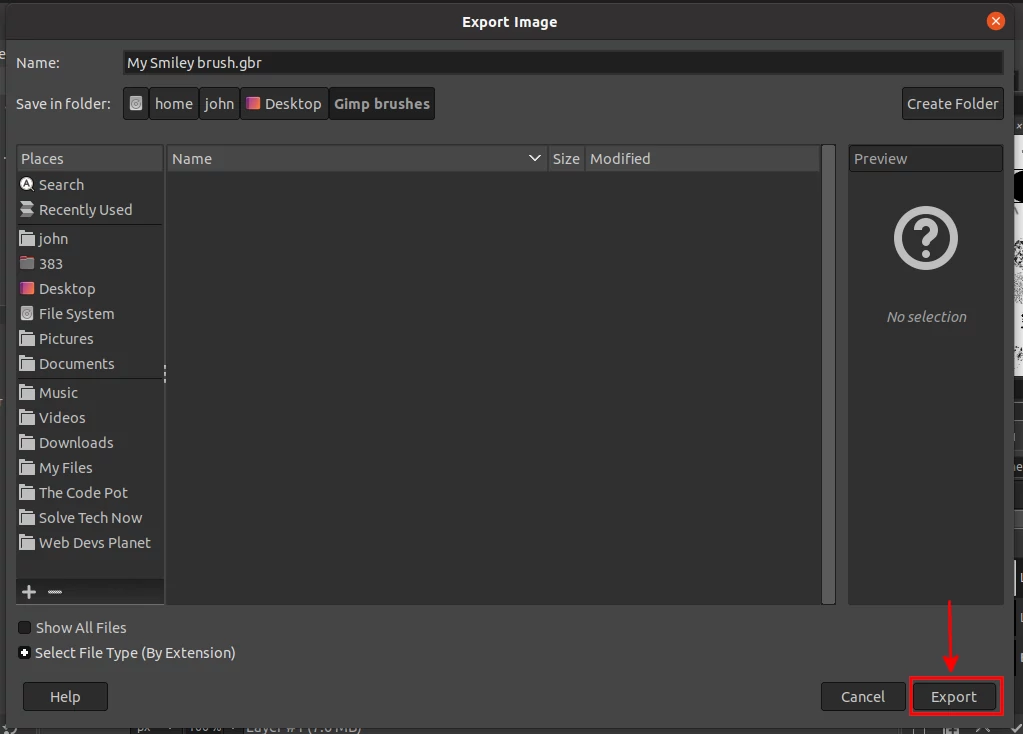
A dialog box titled "Export Image" will open. Write your preferred brush name in the Name field ending with a ".gbr" extension. Navigate through your computer storage and select the GIMP's brushes folder to save the file there. Then click on the Export button.
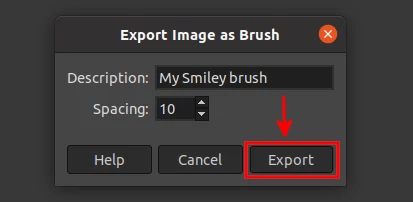
A small dialog box will open with a description and spacing fields. The description is what shows at the top of the brushes tab when you select a brush. The spacing is the space between each instance of the brush strokes. You can always change this later on when using the brush. So just leave it as default and click on the Export button.
In case you are unable to select the GIMP's brushes folder in the "Save in folder" field above (like in my case, I use Ubuntu), just select any other directory/folder and save it there. Then manually copy the brush file from there to the GIMP brushes folder.
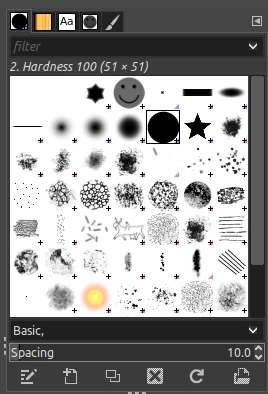
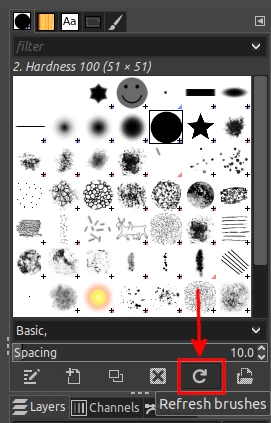
Click on the refresh button at the bottom of the brushes tab. You will be able to see your newly created brush which you can now use in your designs, applying different colors and sizes.
Making an ordinary brush from an image
As an alternative to creating an ordinary brush by painting it from scratch, you can use an image as the basis of your brush. This is especially useful when creating a more realistic-looking brush of an object. For example, it would be much simpler to draw a fire brush from an actual fire image or a tree from an actual tree image than to draw it yourself from scratch.
Follow the steps below to create an ordinary brush from an image:
Step 1: Set the GIMP foreground color to black and the background color to white.
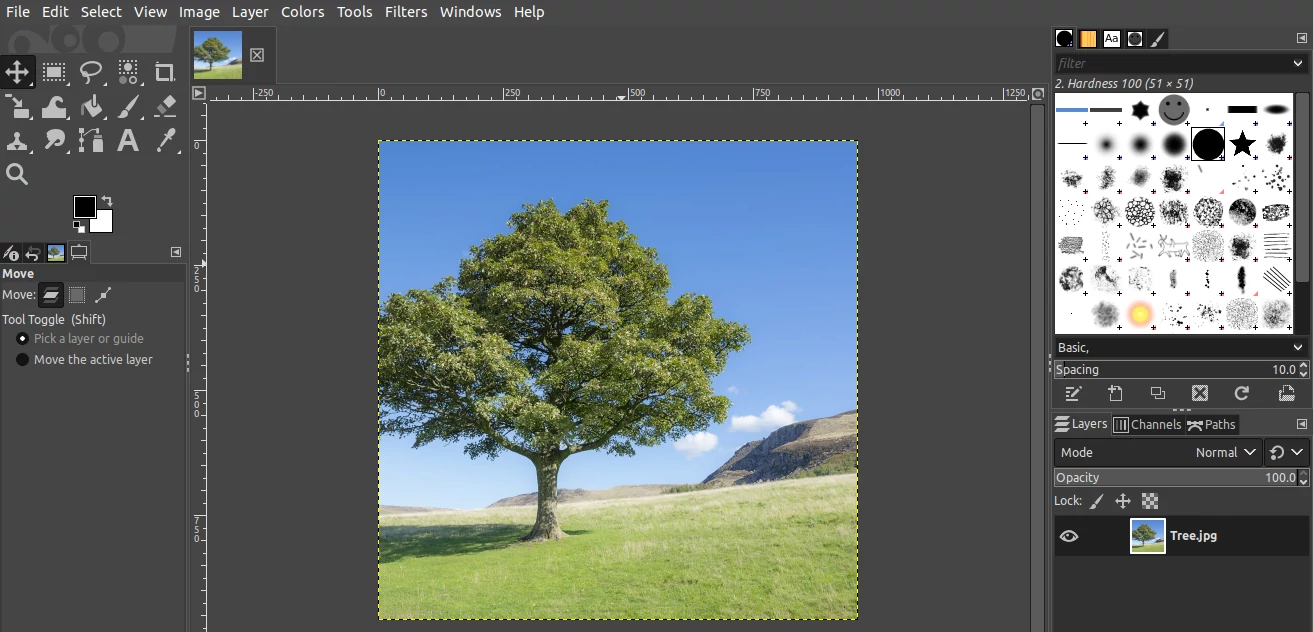
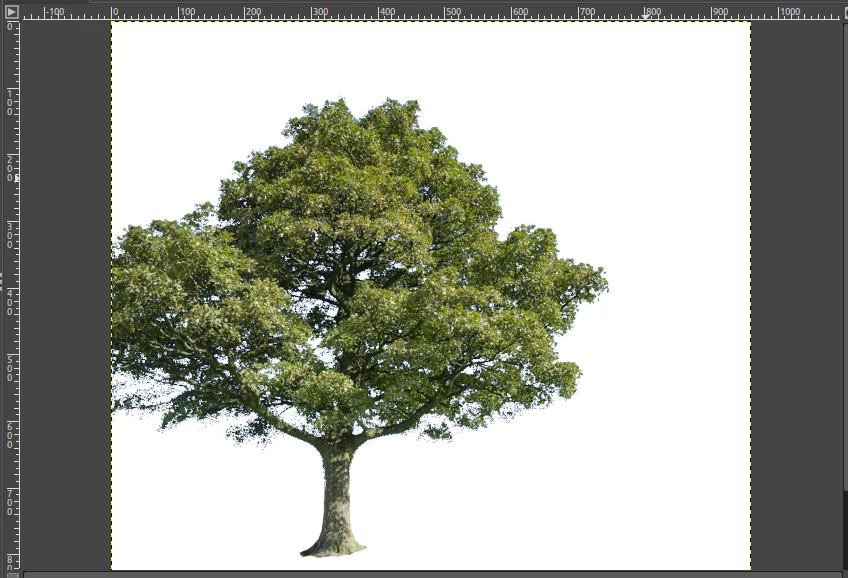
Step 2: Open the image that you would want to use as the basis of your brush in GIMP.
Step 3: Erase the areas (or objects) in your image that you don't want as part of the brush. If the image has a pure color background then you can skip this step.
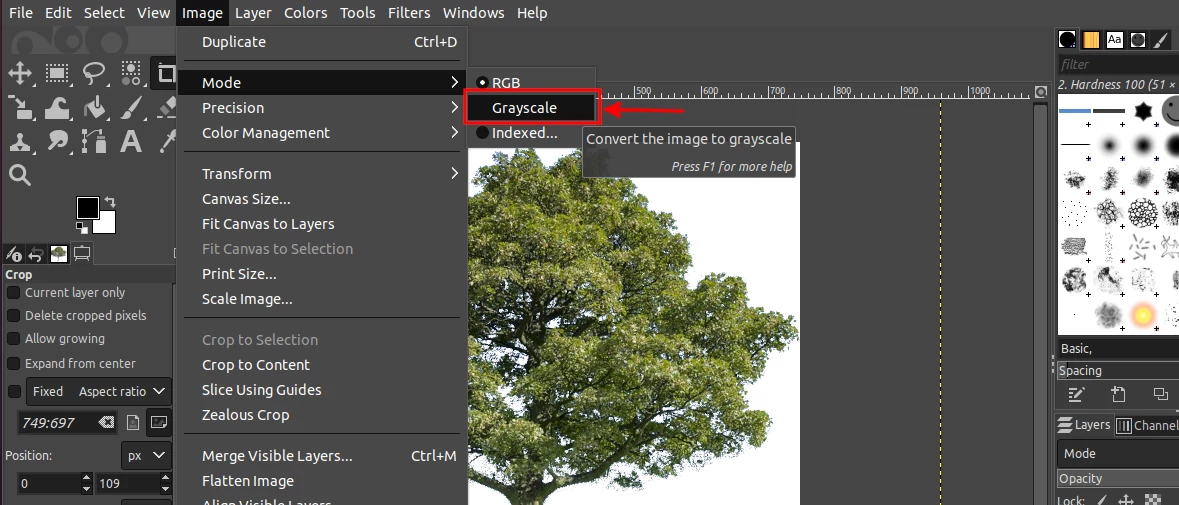
Step 4: Once the image is as you would want it in the brush, crop it to remove the extra unwanted areas and then convert it to grayscale mode. To do so, open the Image menu, then the Mode submenu, and click on the Grayscale option.
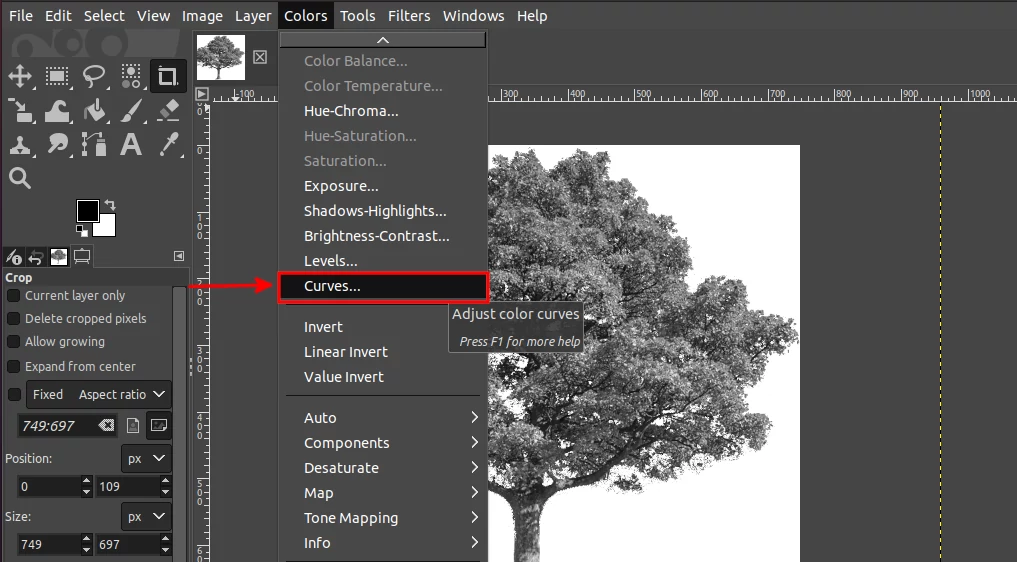
The image will be converted to black and white as a result of discarding the RGB data. But as you may notice, the darkest areas are not as black as they ought to be for making an ordinary brush. The opaque areas are supposed to be pure black while the partially transparent areas should be grayish in color. Therefore, we will need to darken it.
Step 4: Open the Colors menu and then click on the Curves option.
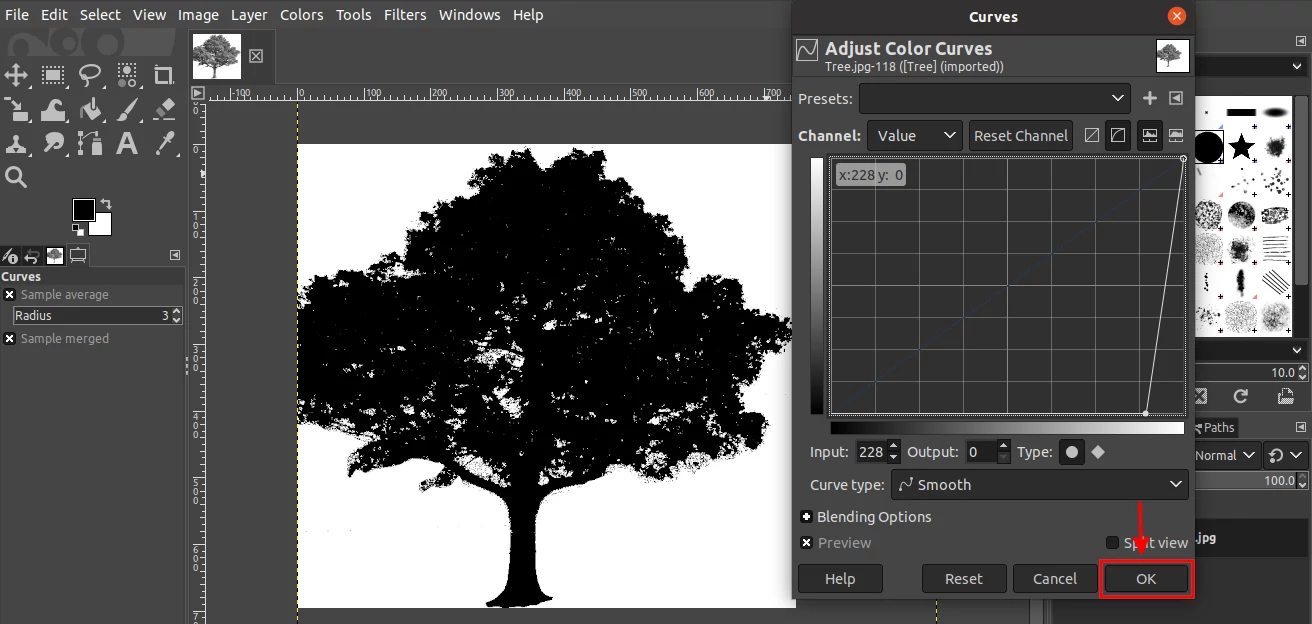
Step 5: Grab the dot at the bottom left corner of the chart and move it towards the right until the opaque areas look purely black. Then click on the OK button.
Step 6: Export the image as a ".gbr" file into the GIMP's brushes folder in a similar way as described above in the "Creating an ordinary brush by painting" section.
Once done, reload the brushes by clicking on the Refresh Brushes at the bottom of the brushes tab.
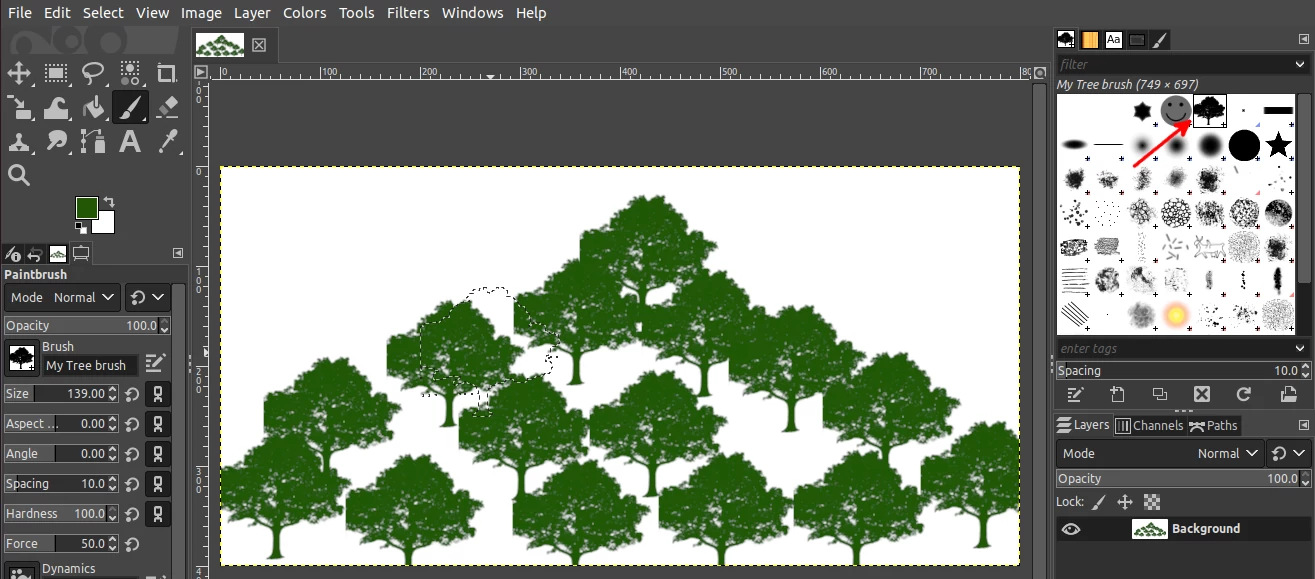
You will be able to see your newly created brush among other brushes and can start using it right away with different colors and sizes.
Creating a color brush
A good example of a color brush is the pepper brush which is found among the default GIMP brushes. This brush does not take the foreground color when painting with it but will always be green regardless of the selected foreground color.
You can make a color brush by opening an image in GIMP and exporting it into the GIMP's brushes folder as a ".gbr" file.
As opposed to ordinary brushes where the white color is interpreted to mean transparency, you have to remove the unwanted image parts to transparency for color brushes so as not to draw the background in the resulting brush.
You can also make a colored painting from scratch and save it as a .gbr file without converting it to grayscale and it will also be a color brush.
Color brushes are great for making watermarks and stamps.
Creating an animated brush
Animated brushes are also known as GIMP image horse and have ".gih" file extensions. In GIMP's brushes tab, these brushes can be identified by having a red triangle at their bottom right corners.
They are more dynamic, allowing for more possibilities compared to the other types. This type allows you to create multiple brush heads for the same brush.
As you paint with an animated brush, the brush heads alternate either randomly or in a sequence.
To create an animated brush in GIMP, follow the steps below:
Step 1: Set the GIMP foreground color to black and the background color to white.
Step 2: Create a new image by opening the File menu and then clicking on the New option. Set the image size depending on your preferred brush size.

Step 3: Add more layers (eg 2 or 3, etc depending on the number of brush heads you want in your brush) of equal dimensions to the one you created. To do so, press and hold the Shift key and then click on the new layer icon at the bottom left corner of the layers tab.

Alternatively, you can use the Ctrl+Shift+N shortcut.
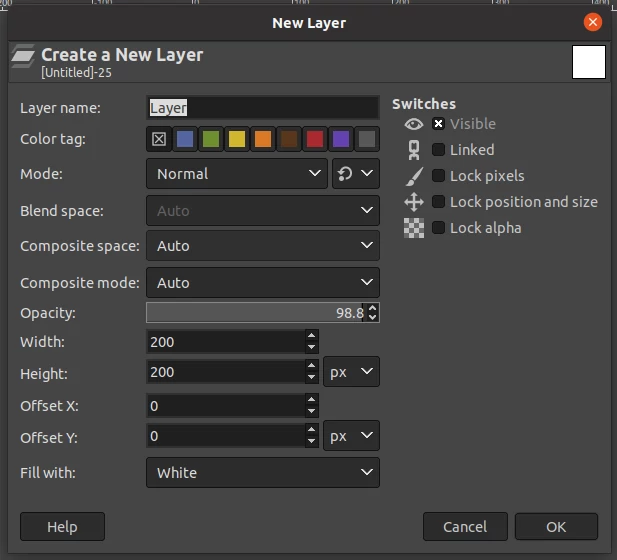
A dialog box for a new layer will open. Select fill with white or background color and then click on the OK button.
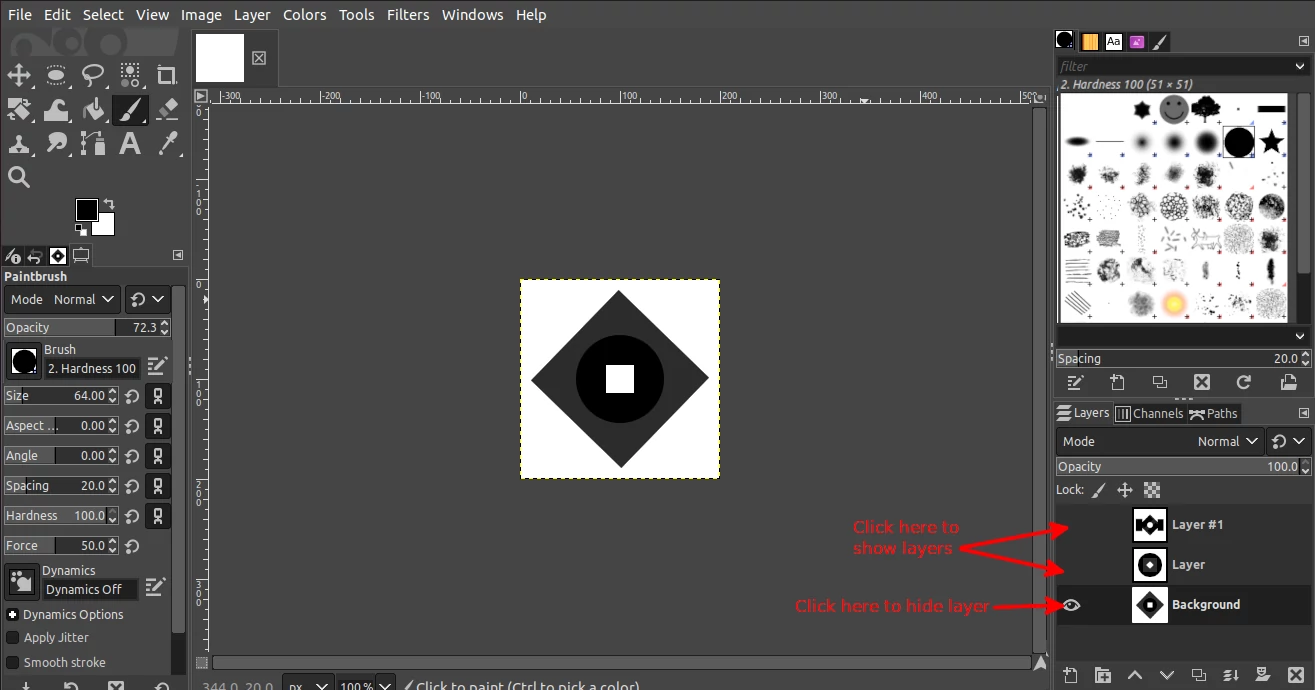
Step 4: Make a painting on each of the layers. Make sure you only use black and gray colors. Draw in pure black the areas you would want to be fully solid/opaque and gray in the areas you would want to be partially transparent. The white areas will be transparent.
To switch between the layers when painting, click on the eye icon on each layer apart from the one you are working on in order to hide the rest. To show a layer again, click on the place of the eye icon again and it will show.
Each painting on a layer will form a separate brush head for the brush. Therefore the number of brush heads will depend on the number of layers.
These layers will ensure that as we paint with the brush, it is going to switch between the different brushes created on each layer.
Note: You can also use images as the basis of your animated brush heads. All you need is to have a separate image with a white background on each layer.
Once you are comfortable with the contents (painting or image) of each layer, convert the image to grayscale mode (Image > Mode > Grayscale).
Step 4: Export the image file as an animated brush by opening the File menu and clicking on the Export As option. Write your preferred brush name in the Name field ending with a ".gih" extension. Select the GIMP's brushes folder as the export directory. Alternatively, you can select anywhere you wish but will have to copy it to the GIMP's brushes folder.
Step 5: Click on the Export button.
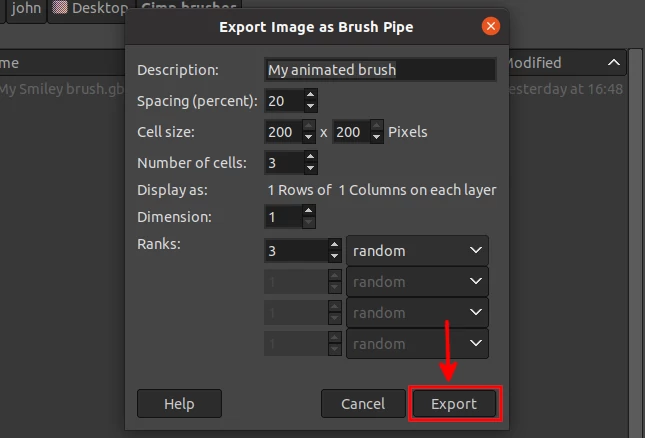
A dialog box titled Export Image as Brush Pipe will open with several fields.
- Description - This is the name that will appear at the top of the brushes tab once you click on a brush.
- Spacing (percent) - This is the space (as a percentage of the brush's diameter) between each instance of the brush strokes painting with the brush.
- Cell size - This is the entire size of the brush (width by height) in pixels.
- Number of cells - This is the number of layers in the image which will be equivalent to the brush heads.
- Dimensions - Determines whether the brush is single or multidimensional. Just leave it as it is.
- Ranks - This is equivalent to the number of cells. The field on its right allows us to set how those cells(brush heads) will alternate. You can leave it as a "random" to have the brush heads cycle randomly with no particular sequence when painting. If you want them drawn in an incremental order (ie starting with layer 1, followed by layer 2,... etc), then choose the incremental option.
Click on the Export button.
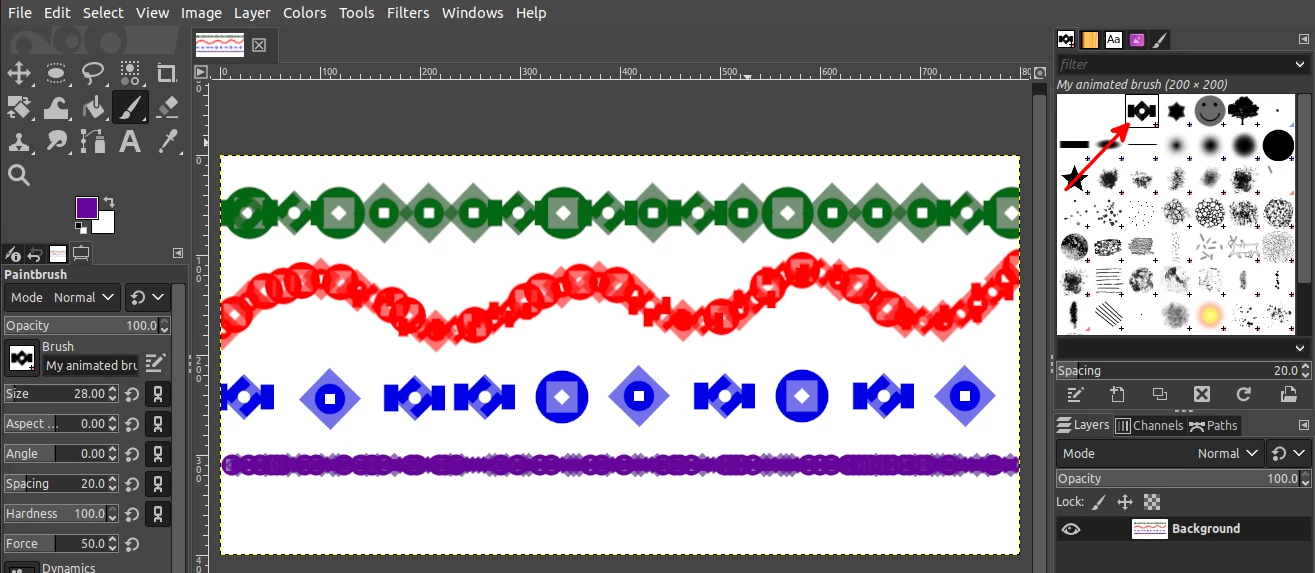
Once the brush has been saved (or copied) to the brushes folder, you can now refresh the brushes by clicking on the refresh icon and you will see it among other brushes and can start using it right away.
Below is an image of a painting using the animated brush that we just created.
Deleting/uninstalling a brush from GIMP
There are a number of reasons why you may want to delete a brush from GIMP. For example, if you created a brush and don't think it looks great, or installed a third-party brush but don't need it anymore or don't find it any useful.
To delete a brush, just select it in the brushes tab by clicking on it, then click on the X (Delete this brush) button at the bottom of the brushes tab.
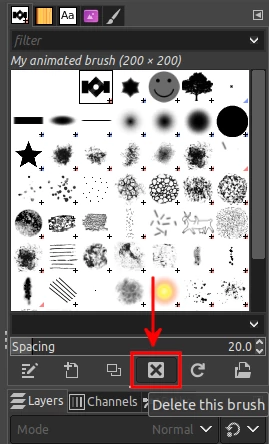
A dialog box will open prompting you to confirm that you are sure of your action. Click on the Delete button.
Another way to delete a brush is by deleting the brush file in the GIMP's brushes folder.
That's it!
Now you know how to create each of the four types of brushes in GIMP or how to delete them. It's my hope you enjoyed this tutorial and found it useful.