
How to work with patterns in GIMP 2.10
Patterns are a versatile design element that can be used in many ways for graphic design.
A pattern is essentially a small image or texture that can be repeated seamlessly to fill a larger area.
Below are some of the common uses of patterns in graphic design:
- Branding: Patterns can be used as part of a brand identity to create a consistent look and feel across all design materials. A pattern that incorporates a brand's logo or colors can help to reinforce the brand's visual identity.
- Backgrounds: Patterns can be used to create interesting and eye-catching backgrounds for designs. For example, a simple repeating pattern can add texture and visual interest to a website.
- Borders: Patterns can be used to create decorative borders or frames around images or text. This can add a sense of structure or formality to a design.
- Textures: Patterns can be used to add texture to an image or design. For example, a pattern that resembles wood grain or fabric can be applied to a design to give it a more tactile, realistic feel.
- Textile Design: Patterns are extensively used in the fashion industry for creating prints on textiles.
- Packaging: Patterns can be used to create packaging designs that stand out on store shelves. For example, a bold and colorful pattern can make a product's packaging more memorable and visually appealing.
Overall, patterns are a powerful design element that can add depth, texture, and interest to a wide range of graphic design projects.
In this article, I will show you how to use patterns in your design projects in GIMP image editor.
How to use patterns in the GIMP image editor
GIMP comes with a number of pre-installed patterns that you can use in your designs. You can also create your own custom patterns or download from the web and add them to GIMP.
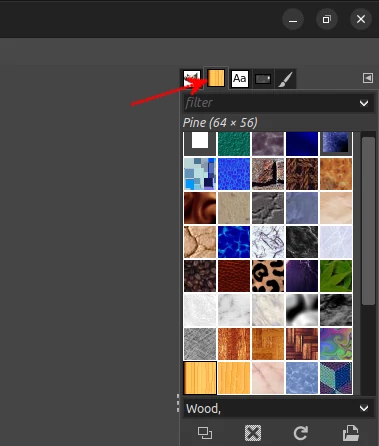
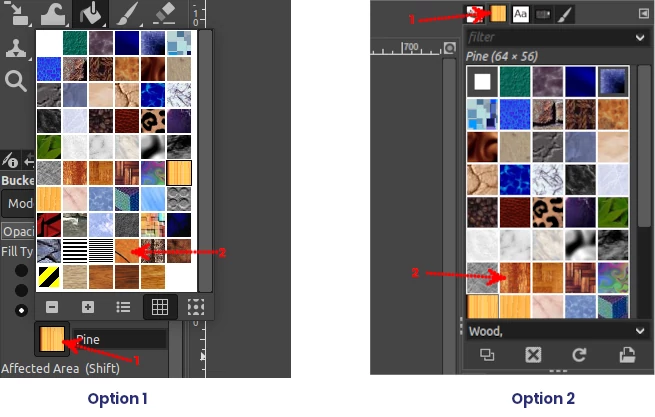
The patterns palette is basically found at the top-right or bottom-right corner of the GIMP application window.
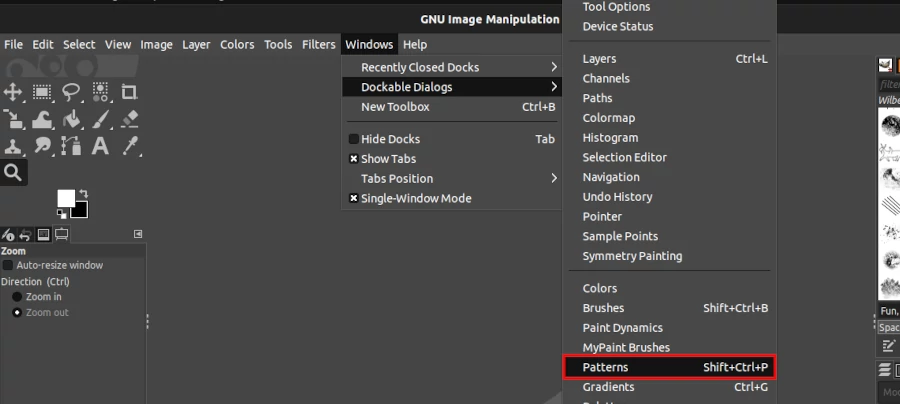
In case you can't find it, you can open it through the "Windows" menu, the "Dockable Dialogs" submenu, and then the "Patterns" option.
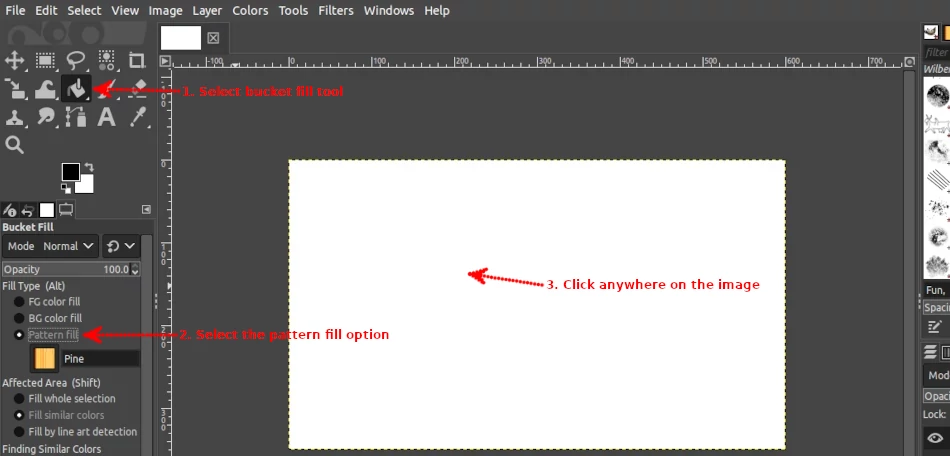
To use a pattern in GIMP, first, create a new document or open an existing image. There are two ways you can fill the image with the pattern:
Method 1: Select the "Bucket Fill" tool in the toolbox. Choose the Fill type as "Pattern fill" in the tool options section which is located below the toolbox. Then click on the area you want to fill with the pattern to apply it to the image.
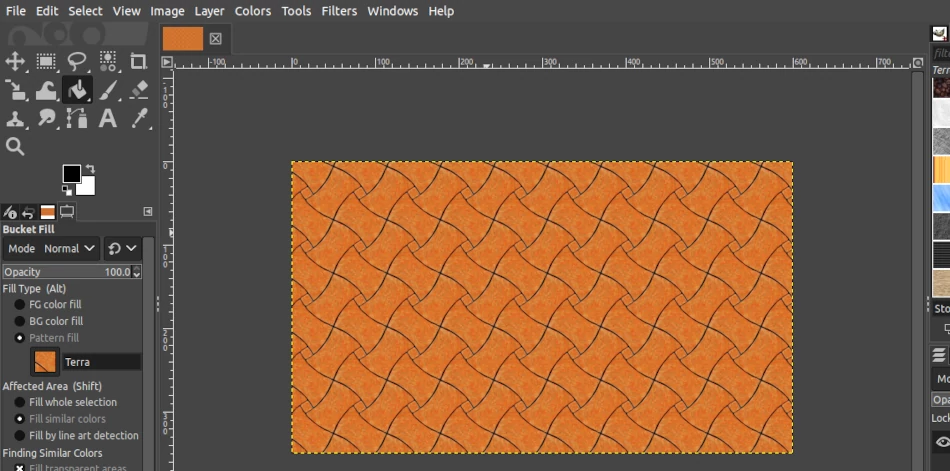
Doing the above will fill the whole image with the pattern as shown below.
To use a different pattern other than the one selected by default, click on the pattern under the "Pattern fill" option and then choose your preferred one from the options that appear. Alternatively, click on a pattern of your choice under the patterns palette on the right side to select it.
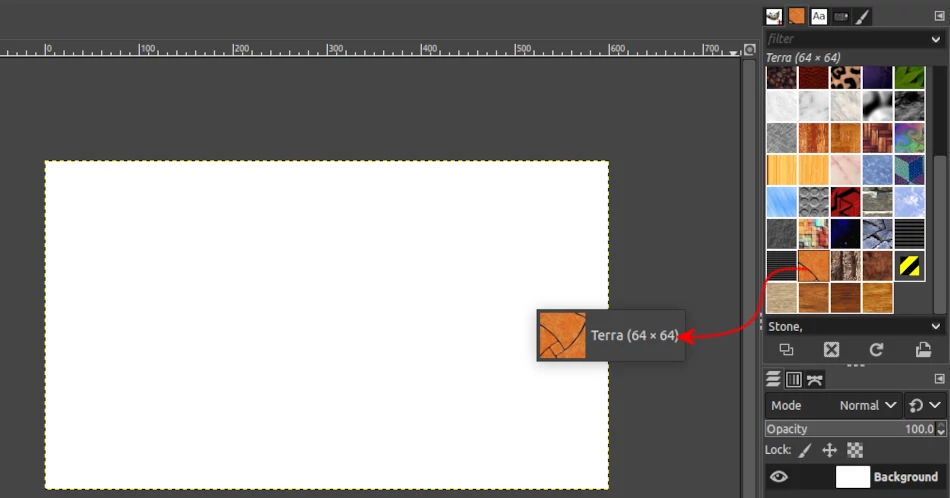
Method 2: Click on your preferred pattern under the patterns palette and drag it to the image in the workspace. The image will be filled with the pattern.
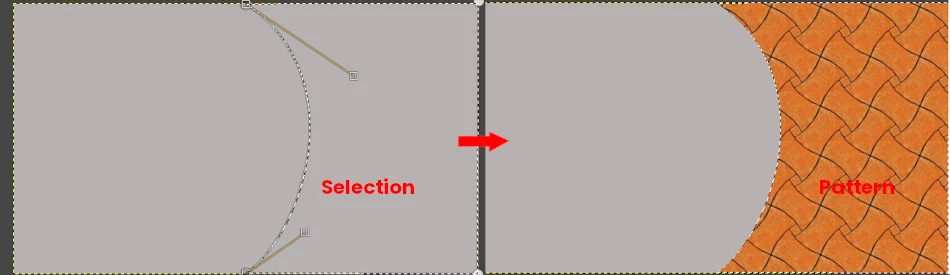
In many instances, you will want to fill only a portion of the image with the pattern as opposed to the whole of it. In such a case, make a selection on the area you want to fill with the pattern and then use any of the above methods.
In the same way, you can also use a pattern with shapes, borders, texts, etc.
Example 1: Adding a pattern to a text
You can make a text to comprise a pattern instead of a solid color (eg black, blue, etc). To do so, just write your text on an image and style it as you wish.
Open the "Select" menu and click on the "By Color" option. Alternatively, you can use the Shift+O keyboard shortcut to activate the "Select by color" tool.
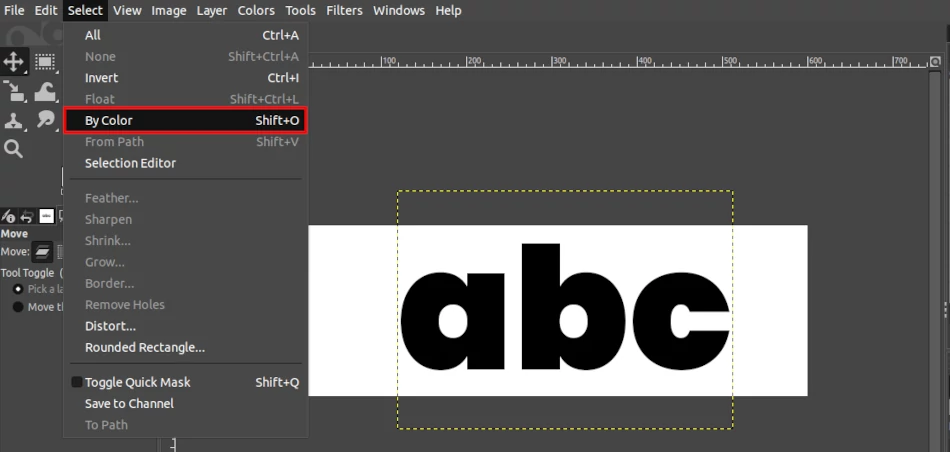
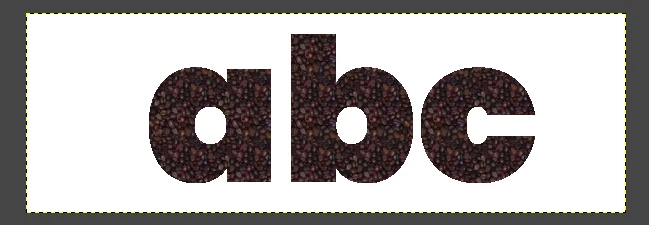
Then click on the text to have it selected. Use any of the two methods (bucket fill or dragging the pattern) to fill the selection (text) with the pattern.

The text will now be filled with the pattern as shown below.
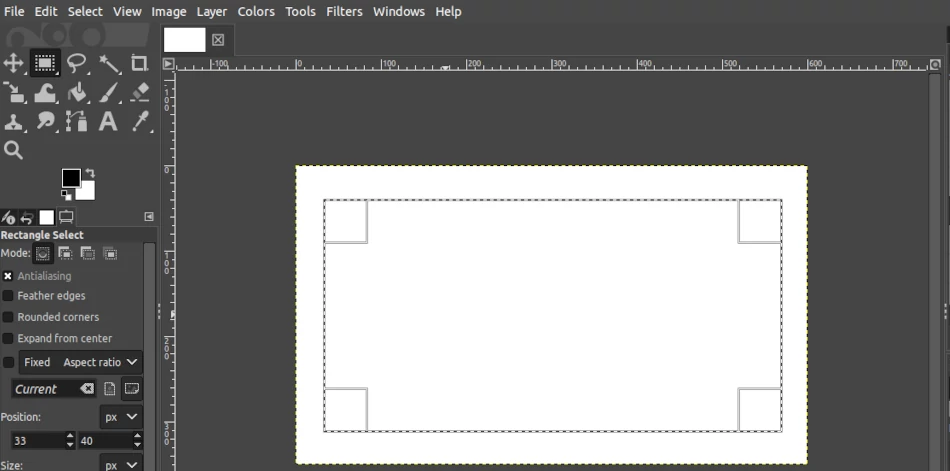
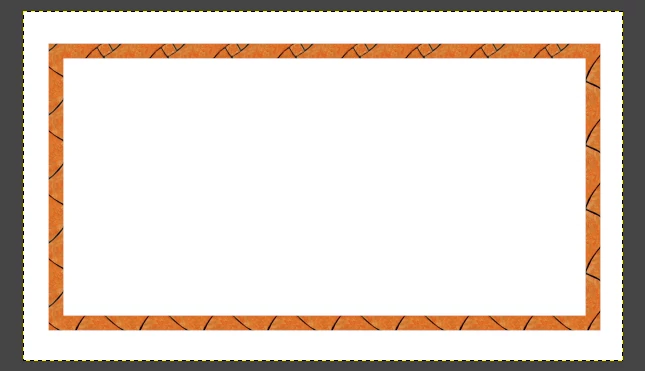
Example 2: Using patterns in borders
To create a decorative border with a pattern on an image, first, make a selection around the area where you want the border to appear. You can use the "Rectangular select" or "Ellipse select" tool.
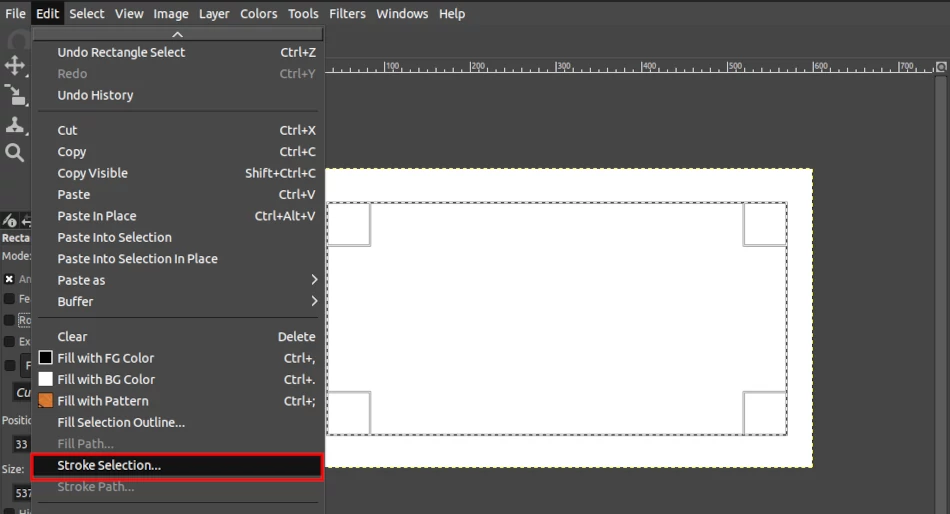
Next, select the pattern you want to fill the border with by clicking on it in the patterns palette on the right side.
Then open the "Edit" menu and select the "Stroke Selection" option.
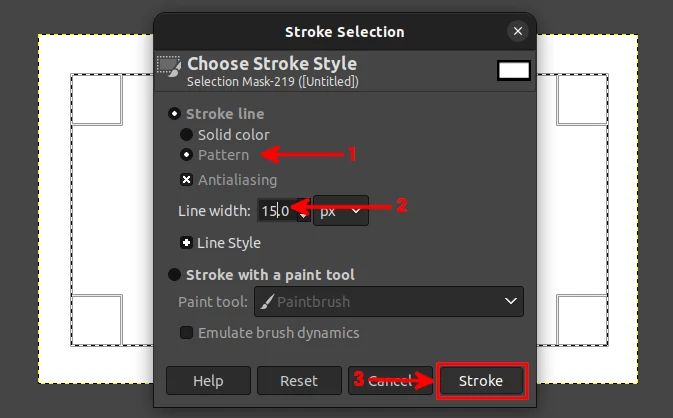
A "Stroke Selection" dialog box will open. Click on the "Pattern" option under the "Stroke line" section. Enter your desired "Line width" and click on the "Stroke" button at the bottom to apply.
Your border will look as below depending on the pattern you chose and the line width you entered.
That's it! Now you know how to use patterns to fill any area in your GIMP designs.