![[Complete Guide]: How to Create Curved Text in GIMP](https://www.solvetechnow.com/assets/images/gallery/how-to-create-curved-text-in-gimp.webp)
[Complete Guide]: How to Create Curved Text in GIMP
Curved text can be a useful and perfect feature when designing logos, banners, and other graphics that require a creative touch.
While GIMP is one of the most popular and powerful open-source image editing software and offers a wide range of features and tools for graphic design, it lacks a direct and straightforward way for creating curved text. If you are doing it for the first time, it most definitely will take you quite some time trying to figure out how it's done.
In this article, I'll show you how to create curved text in GIMP through a step-by-step process. So, whether you're a beginner or a pro, follow along with this tutorial to learn how to create curved text in GIMP and elevate your designs to the next level.
Step-by-step process of creating curved text in GIMP
Follow these steps to create curved text in GIMP:
Step 1: Open GIMP and create a new image
Open GIMP and create a new image by opening the "File" menu and clicking on the "New" option or by using the Ctrl+N keyboard shortcut. Set the width and height of the image according to your requirements.
You can alternatively open an existing image through the "File" menu and the "Open" option or by using the Ctrl+O keyboard shortcut.
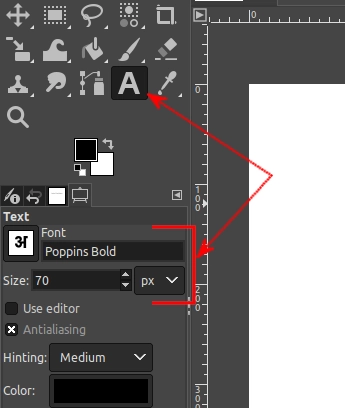
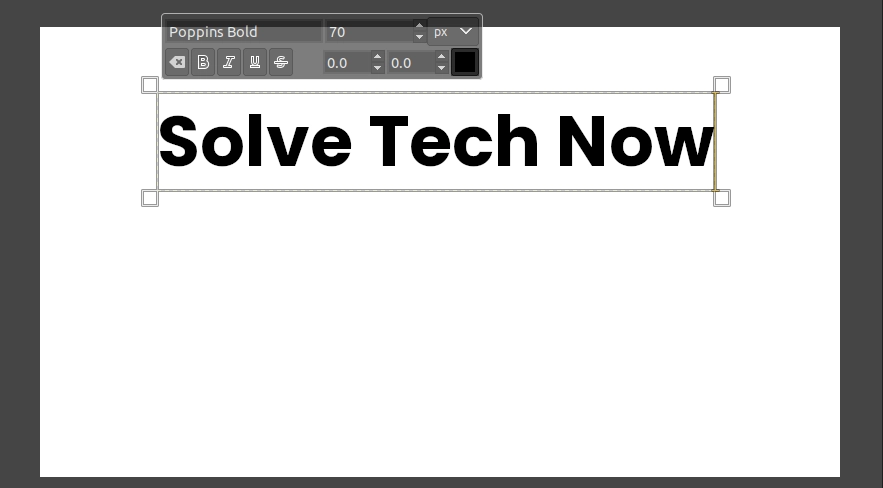
Step 2: Write and style your text
Select the Text tool by clicking on the "A" icon in the toolbox. Choose your preferred font and set the size of the text in the tool options panel in the left column. In my case, I select "Poppins Bold" font (a custom font) and set its size to 70px.
Click anywhere on the image and type your text. The position where you write it doesn't really matter in this case.
Step 3: Draw a curved path on the image
Create a curved path on the image, on which you would want the text to follow. To do so, grab the Paths tool from the toolbox and click on a point where you would want the curve to start. Then click on a second point (where you would want it to end) and drag the mouse. Control handles will appear, use them to adjust the curve by dragging them.
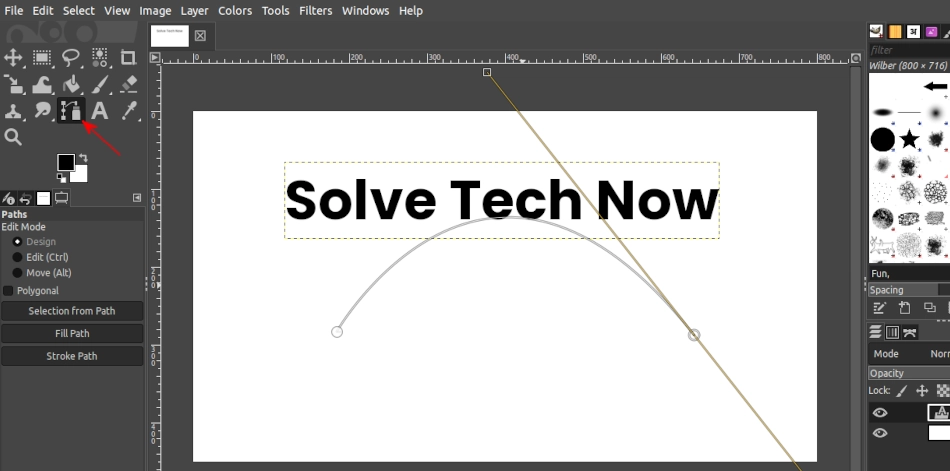
The path must have at least two nodes/points but you can make as many as you wish depending on how complex you want your path to curve.
Step 4: Create a new transparent layer
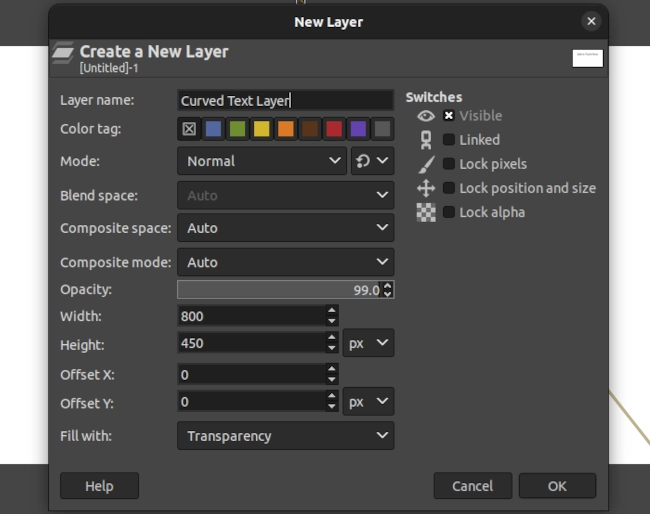
Once satisfied with the curve, create a new layer by opening the "Layer" menu and selecting the "New Layer" option. Alternatively, you can use the Shift+Ctrl+N keyboard shortcut.
A New layer dialog box will open, name the layer "curved text" or whichever name you can identify it with. In the "Fill with" field, select "Transparency" and click on the OK button.
Step 5: Apply the path to the text
Right-click on the text layer in the layers panel and then click on the "Text along Path" option.
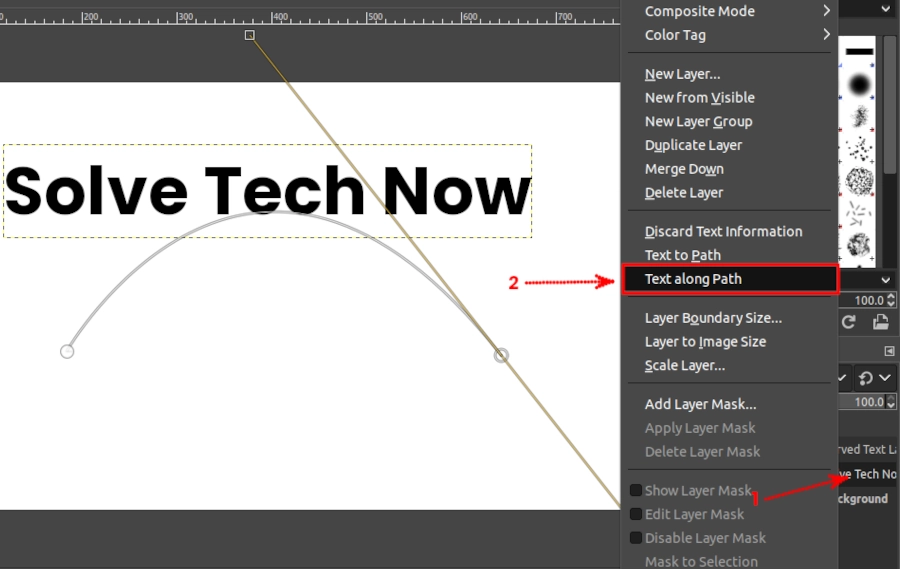
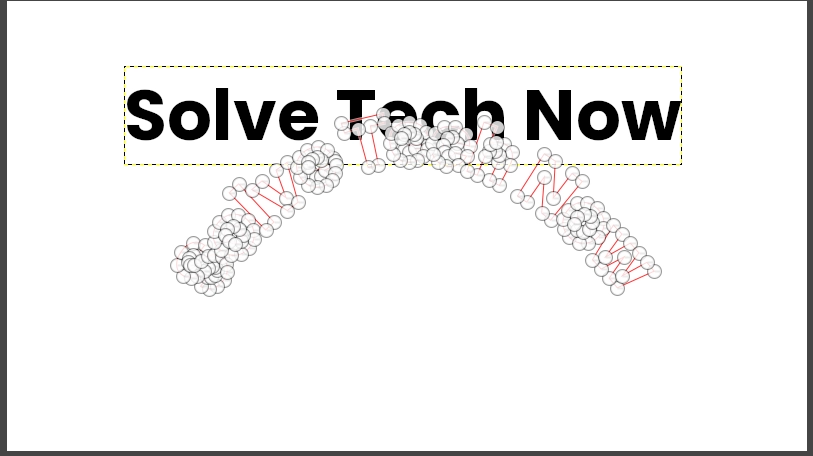
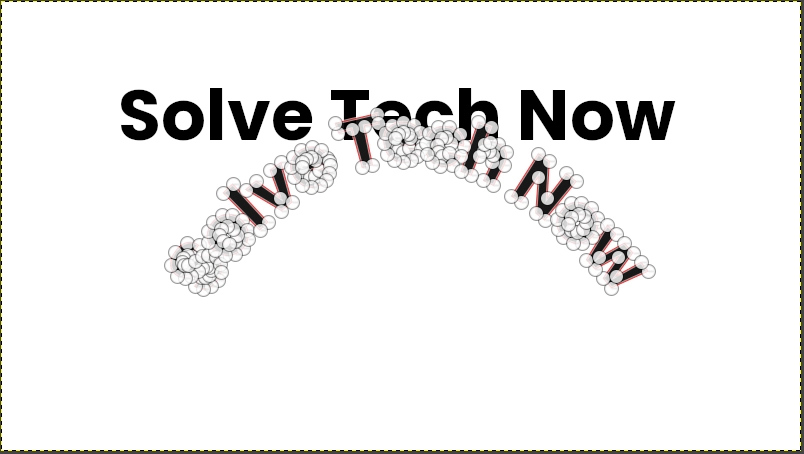
This will add the text along the curved path you created. The text along the path will be highlighted with multiple nodes and no color fill as shown below. If the text is very small, it will look less clear due to these nodes but that shouldn't worry you.
Step 6: Fill the curved text with color
Click on the "curved text" (transparent) layer in the layers panel to have it selected. Then click on the "Fill path" button under the path tool options in the left column.
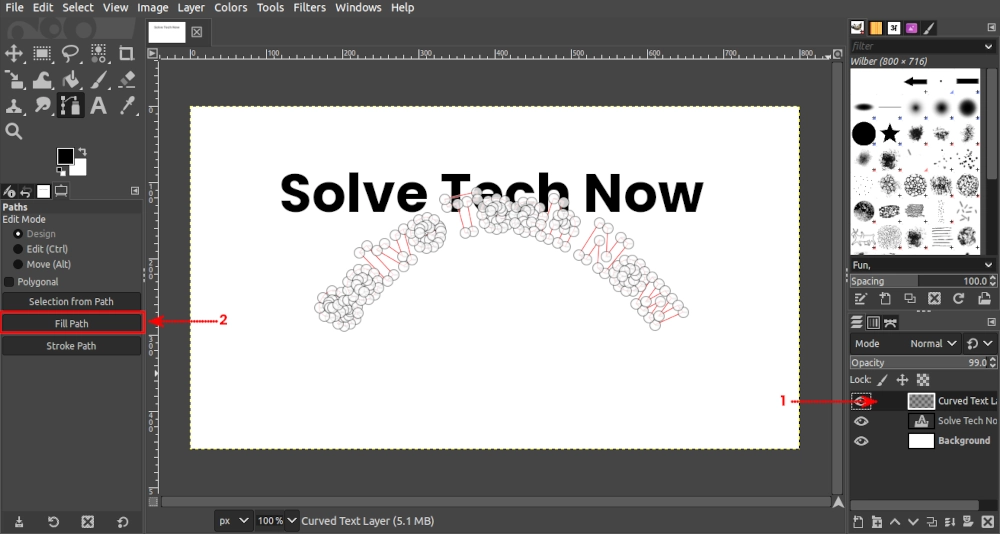
A small "Fill path" dialog box will open. Make sure the "Solid color" option is selected. This will take the selected foreground color in filling the text. Then click on the Fill button.
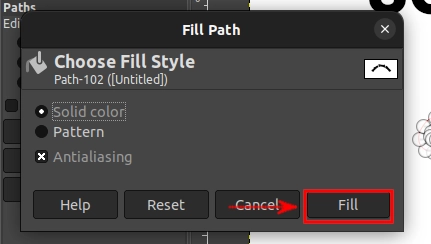
In case you want to fill the text with a pattern instead of a solid color, just choose the "Pattern" option in the "Fill path" options.
You will now have your text filled with the foreground color (or the selected pattern) but still be highlighted with nodes.
Click on the Move tool or a selection tool such as the rectangle select in the toolbox to get rid of the nodes around the text.
Step 7: Hide or delete the original text layer
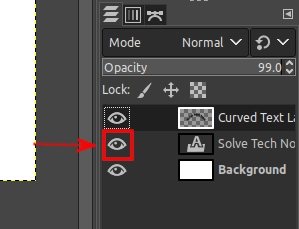
Now that we have the curved text, we don't really need the original text and we have to get rid of it. To do that, click on the eye icon of the text layer in the layers panel to hide it. Alternatively, right-click on the layer and select the "Delete Layer" option.
Step 8: Hide or delete the path
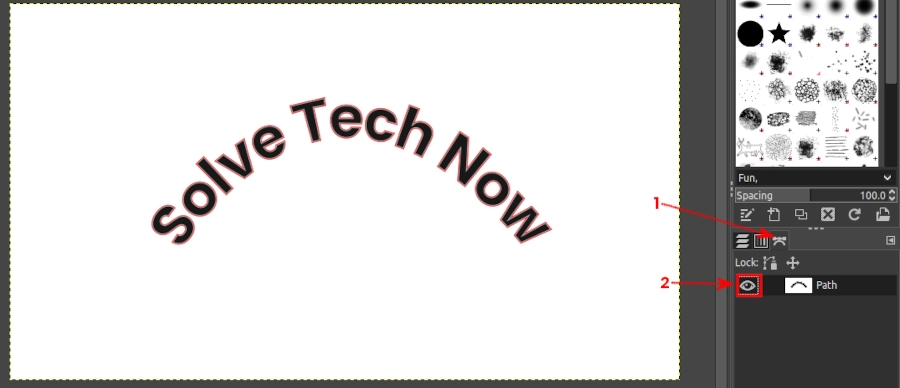
You will notice that the text is still highlighted with a red color. To get rid of it and remain with only the foreground color (or pattern), switch to the Paths panel at the bottom-right and click on the eye icon of the path to hide it. Alternatively, you can right-click on it and select the "Delete Path" option.
Now you will finally have curved text as shown below.
That's it! You have now created curved text in GIMP. You can now experiment with different curves and fonts to create unique designs that stand out.