How to Draw an Octagon Shape in GIMP
GIMP is a versatile and powerful free open-source graphics editing software that allows users to create stunning digital art and designs.
One of the fundamental skills in graphic design is the ability to create basic shapes such as circles, squares, triangles, and polygons.
While circles and squares are relatively easy to draw, polygons can be a bit more challenging, especially for beginners.
In this article, I will guide you through the step-by-step process of drawing an octagon shape in GIMP.
Whether you're a seasoned designer looking to brush up on your skills or a beginner just starting with digital art, this tutorial will provide you with the tools you need to draw a perfect octagon shape in GIMP.
What is an Octagon?
An octagon shape is a polygon with eight sides and eight angles. It is a two-dimensional shape that has straight sides and interior angles that add up to 1080 degrees.

The word "octagon" comes from the Greek words "octa," meaning eight, and "gonia," meaning angles.
Octagons can be found in many real-world objects, such as stop signs, regular eight-sided tiles, and some architectural structures.
In graphic design, octagons are often used as a design element to add visual interest and create a sense of balance and symmetry in compositions.
How to draw an Octagon Shape using GIMP
Here are the steps to create an octagon shape using GIMP:
Step 1: Create a new image in GIMP
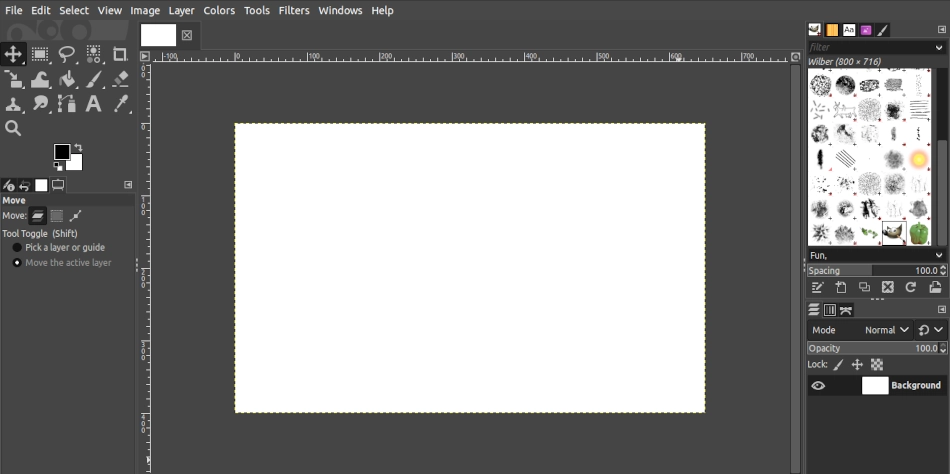
First, you need to create a new image in GIMP. Open the "File" menu and select "New" or use the keyboard shortcut Ctrl+N. In the "Create a New Image" dialog box, set the size and resolution of the image as per your requirements. Click on the OK button to create a new image.
Step 2: Create a new layer
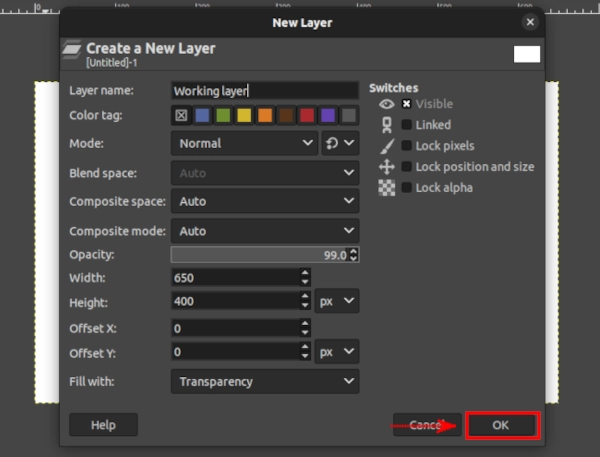
Next, create a new transparent layer on the image. To do this, open the "Layer" menu and select "New Layer" or use the keyboard shortcut Shift+Ctrl+N.
A "New Layer" dialog box will open. Give the layer a name of your choice if you wish (I name mine "Working layer"). Select the "Transparency" option in the "Fill with" field. Click on the OK button to create the new layer.
Step 3: Make a square selection
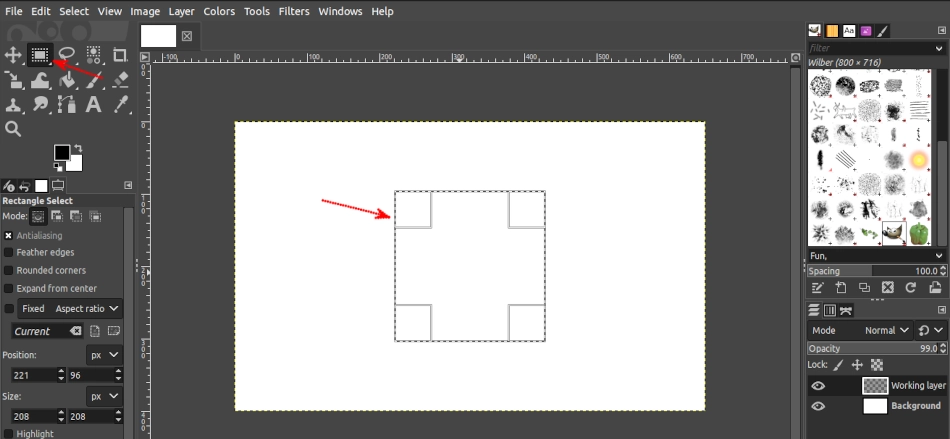
Grab the "Rectangle Select" tool in the toolbox and draw a square selection on the image. To do so, click on the image, press and hold down the Shift key as you drag the mouse.
Release the mouse when you are satisfied with the size of the square and then release the Shift key.
The purpose of holding the Shift key is to enable you to make a perfectly square selection instead of a rectangle.
You can easily move the square selection on the image by clicking on its inside and holding the left-click button while dragging the mouse around.
Step 4: Draw an outline along the selection
To draw an outline along the selection, open the "Edit" menu and select "Stroke Selection".
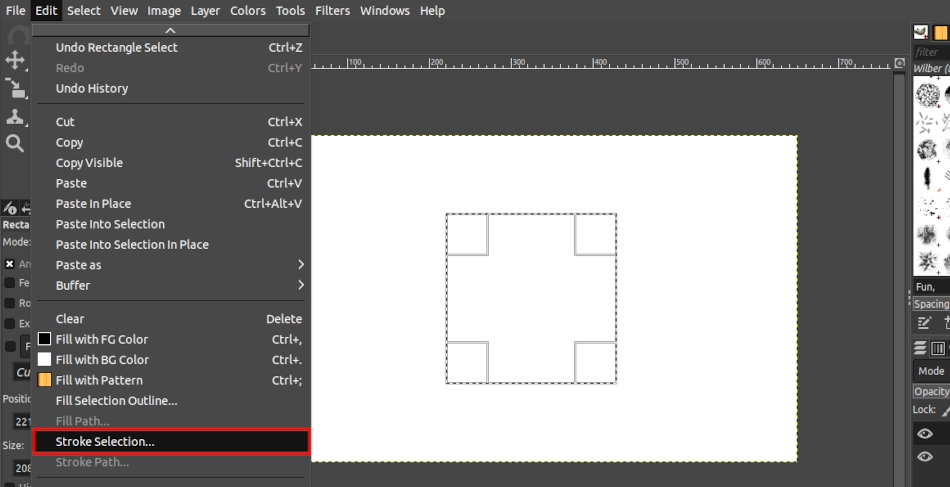
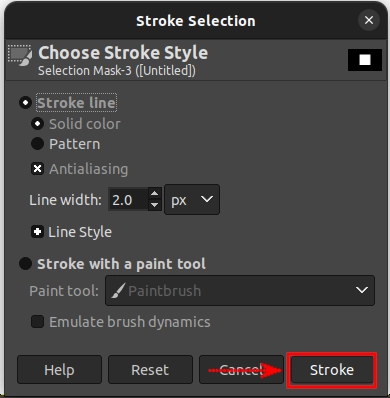
A small "Stroke Selection" dialog box will open. Make sure the "Stroke line" and "Solid color" options are selected. Enter a line width (outline thickness) value in px. 1 or 2px is enough. Then click on the Stroke button.
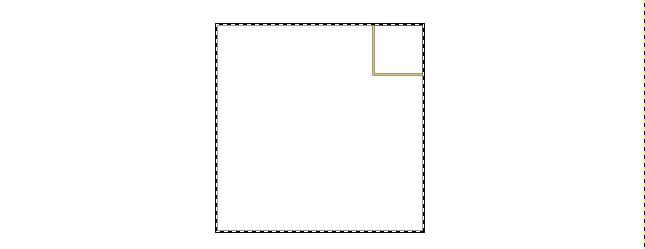
This will create a border along the selection as shown below.
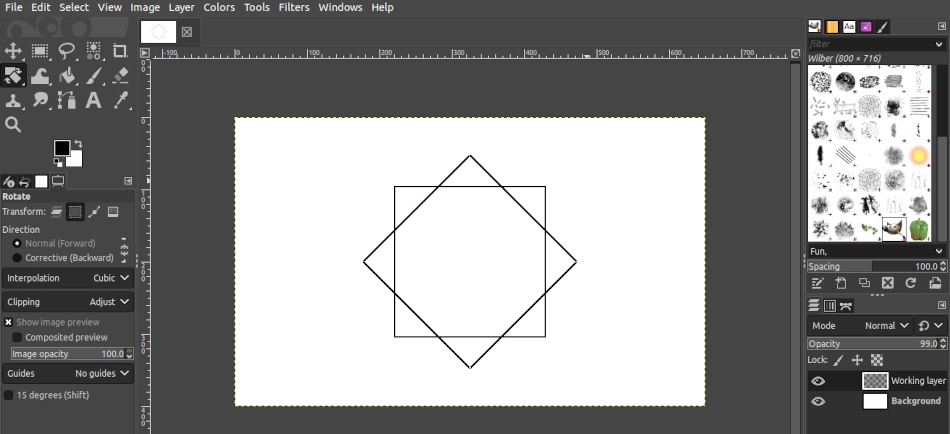
Step 5: Rotate the selection
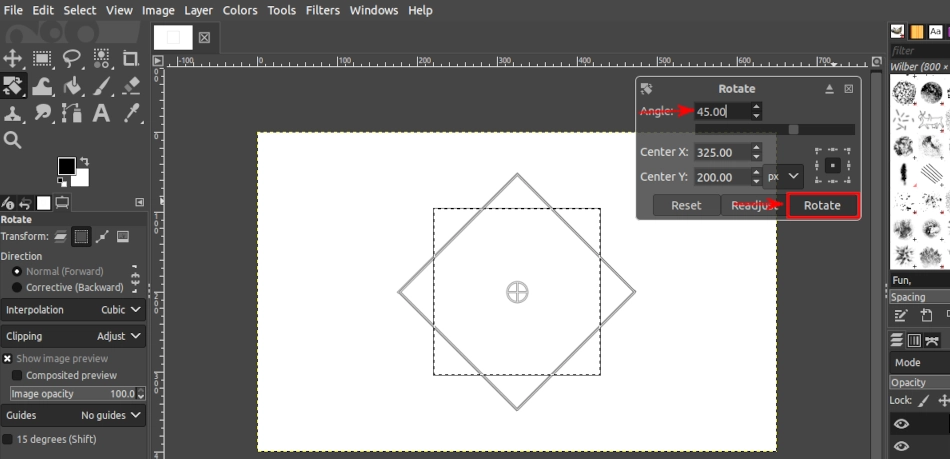
Next, rotate the selection at 45°. To do that, select the "Rotate" tool in the toolbox or use the keyboard shortcut Shift+R to activate it. Switch the Transform option from "Layer" to "Selection" under the tool options. Then click on the selection in the image.

A small tool options box will open at the top-right of the workspace. Enter 45 in the Angle field and then click on the Rotate button to apply the rotation.
Note that after the rotation the selection will become less visible but it's still there. If you check well, you will spot small blinking dots at the four corners.
Step 6: Stroke the rotated selection
Next, you will need to draw an outline along the rotated selection. Open the "Edit" menu and select "Stroke Selection". Repeat exactly as you did in step 4 above.
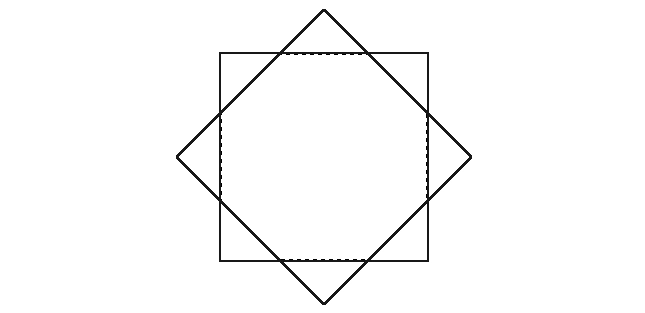
Then get rid of the selection by use of the Shift+Ctrl+A keyboard shortcut. You will have the new outline as in the screenshot below.
If you observe keenly, you will notice that the intersection at the center of the two outlines is a perfect octagon.
Step 7: Make a selection of the intersection
Next step, make a selection around the intersection (center area). To do so, select the "Fuzzy Select" tool in the toolbox or press U to activate it, then click at the center.
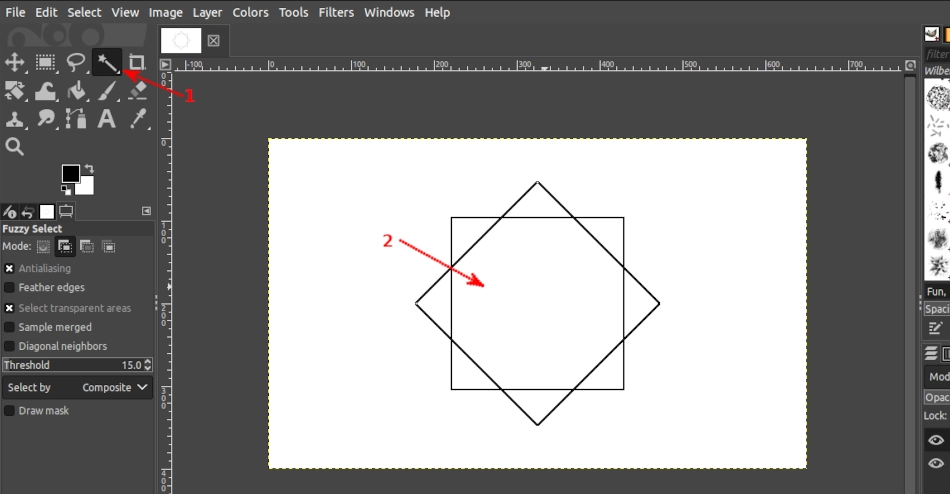
Now you will be able to see a dashed line around the intersection, indicating the selection.
Step 8: Make a new transparent layer
Just like in step 2, create another transparent layer and give it a name of your choice.
The reason why we need a new layer is that we want the shape on a separate layer as we will get rid of the second layer later.
Step 9: Fill the selection with the foreground color
Now that we have the octagon shape selected, the next step is to fill it with your preferred foreground color. To do so, select the "Bucket Fill" tool in the toolbox or use the Shift+B keyboard shortcut to activate it.
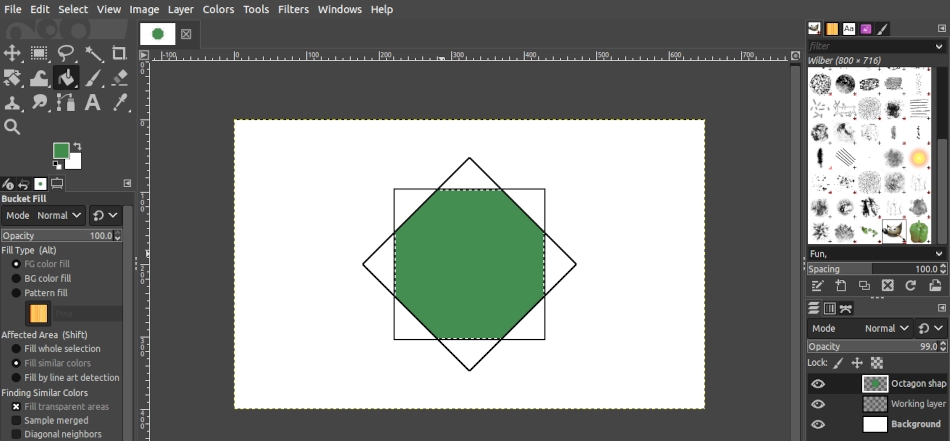
Select a foreground color, which you would want to fill the shape with. Next, click within the selection.
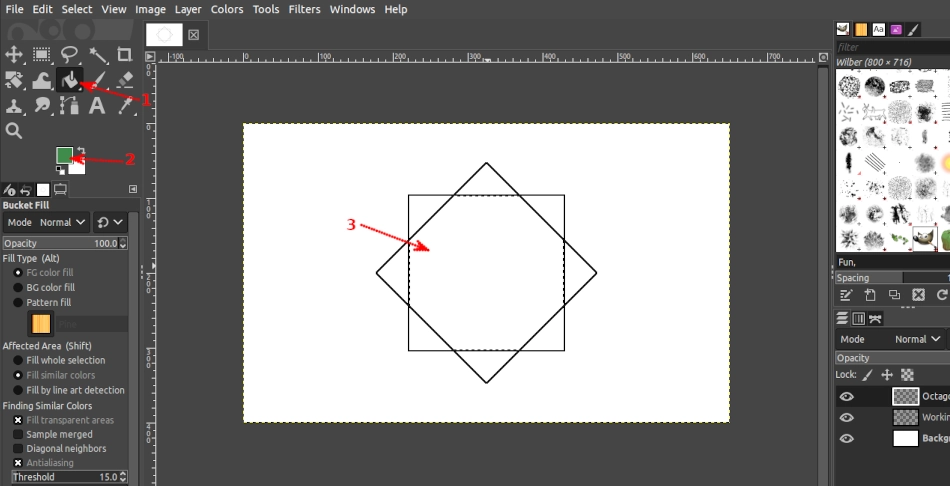
You will now see your perfect octagon shape filled with the foreground color but still selected and within the outlines of square and diamond shapes as shown below.
Step 10: Get rid of the second layer and the selection
At this point, we don't need the selection and contents of the second layer. Use the Shift+Ctrl+A keyboard shortcut to get rid of the selection.
Then, click on the eye icon of the second layer in the layers panel (at the bottom right) to hide the layer.
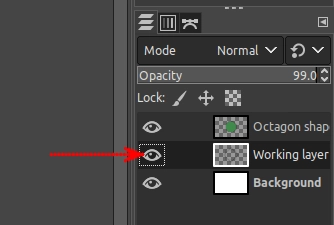
Alternatively, you can right-click on the layer and then click on the "Delete Layer" option to delete it instead of hiding it.
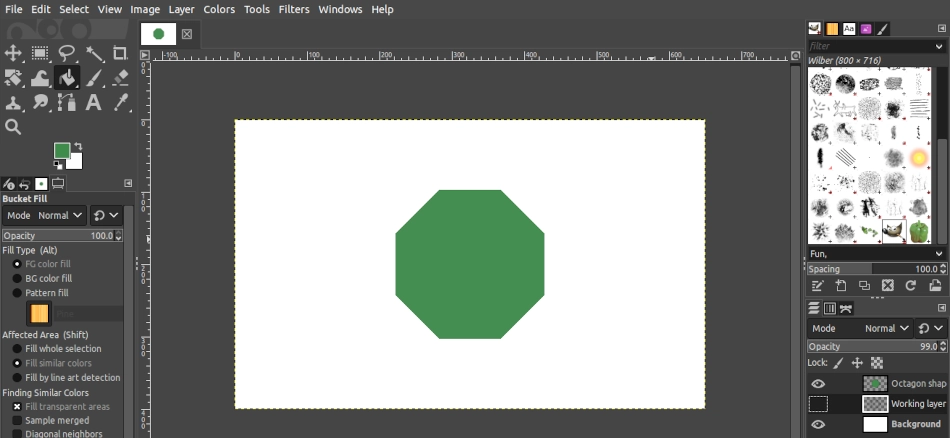
You will have your final octagon shape as in the screenshot below which you can now save by exporting the image to your preferred location.
That's it! Now you know how to draw an octagon shape using GIMP in your designs.
It's my hope that you found the article helpful and were able to follow along. I wish you all the best in your designs.