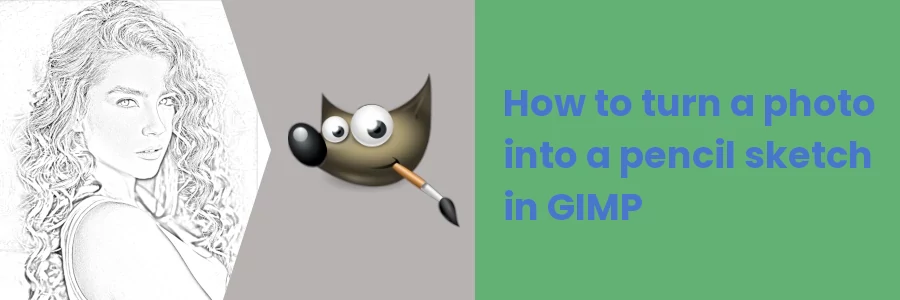
How to turn a photo into a pencil sketch in GIMP 2.10
A pencil sketch is a drawing made with a pencil on paper, typically using a combination of lines, shading, and hatching to create a representation of a subject.
Pencil sketches can range from quick and loose sketches to more detailed and refined drawings, and can be used to capture anything from still lifes and landscapes to portraits and figures.
A photo pencil sketch is a digital image that simulates the look of a hand-drawn pencil sketch from a photograph. This can be done using various software programs (such as Photoshop or GIMP), which use algorithms to convert the photograph into a pencil sketch-like image.
Photo pencil sketches can vary in their level of detail, shading, and texture, depending on the settings used in the software program. Some photo editing software may allow for customization of the pencil sketch effect, such as adjusting the level of detail or the intensity of the lines and shading.
Making pencil sketch from a photo can be a fun and creative way to turn a photograph into a unique and artistic piece of work.
In this article, I will show you a step-by-step procedure on how to convert a photograph into a pencil sketch using the GIMP image editor.
How to convert a photo into a pencil sketch in GIMP 2.10
GIMP is a free and open-source image editing software that provides a wide range of tools for manipulating digital images. One of the many things you can do with GIMP is to turn a photo into a pencil drawing.
Use the steps below to turn a photo into a pencil sketch in GIMP 2.10:
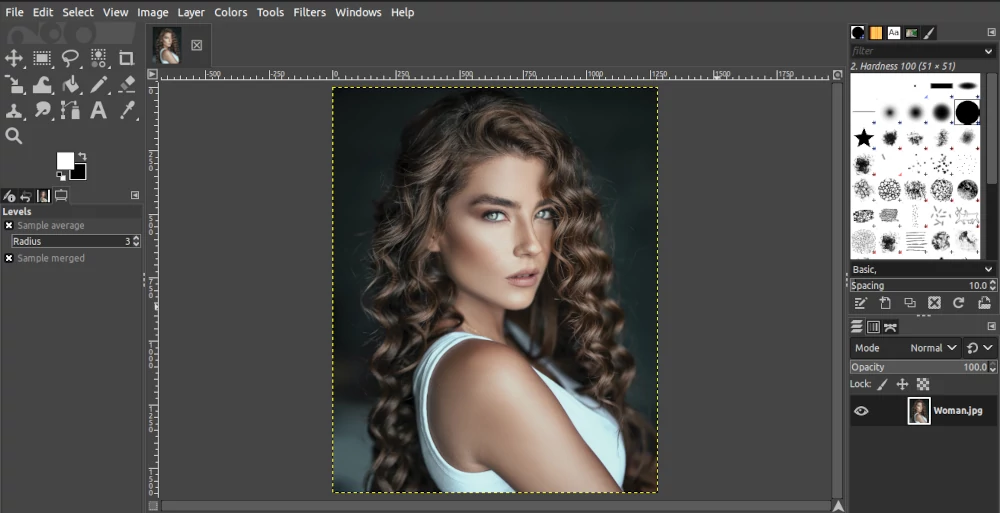
Step 1: Launch GIMP on your computer and open the photo you want to convert to a pencil sketch in it. You can do so by opening where the image is stored and dragging it into the GIMP workspace, or by opening the "File" menu on GIMP, then the "Open" option, and choosing your image from your computer storage.
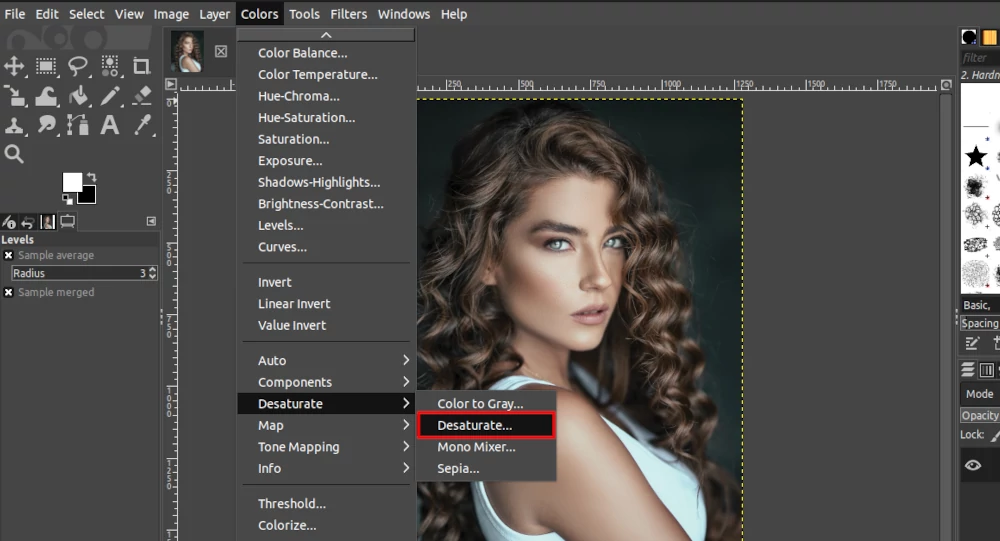
Step 2: Desaturate the image to remove all the color from it and convert it to black and white. To do so, open the "Colors" menu, select the "Desaturate" submenu, and click on the "Desaturate" option.
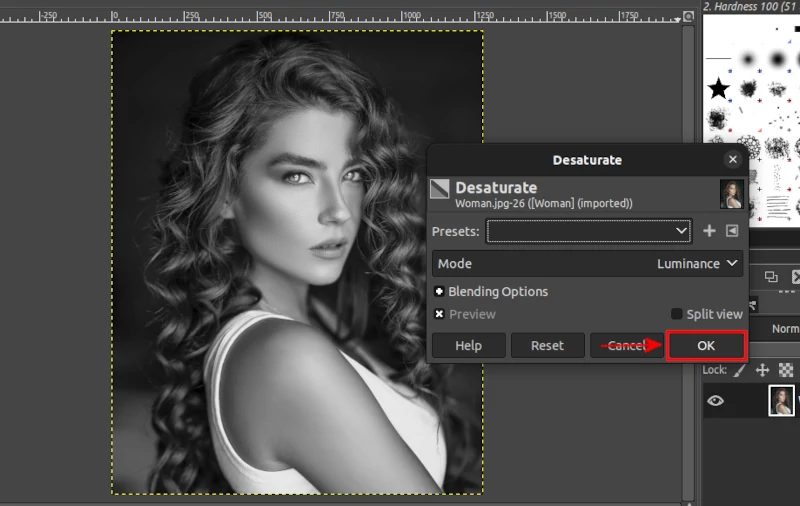
In the "Desaturate" dialog box that opens, leave everything as default and click on the "OK" button to apply the changes.
Step 3: Create a duplicate layer of the image by opening the "Layer" menu and then clicking on the "Duplicate Layer" option.
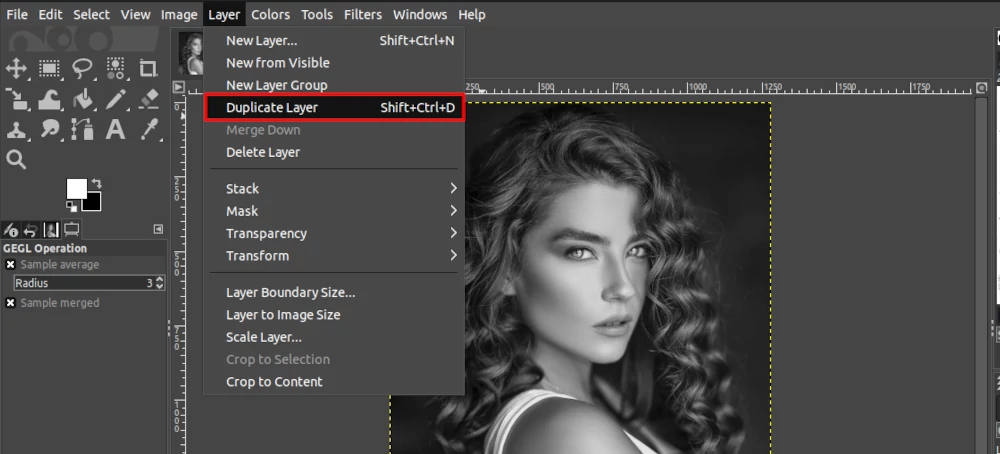
Alternatively, you can use the "Ctrl+Shift+D" shortcut on your keyboard.
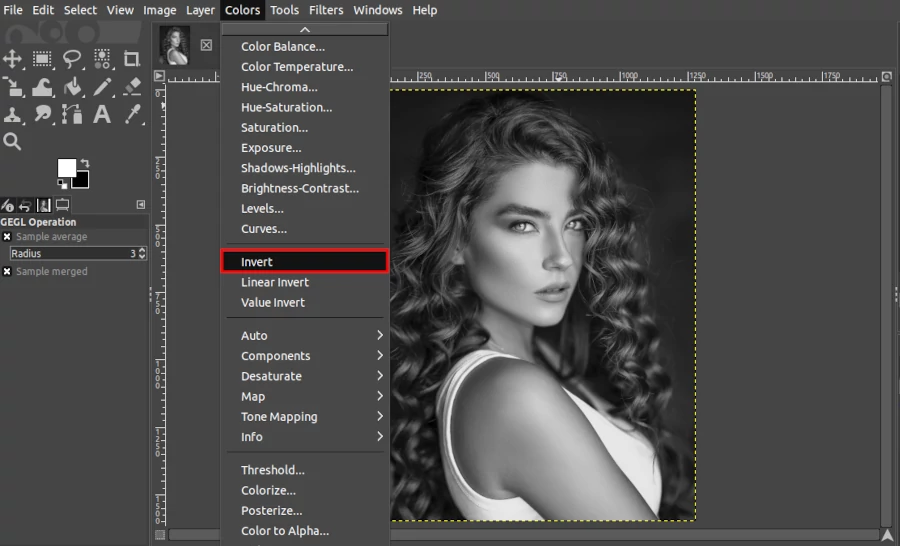
Step 4: Invert the colors of the duplicate layer by opening the "Colors" menu and then clicking on the "Invert" option. Alternatively, you can use the "Ctrl+I" shortcut on your keyboard.
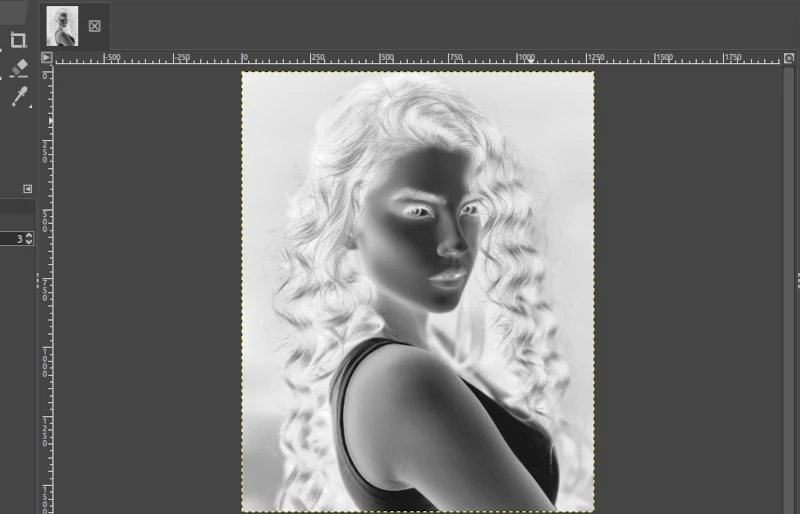
The image will change to look like below.
Step 5: Change the layer mode from "Normal" to "Dodge" in the layers palette at the bottom right corner of the application window.
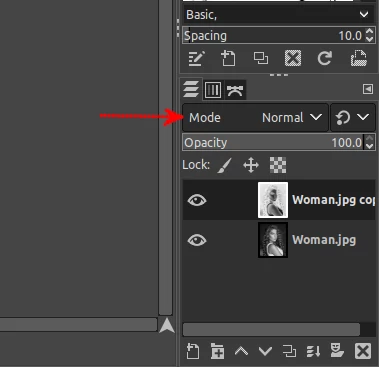
The image layer will be as below after changing the layer mode.

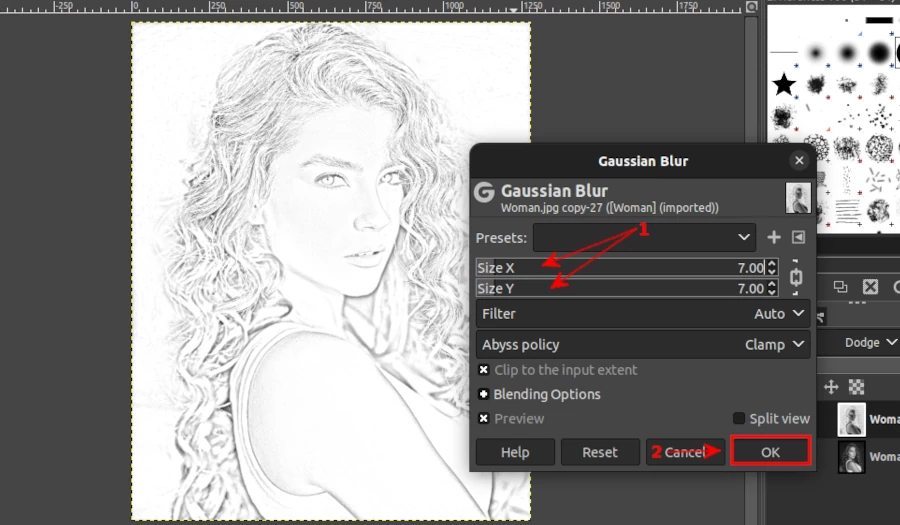
Step 6: Apply the "Gaussian Blur" filter effect on the layer. To do so, open the "Filters" menu, hover the cursor over the "Blur" submenu, and click on the "Gaussian Blur".
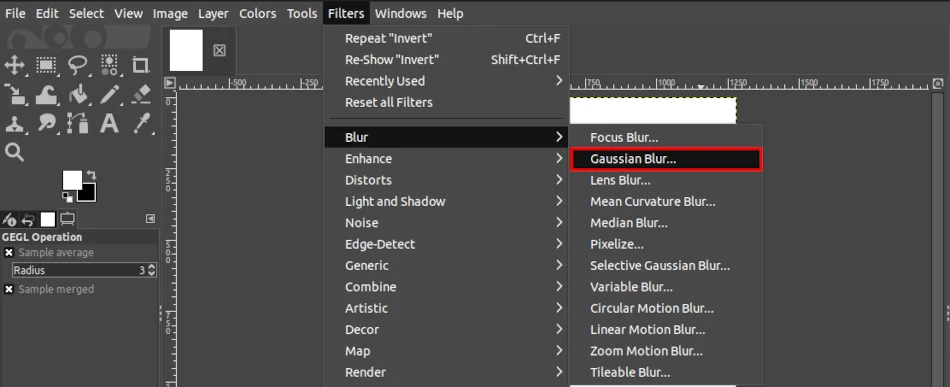
A small dialog box will open. Adjust the values of size X and size Y until you are satisfied with the level of blurriness for your pencil drawing effect. Then click on the OK button to apply the filter.
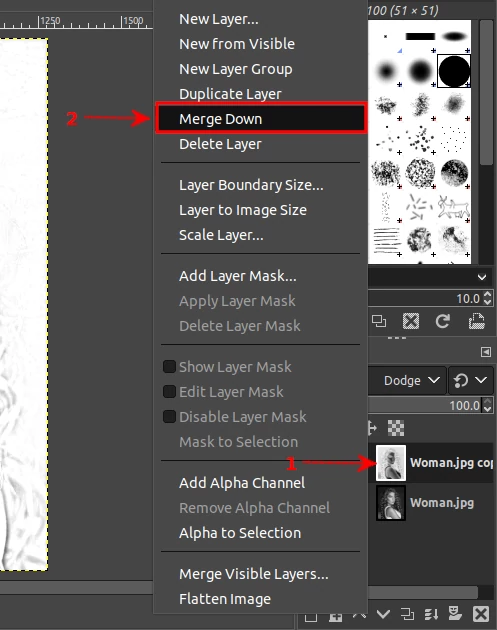
Step 7: Merge the two layers by right-clicking on the duplicate layer in the Layers palette and selecting the "Merge Down" option.
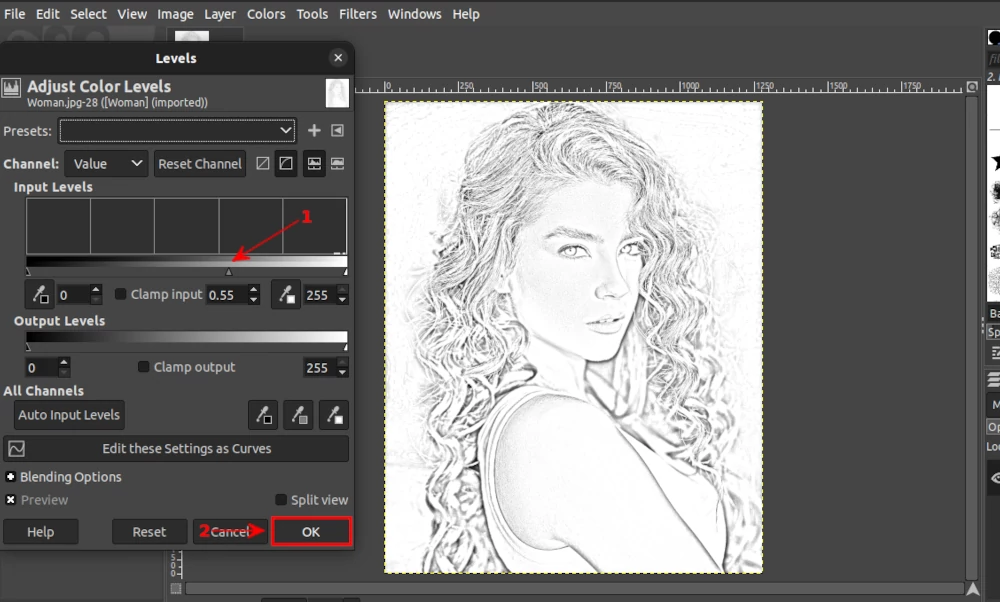
Step 8: Finally, go to the "Colors" menu again and select "Levels".
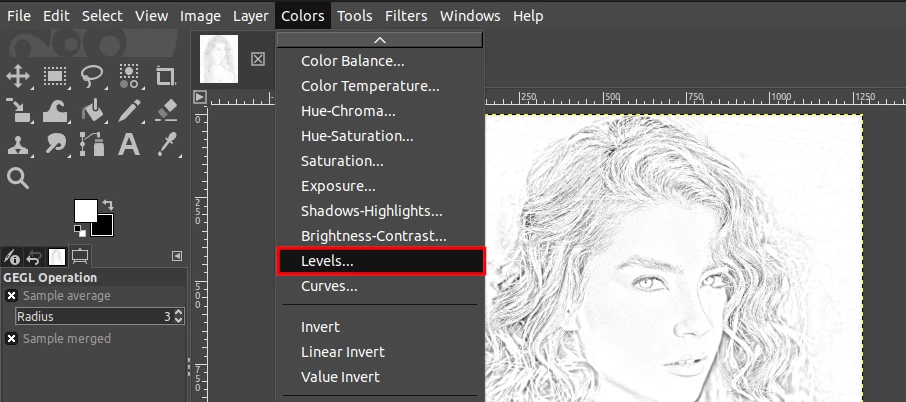
In the "Levels" dialog box, move the middle slider to the right to increase the contrast of the image, making it look more like a pencil sketch. Then click on the OK button to apply the changes.
Save the pencil sketch image as a new file by opening the "File" menu and then selecting the "Export As" option. Alternatively, use the Shift+Ctrl+E shortcut on your keyboard. Choose a file format, select the storage location, and click on the Export button to save the file.
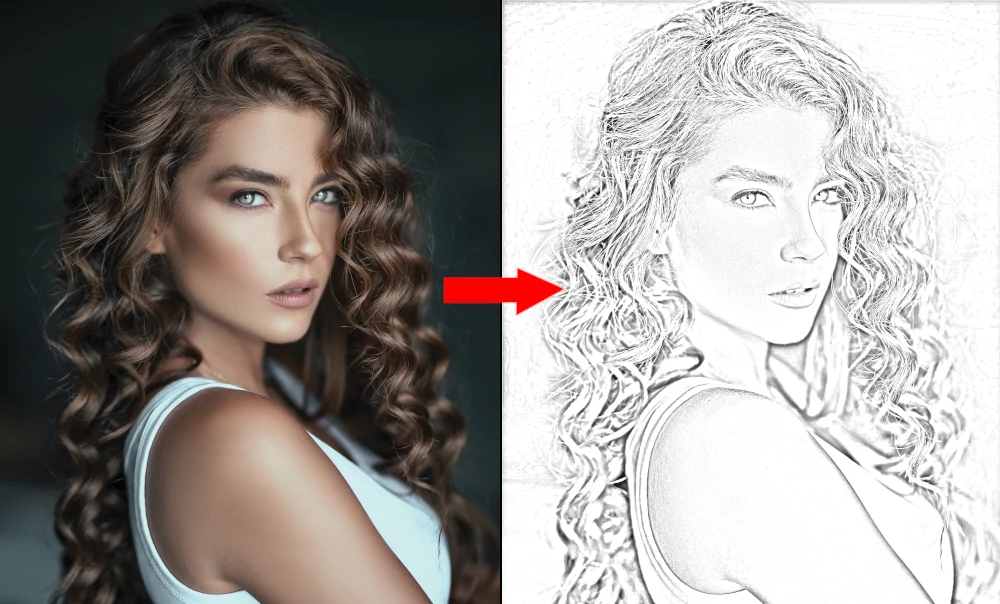
Below you can compare the original photo with its pencil sketch.
That's it! Now you know how to make a pencil sketch image from a photo in GIMP 2.10.
