How to Add a Border Outline to Text in GIMP
Outlining text is a simple yet effective way to make your text stand out and draw attention to it.
This involves adding a border of a different color around all the characters of the text. It goes around the outside (and inside for those that have an inner side) of the characters, which adds some flair.
In this article, I will show you how to add a border outline on text in GIMP through a step-by-step process.
A step-by-step process for outlining text in GIMP
Here are the steps to outline text in GIMP:
Step 1: Open GIMP and Create a New Image
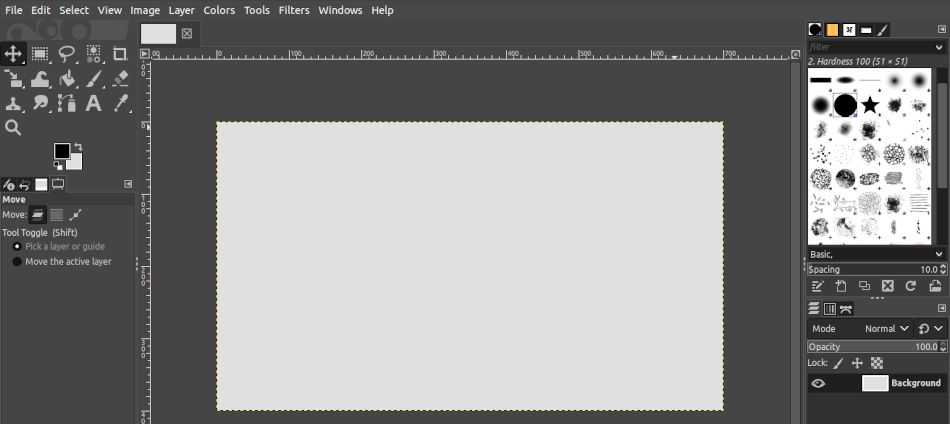
Open GIMP on your computer and create a new image through "File" > "New" or using the Ctrl+N keyboard shortcut. Choose the size of your canvas and click on "OK".
Alternatively, you can open an existing image via "File" > "Open" or using the Ctrl+O shortcut.
Step 2: Add and style your Text
Click on the Text Tool labeled "A" in the toolbox on the left column. Select your preferred font and set the size under the tool options panel. Set the foreground color that you want your text to take. Click anywhere on the image and type the text that you would want to outline.
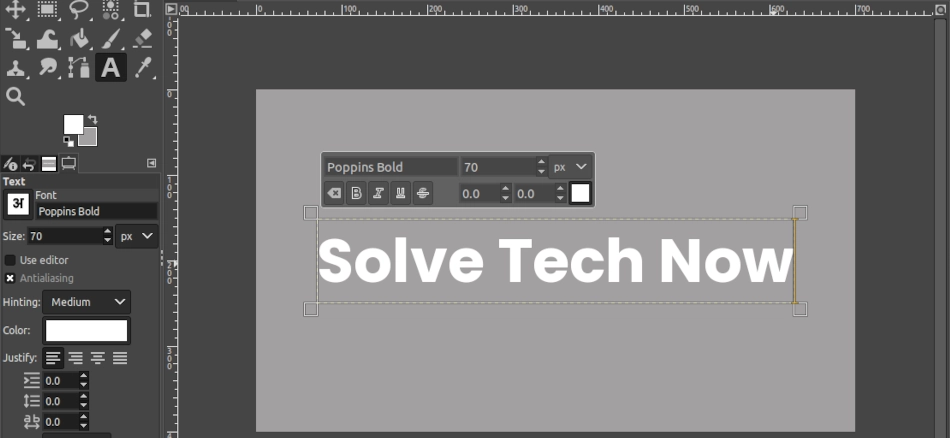
A new layer for the text will be created, which you can see in the layers' panel at the bottom right corner.
If you would want to change the position of text on the image, just select the Move tool in the toolbox, click on any character of the text, and drag it around to the position of your choice.
Step 3: Make a selection the Text
Next, you need to select all the text characters.
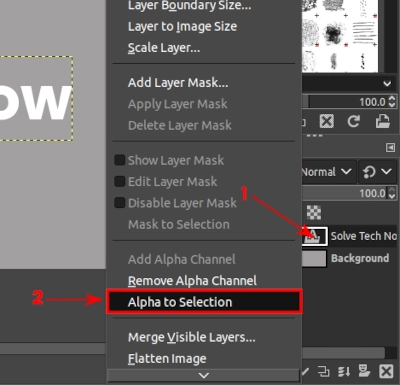
You can do this by right-clicking on the text layer in the layers panel and selecting the "Alpha to Selection" option.
Alternatively, click on the "Select by Color Tool" in the toolbox or use the Shift+O shortcut to activate it and click on any character/letter of the text. This will select all the text.

Step 4: Create a new transparent layer
Next, you will need to create a new transparent layer. This will enable you to make changes to the text without affecting the basic text layer.
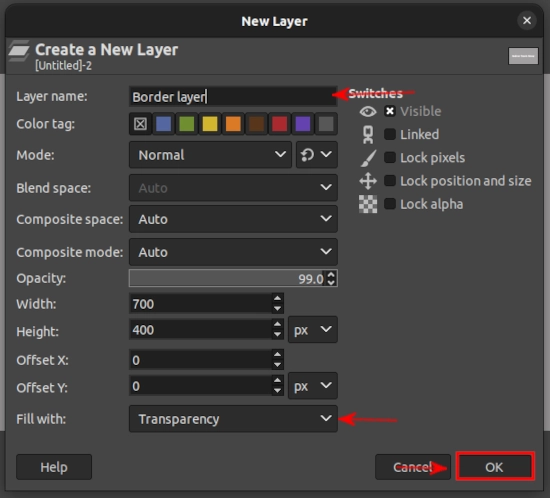
Use the "Layer" menu then the "New Layer" option or use the Shift+Ctrl+N keyboard shortcut. In the New Layer dialog box, give the layer an identifiable name such as "Border layer", select the "Transparency" option for the "Fill with" field and click on the OK button.
Step 5: Add a border outline to the text
This step has several ways of implementation. We will cover 3 methods:
- Stroke selection
- Grow selection then fill
- Border selection then fill
Method 1: Stroke selection
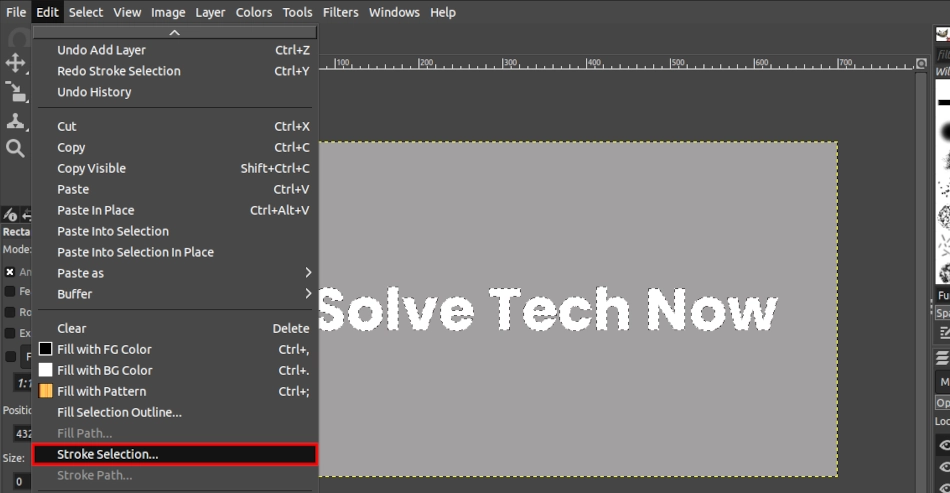
Open the "Edit" menu and select the "Stroke Selection" option.
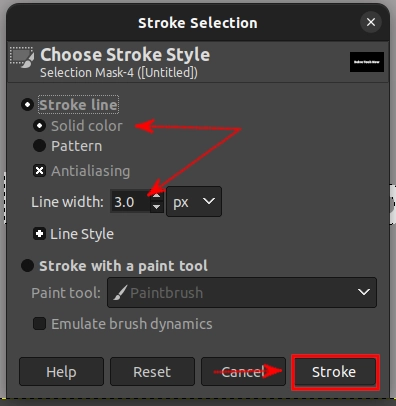
In the "Stroke Selection" dialog box that opens, select the "Stroke line" and "Solid Color" options. In the "Line width" field, enter your preferred border outline width/thickness in pixels. Then click on the Stroke button.
You will now have your text with a border outline (filled with the selected foreground color) but still with the selection as shown below.

Use the Shift+Ctrl+A keyboard shortcut to get rid of the selection and you will have your outlined text as shown below.

Method 2: Grow selection then fill
The "Grow" select option extends the selection by a defined number of pixels outwards in every direction. This leads to a bigger version of the text selection created in step 3.
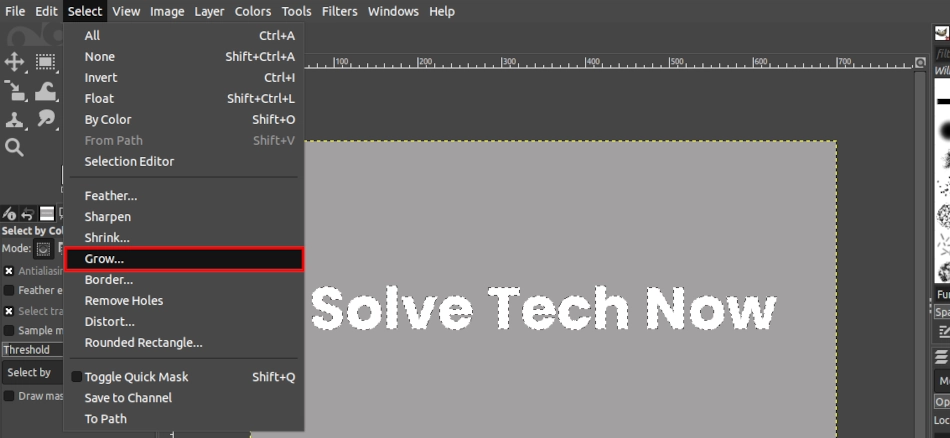
Open the "Select" menu and click on the "Grow" option.
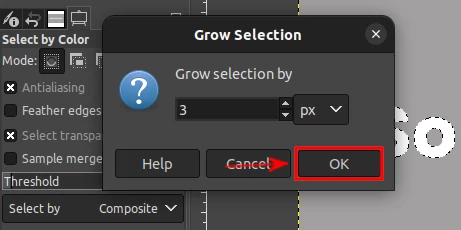
A small dialog box will open. Enter the number of pixels that you want to extend the selection with. This value will mostly depend on the size of the text and how thick or thin you want the border outline to be. For larger font sizes, you can enter a bigger value and vice versa. In my case, I enter 3px. Click on the OK button.
The selection will be extended with the number of pixels you entered. As you see below, there is now a small gap between the selection and the text.

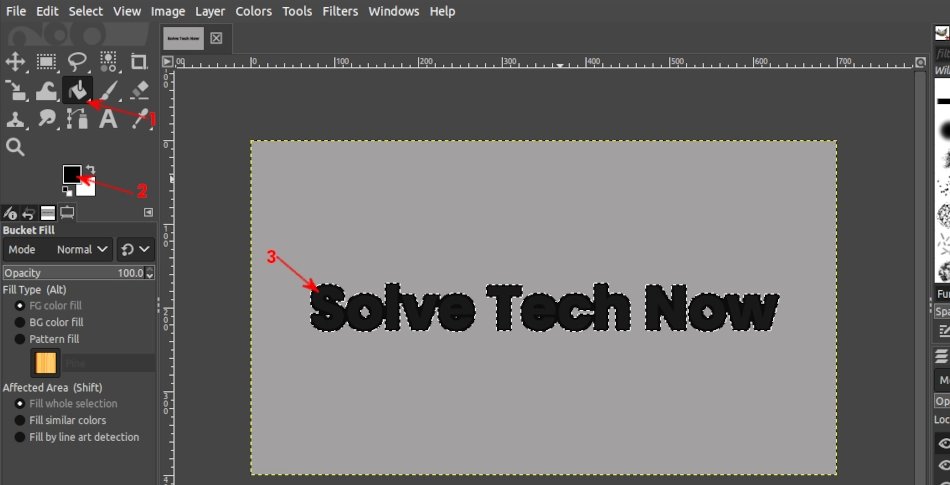
Switch the foreground color to your preferred outline color on the text. Select the "Bucket Fill" tool and click on any character of the text. This will fill the extended text selection with the foreground color as shown below. The original color of the text will no longer be visible at this point.
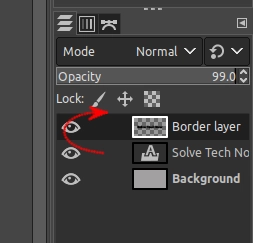
Next, you will need to move the text layer on top of the border layer to have a border effect on the text. To do that, click and drag the text layer up in the layers panel.
Use the Shift+Ctrl+A keyboard shortcut to get rid of the selection and you will have your text with a good border outline as shown below.

Method 3: Border selection then fill
The "Border" select option makes a new border selection along the edges of the text. This selection goes in both directions inwards and outwards of the original selection created in step 3 by a specified number of pixels.
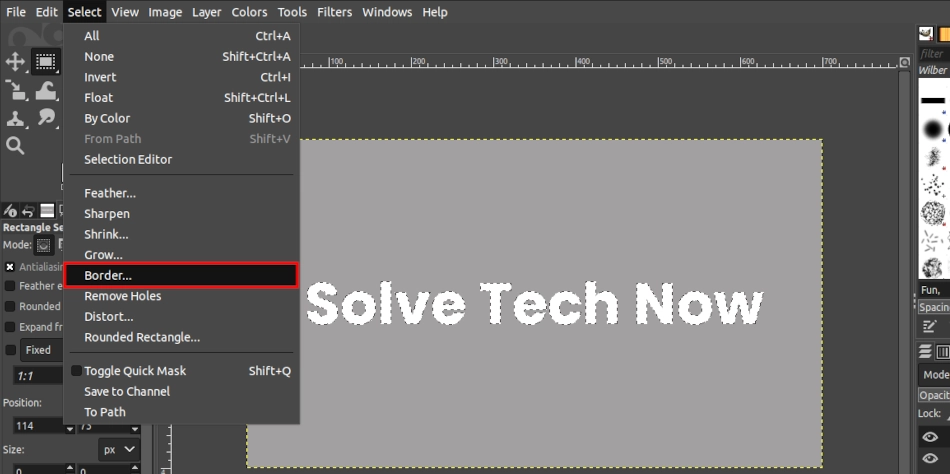
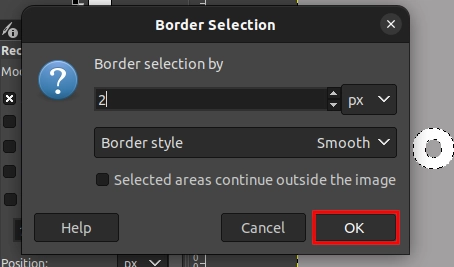
Open the "Select" menu and click on the "Border" option.
A small dialog box will open. Enter the number of pixels that you want your border to go inwards and outwards. For example, if you want your border to have a thickness of 6px, enter 3px. This means it will go 3px inwards and 3px outwards making a total width of 6px. In my case, I enter 2px.
Leave the border style as default (smooth) or feathered to round out the border edges. Click on the OK button.
This is how the new selection will look.

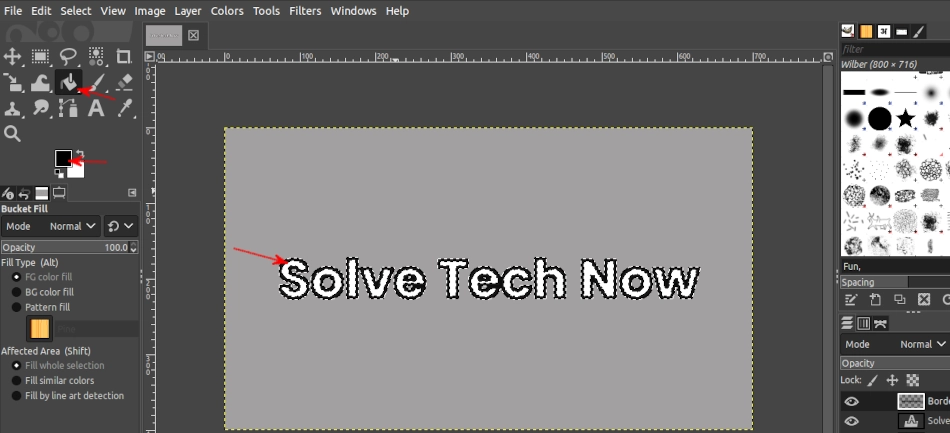
Select the "Bucket Fill" tool. Make sure your preferred outline color is selected as the foreground color. Click on the text and the border selection will be filled with the foreground color as shown below.
Now use the Shift+Ctrl+A keyboard shortcut to get rid of the border selection. You will have a text with a good outline as shown below.

That's it! By following these steps, you have learned how to outline your text and give it a more visual interest in GIMP.
You can now experiment with different outline widths, colors, and styles to find the look that works best for your project.