Step-by-Step Guide on How to Fill Text with Images in GIMP
In the world of graphic design, text and images are two fundamental elements that work together to create powerful visual messages.
But what if you could take these elements to the next level by filling text with images? Well, this technique has been used for years in print design, and you most probably have seen it and maybe wondered how it's done.
Filling text with an image can add depth, texture, and visual interest to your designs, making them stand out from the crowd.
In this article, I will take you through the process of filling text with an image in your designs in GIMP.
How to Fill Text with Images in GIMP
To fill the text with an image in GIMP, use the following steps:
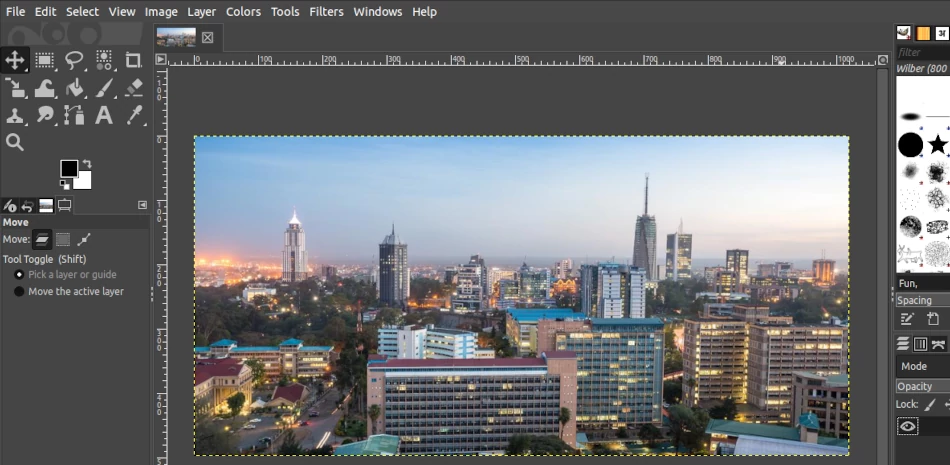
Step 1: Open the image you want to use to fill the text in GIMP.
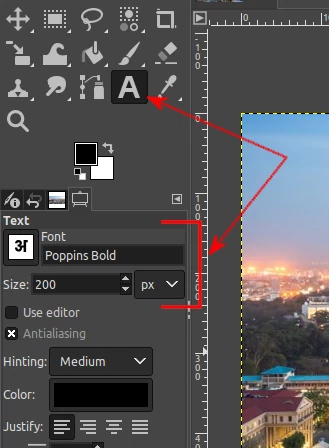
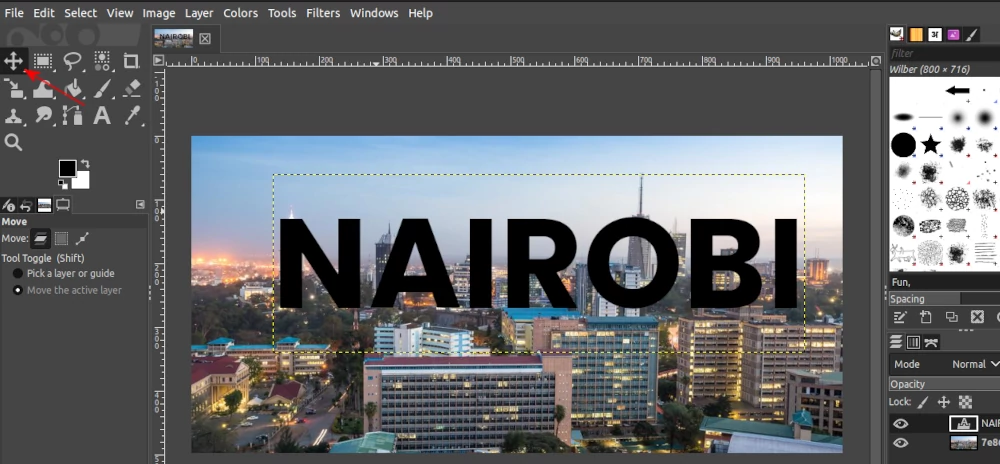
Step 2: Select the Text Tool by clicking on it in the toolbox. Choose your preferred font and set the size under the tool options. In my case, I set it to Poppins Bold and size 200px.
Step 3: Click anywhere on the image and write the text you want to fill with an image. This will create a text layer on which the text will be written. It will be visible under the layers tab at the bottom right of the application window.
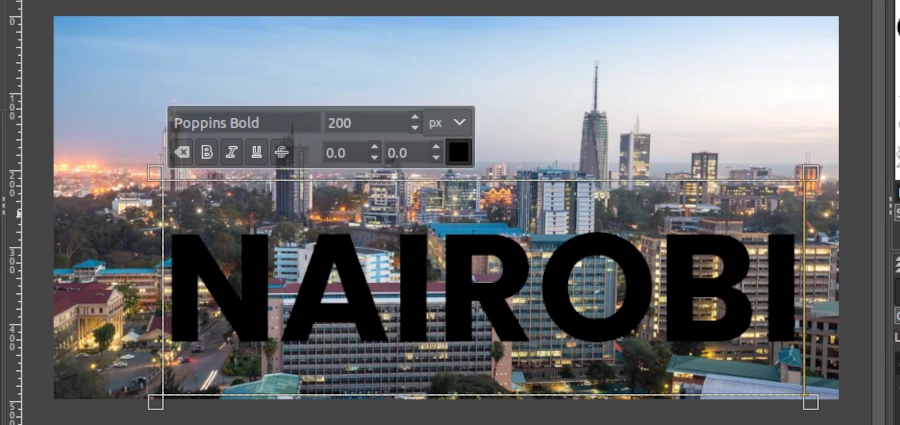
Step 4: Use the Move Tool to move the text to your preferred position on the image. To do so, just click on the Move Tool in the toolbox to select it, then click on any text character and drag the mouse.
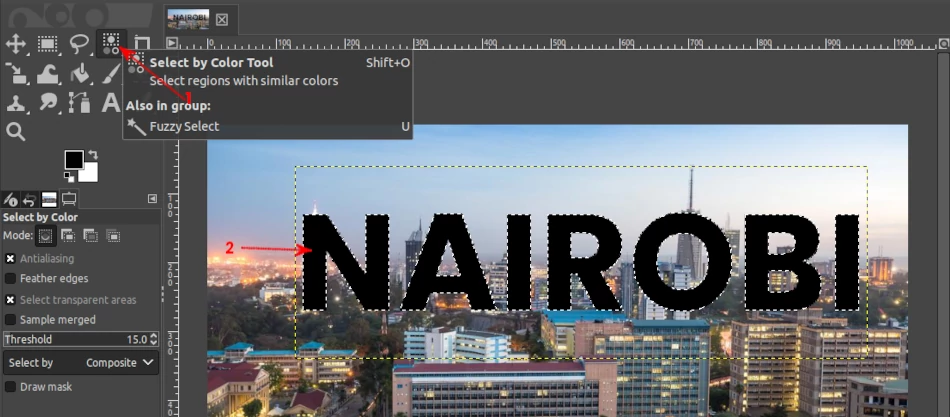
Step 5: Select the "Select by Color Tool" by clicking on it in the toolbox or by using the Shift+O keyboard shortcut. Then click on any character on the text to have it all selected as below.
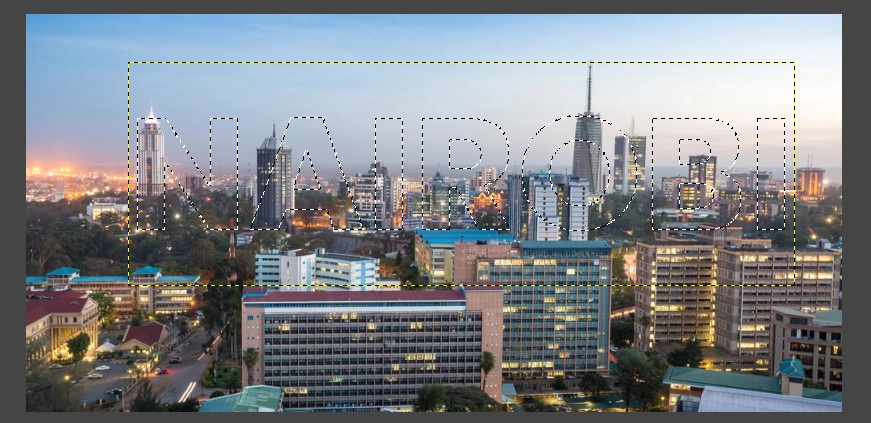
Step 6: Press the Delete key on the keyboard or open the "Edit" menu and select the "Clear" option. This will have the text selected but its color deleted to transparency as you can see dashed (broken line) borders along where the text had occupied.
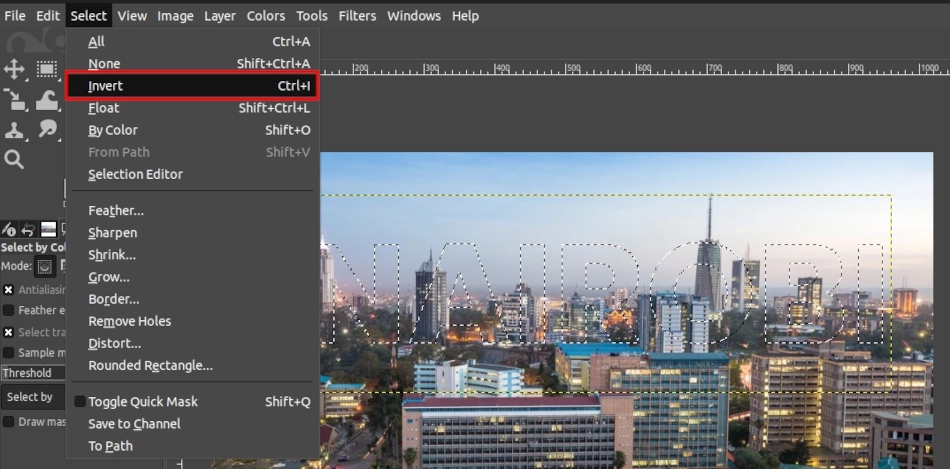
Step 7: Invert the text selection by opening the "Select" menu and clicking on the "Invert" option or by using the Ctrl+I keyboard shortcut. This will make the area surrounding the text on the text layer to be selected leaving only the text unselected.
Step 8: Open the "Edit" menu and select the "Fill with BG Color" or "Fill with FG Color" option depending on which color you want as your text background.
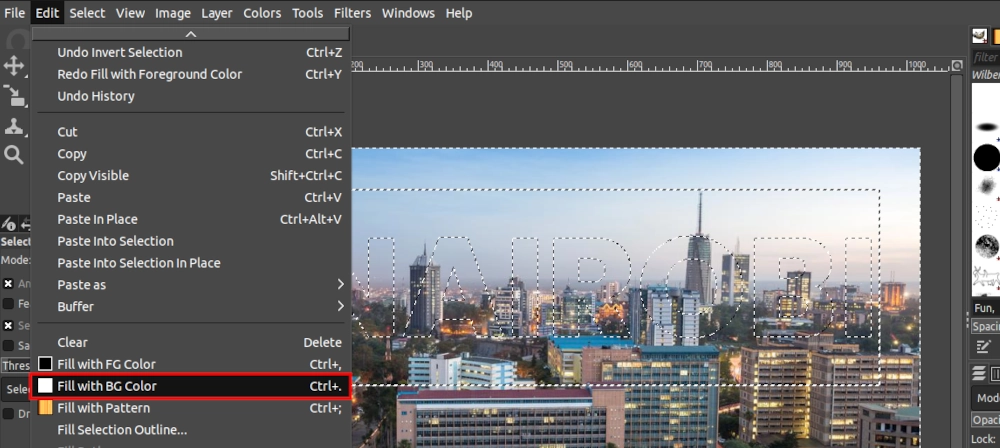
This will make the area surrounding the text on the text layer to be filled with a solid color, while the text will be filled with the image.
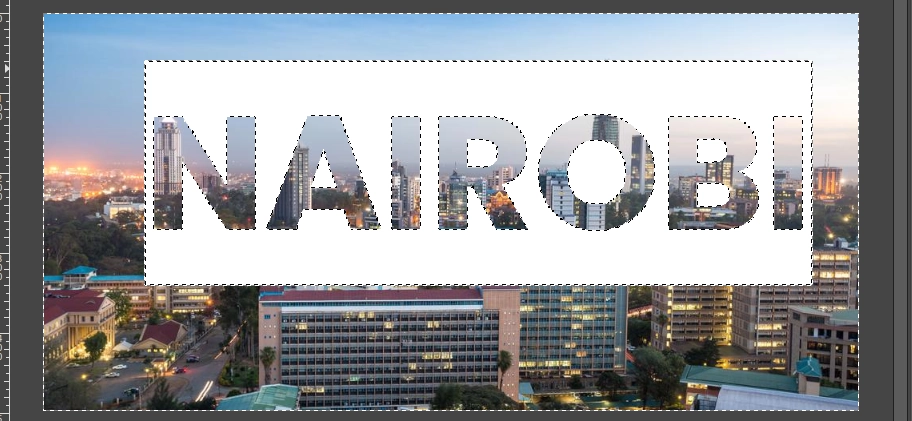
Now you can remove the selection on the image by opening the "Select" menu and selecting the "None" option, or by using the Shift+Ctrl+A keyboard shortcut.
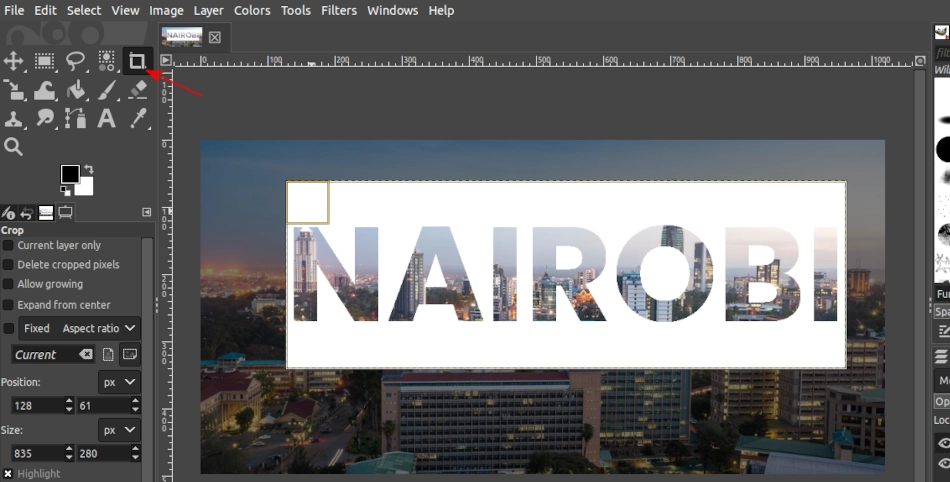
Step 9: Grab the Crop Tool from the toolbox and select the text layer area. Then press the Enter key to crop the image to that selection.
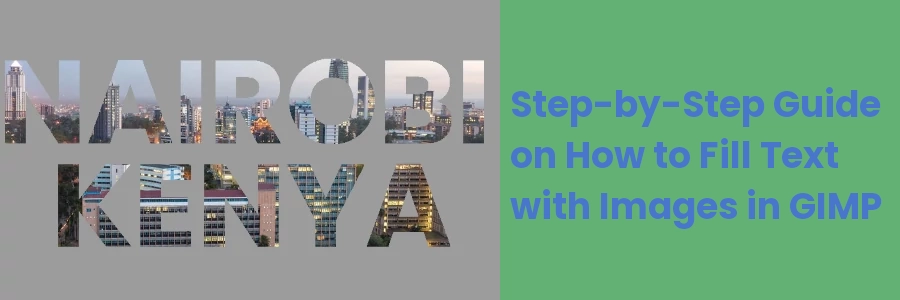
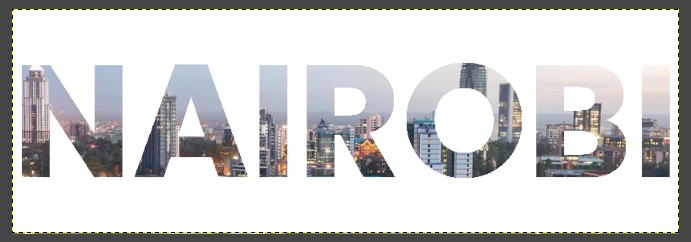
Your cropped, final image will now look as below.
Step 10: Save your image by opening the "File" menu and selecting the "Export As" option or by using the Shift+Ctrl+E keyboard shortcut.
That's it! Now you know how to fill the text with an image in GIMP.