How to Draw a Hexagon Shape in GIMP
The use of geometric shapes can add structure and interest to your graphic design and digital art.
GIMP is one of the most powerful free open-source image editing software that provides users with a range of features to create stunning digital art, including the drawing of geometric shapes.
Such shapes include circles, rectangles, squares, triangles, and polygons.
In this article, you will learn how to draw a hexagon shape in GIMP in a simple step-by-step process.
A hexagon shape is a six-sided polygon that has six angles and six vertices. It is a two-dimensional shape that can be regular or irregular.
A regular hexagon has six equal sides and angles, while an irregular hexagon has sides and angles of different lengths and measures. In this article, we will be covering a regular hexagon.

Hexagons are often found in nature, such as in the structure of honeycombs, and are commonly used in human-made designs, such as in architecture, engineering, and graphic design.
The hexagon's unique shape and symmetry make it a versatile and visually appealing design element that can be used in a variety of creative ways.
Drawing a Hexagon Shape in GIMP
Follow the steps below to create a hexagon shape using GIMP.
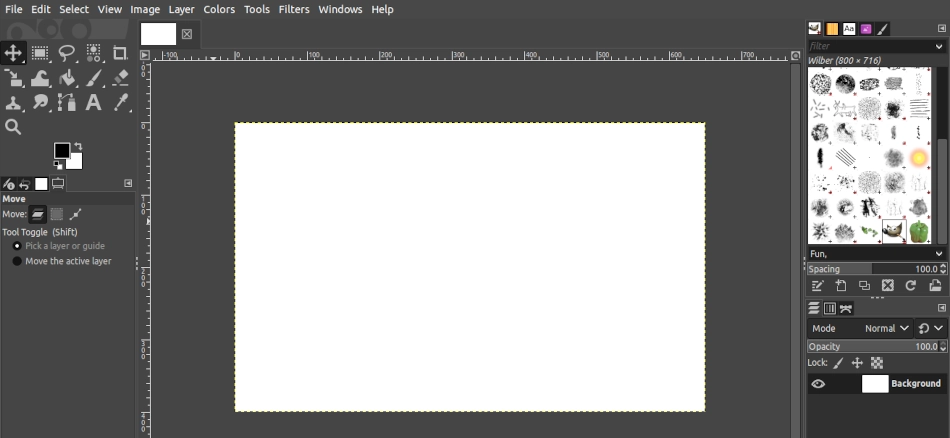
Step 1: Create a New Image
Open GIMP and create a new image by opening "File" > "New" on the menu. Set the size of your image to your desired dimensions and click on the OK button.
Alternatively, if you want to draw the shape on an existing image, just open it by opening "File" > "Open" and selecting it from your device storage.
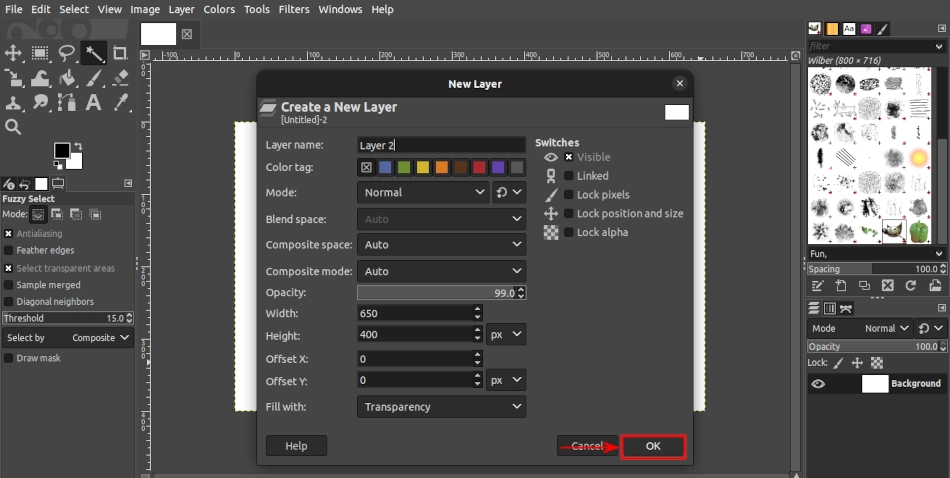
Step 2: Create a new transparent layer
Create a new layer by opening "Layer" > "New Layer" on the menu or using the Shift+Ctrl+N keyboard shortcut.
A "New Layer" dialog box will open. Give the layer a name of your choice that you can identify it with, then select "Transparency" in the "Fill with" dropdown field. Then click on the OK button to create the layer.
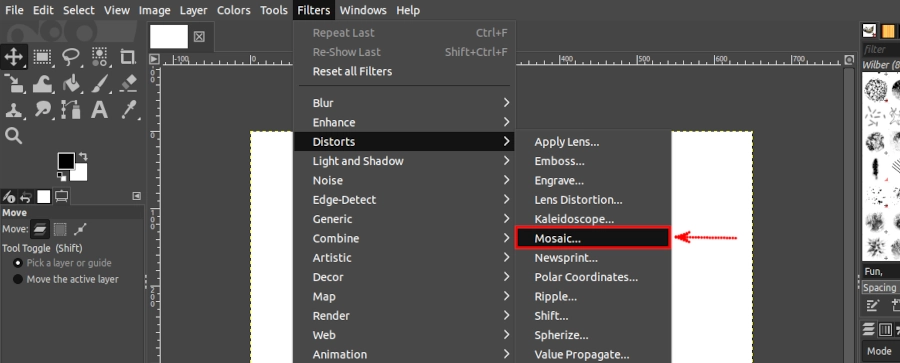
Step 3: Open the Mosaic filter
Next, open the Mosaic filter by going to "Filters" > "Distorts" > "Mosaic".
Your image will be filled with a pattern of small shapes and a "Mosaic" dialog box with a number of sliders and settings as shown below.
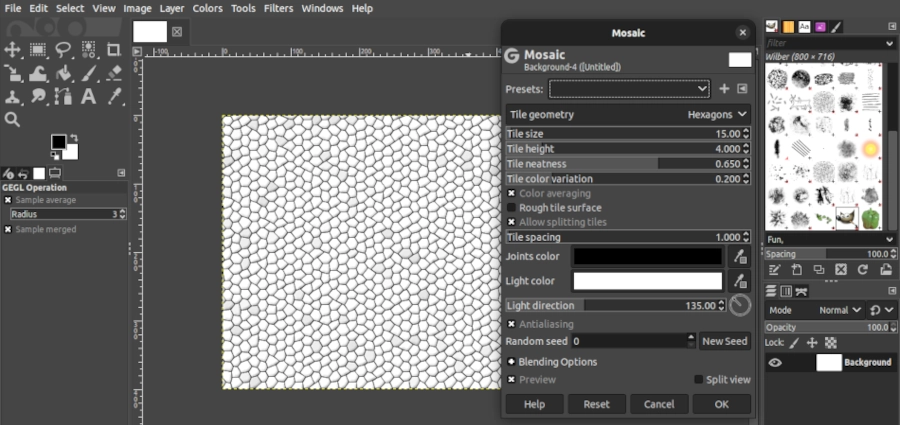
Step 4: Customize mosaic settings to a hexagon
In the "Tile geometry" dropdown field of the dialog box, select the Hexagons option or ensure it's selected.
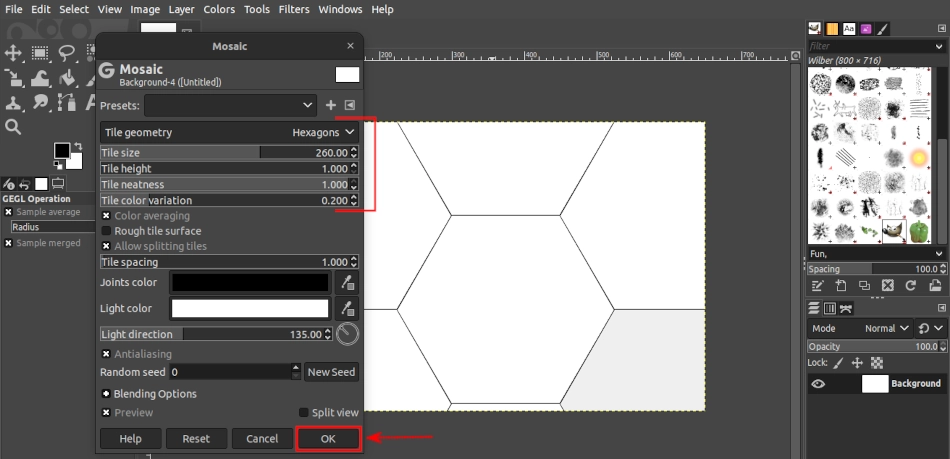
Move the Tile size slider to the right to enlarge the shapes to your preferred size. This is dependent on the size of your image (canvas). The larger the image, the larger the tile size you can set, and vice versa. In my case, I set it to 260.
Move the Tile height slider to the far left to have the value as 1.00.
Move the Tile Neatness slider to the far right to have the value as 1.00.
Now you will have a series of large perfect hexagon shapes on your image. If none fits within the image, adjust the size slider to have at least one fitting well on all sides.
Click on the OK button to apply the settings when you are comfortable with the shapes.
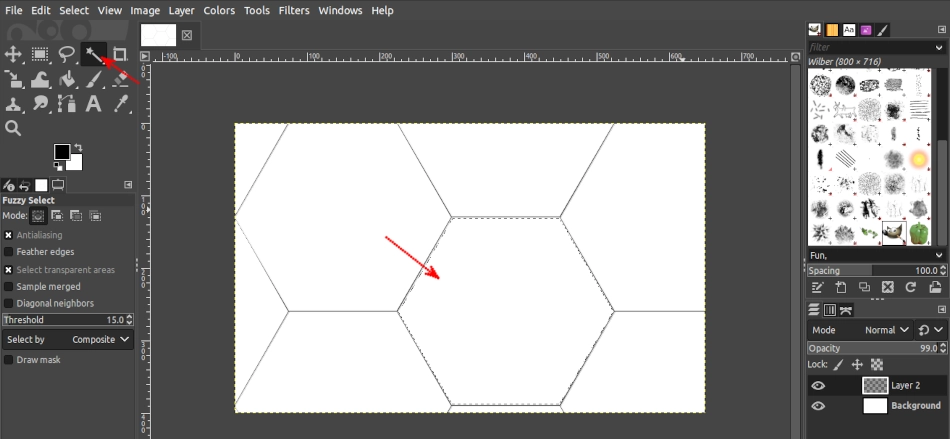
Step 5: Make a selection of a hexagon shape
Select the "Fuzzy Select" tool in the toolbox or just press U on the keyboard to activate it. Then click inside of a full hexagon shape in the image to have it selected.
Once selected, it will be surrounded by a dashed/broken border.
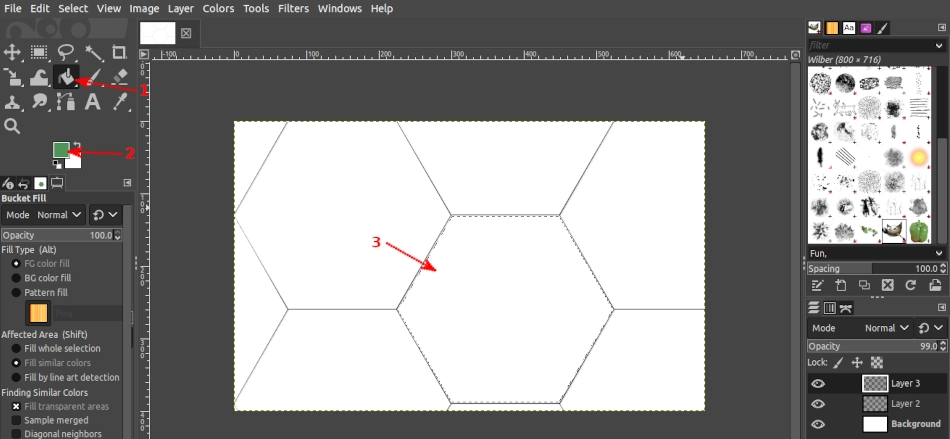
Step 6: Make another transparent layer
Make another transparent layer just like in step 2 and give it a different name.
Step 7: Fill the selection with a color
Select the "Bucket Fill" tool in the toolbox or use the Shift+B keyboard shortcut to activate it. Select your preferred fill color as the foreground color. Then click in the selection on the image to fill it with the foreground color.
Step 8: Get rid of the second layer and the selection
At this point, we have our hexagon shape ready. All we need is to get rid of the second layer and the selection to remain with only the hexagon shape.
Use the Shift+Ctrl+A keyboard shortcut to remove the selection.
Click on the eye icon of the second layer in the layers panel (at the bottom right) to hide the layer.
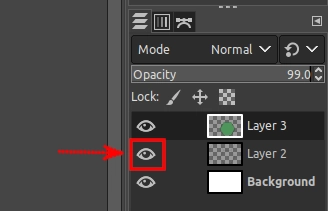
Alternatively, you can delete the second layer by right-clicking on it and selecting the "Delete Layer" option.
Now you will have your perfect colored hexagon shape as in the screenshot below.
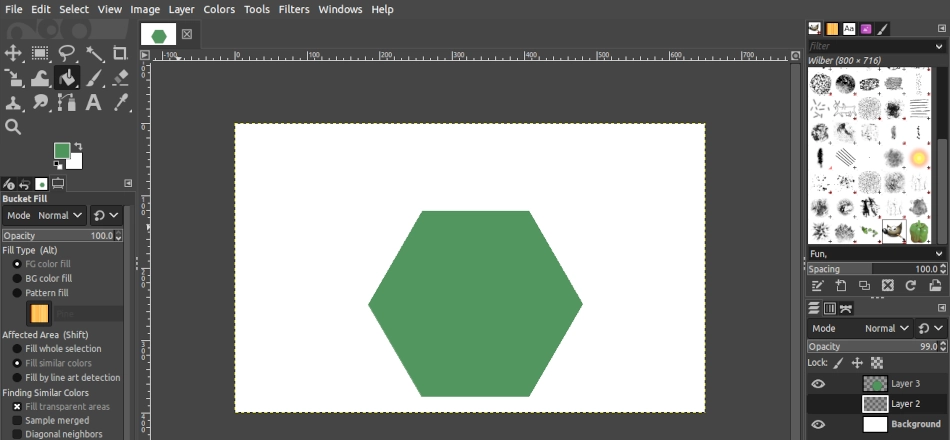
You can easily move the shape to your preferred position on the image by clicking on it and dragging it.
That's how easy it is to draw a hexagon shape in GIMP. It might seem a bit challenging at first if you are new but with practice, you find how easily you can do it.