How to rotate selections in GIMP
Making selections is an essential part of image editing and graphic design. It involves choosing a specific area or object within an image, which can then be manipulated, moved, or modified independently of the rest of the image.
It allows for precise editing, background removal, combining images, adding filters and effects, and creating masks among other tasks.
GIMP is a popular open-source image editing software that allows users to edit and manipulate images in various ways. With it, you can use tools such as Rectangle Select, Ellipse Select, Free Select Tool, Fuzzy Select, Select by Color tool, and Path tool among others to make selections.
For some reason, you may want to rotate a selection on an image in GIMP. For example, you may want to make a rhombus/diamond shape selection on an image in which there isn't a direct way. To do this, you will have to make a square selection using the Rectangle Select tool, then rotate it at 45°.

In this article, I’ll show you how to rotate selections in GIMP through a step-by-step process.
Rotating a selection in GIMP
Follow the steps below:
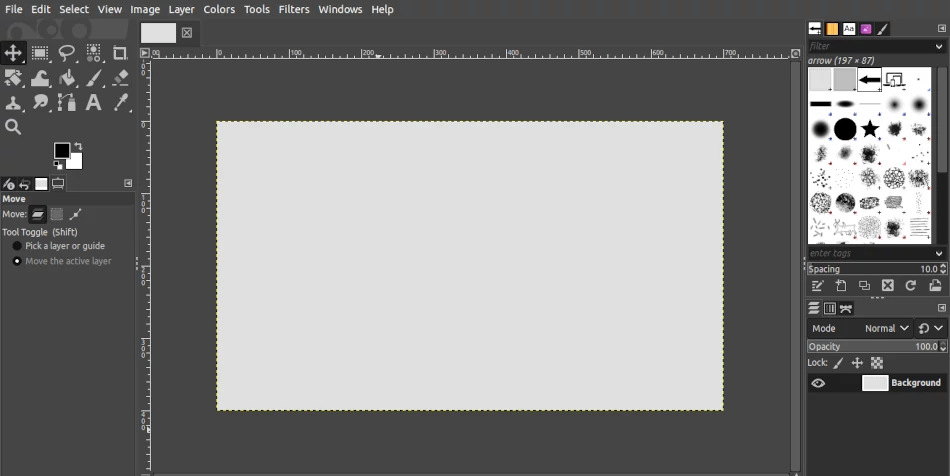
Step 1: Open your image in GIMP
The first step is to open the image you want to work with in GIMP. To do this, go to File > Open and select the image you want to edit. You can alternatively open where it is stored, click on it and drag it into the GIMP's workspace.
Alternatively, you can create a new image to work with if you don't intend to work on an existing one. To do this, go to File > New or use the Ctrl+N keyboard shortcut and enter your preferred image dimensions.
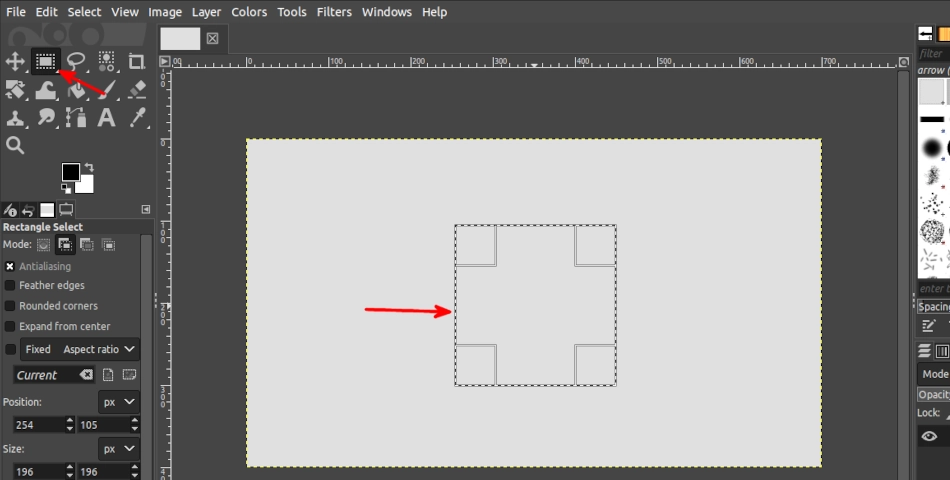
Step 2: Make your selection
Use one of the selection tools available in GIMP that best suits your needs to make your selection on the image.
In my case, I will use the Rectangle Select tool to make a square selection. To make a perfect square, grab the Rectangle Select tool in the toolbox, press and hold down the Shift key while dragging the mouse over the image. Release the mouse once you are satisfied with the selection and then release the Shift key.
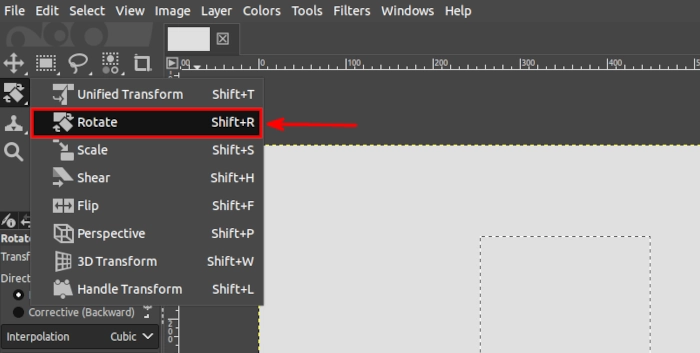
Step 3: Activate the rotate tool
Once you have made your selection, activate the rotate tool by selecting it in the toolbox. Alternatively, go to Tools > Transform Tools > Rotate or use the keyboard shortcut Shift + R.
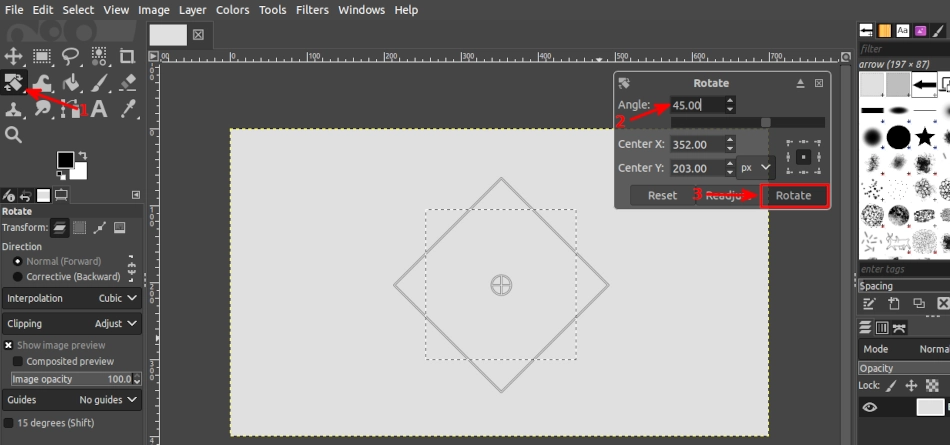
Step 4: Rotate your selection
With the rotate tool active, click on the image and drag the mouse to rotate the selection to the desired orientation.
You can also use the rotation angle option in the tool options panel to specify the degree of rotation. Once you have rotated your selection, click the Rotate button in the tool options panel to apply the changes.
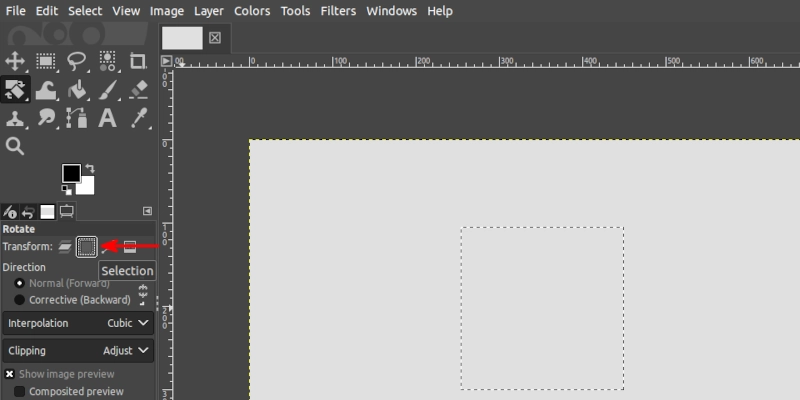
As you will note, by default, rotating a selection will also rotate the part of the image layer within it as shown below. Some parts of the image that were previously covered with the layer before rotation will now be filled with the background color or transparency (if the image has an alpha channel).

To just rotate the selection alone on the image without affecting the image layer in the selection, you will need to first switch the transform option of the rotation tool options from "Layer" to "Selection" before doing the rotation.
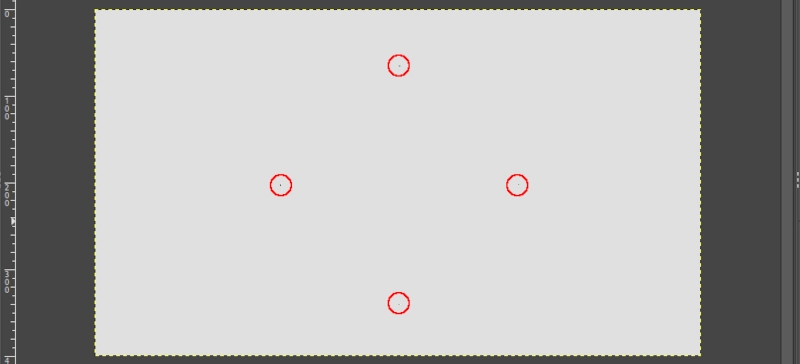
Now the rotated selection will look as below. It's not very visible but if you look keenly you will observe some blicking dots on all the corners.
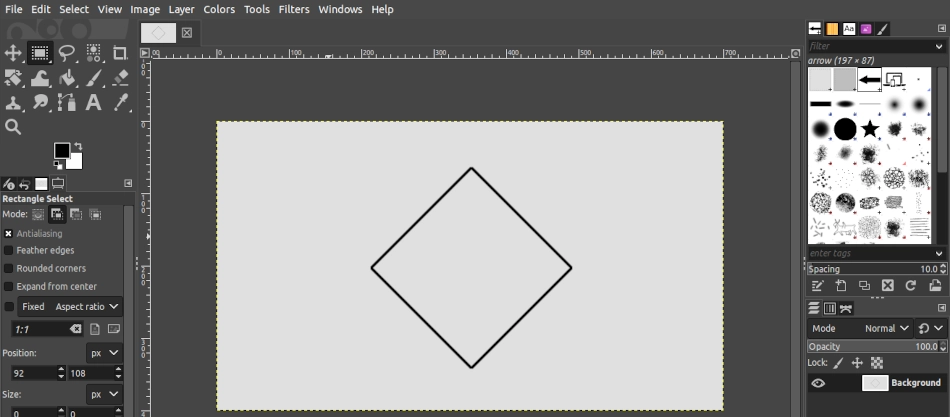
Though not very visible, you can do any operation on the selection just like any other selection. In my case, you can see the shape is now very clear below after stroking the selection (Edit > Stroke Selection).
Step 5: Deselect your selection
When you are done editing your selection, you can then deselect it. To do this, go to Select > None or use the keyboard shortcut Ctrl+Shift+A.
Step 6: Save your changes
After you are done editing your image, export it by going to "File > Export As" to save the changes before closing it.
That's it! Now you can easily rotate any selection on an image to your preferred angle in GIMP.
