How to blur the image background in GIMP
Blurring an image is the act of making it appear less sharp and clear by reducing the contrast between adjacent pixels. The process of blurring an image involves applying a filter or a set of mathematical operations that modify the values of pixels in the image.
Blurring an image gives it a smooth look, as it reduces the details and sharp edges. This can be useful in many situations, especially when you want to blur the image background.
There are several reasons why you might want to blur the background of an image:
- To focus attention on the subject: By blurring the background, you can draw the viewer's attention to the subject of the image, which is usually the main point of interest.
- To create a shallow depth of field: Blurring the background can help create a shallow depth of field, which is often used in portrait photography to make the subject stand out from the background.
- To remove distractions: Sometimes the background of an image can be distracting, especially if there are elements that don't contribute to the overall composition. Blurring the background can help remove these distractions and create a more visually appealing image.
- To create a sense of depth: Blurring the background can also help create a sense of depth in the image, making it feel more three-dimensional.
- To hide sensitive or confidential information: In some cases, you might want to blur the background of an image to hide sensitive or confidential information that is visible in the background.
Overall, blurring the background can be a useful technique for creating more visually appealing and effective images.
The blurring is typically done when taking the photo with a camera, where the camera makes the background blur except the main object or focal point.
However, it is also possible to blur the image background during post-processing with an image manipulation program such as GIMP. Using GIMP, you can define which area (or object) of a photo you want to remain in focus and then apply a blur effect to the other areas.
In this article, I will show you how to blur the background of an image using GIMP (GNU Image Manipulation Program).
Blurring the background of an image in GIMP
There are different ways in which you can blur the background of an image in GIMP. In this tutorial, I will show you how to do it using a selection tool and blur filter effects. Follow these steps:
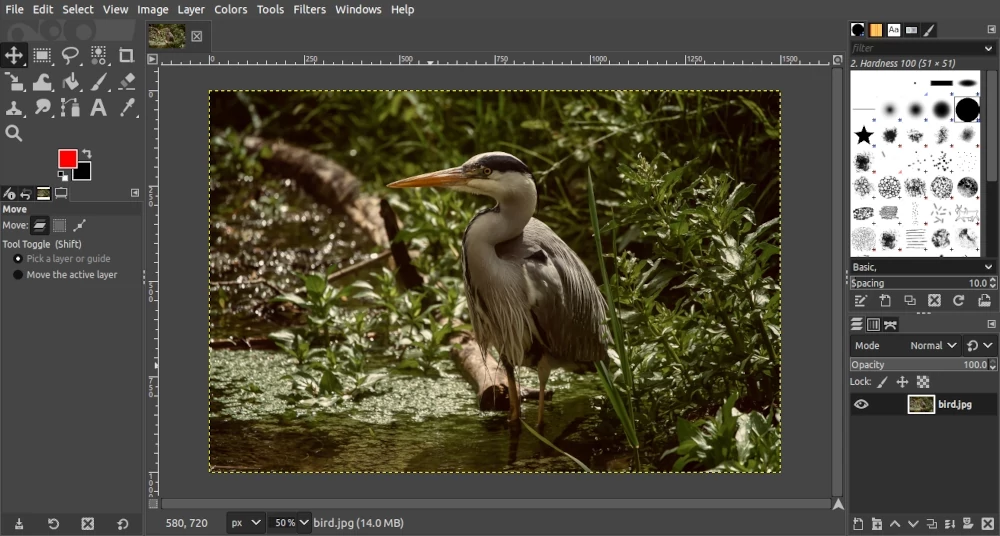
Step 1: Open GIMP on your computer and then open your image whose background you want to blur. You can do so by dragging from your storage folder and dropping it in the GIMP workspace, or by opening the "File" menu and selecting the "Open" option.
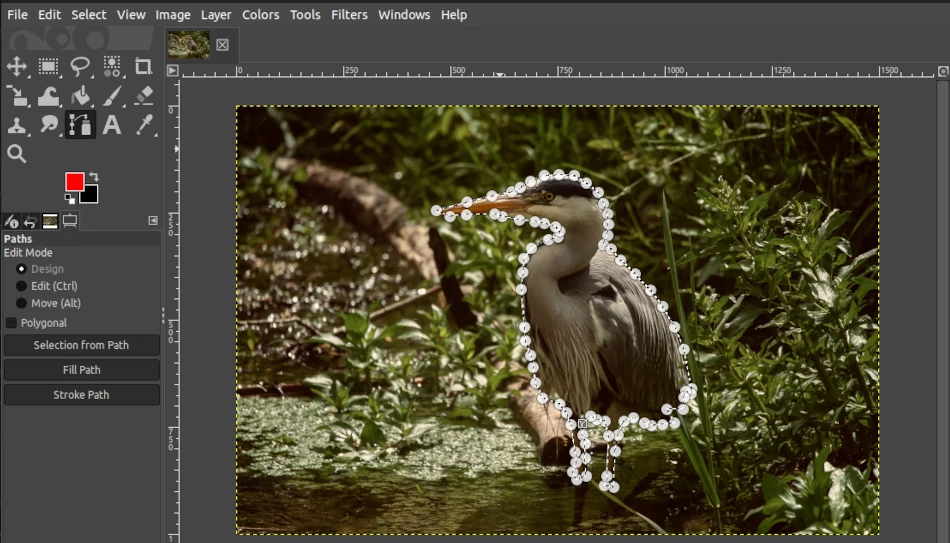
Step 2: Make a selection around the image subject (the area you want to leave in focus) using a selection tool such as the Free Select Tool or Path Tool.
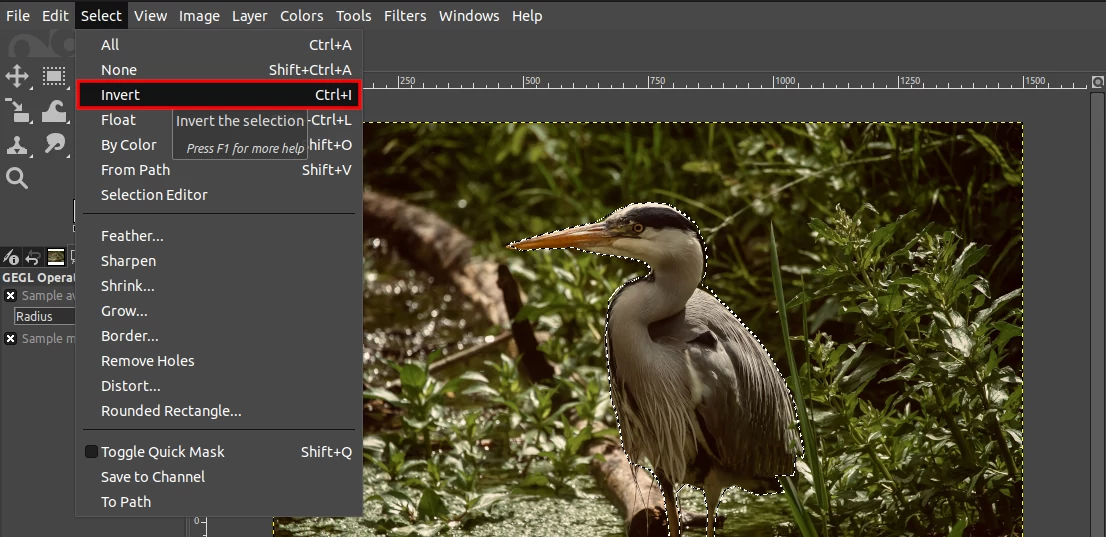
Step 3: Invert the selection to have the background as the selected area. To do so, open the Select menu and click on the "Invert" option.
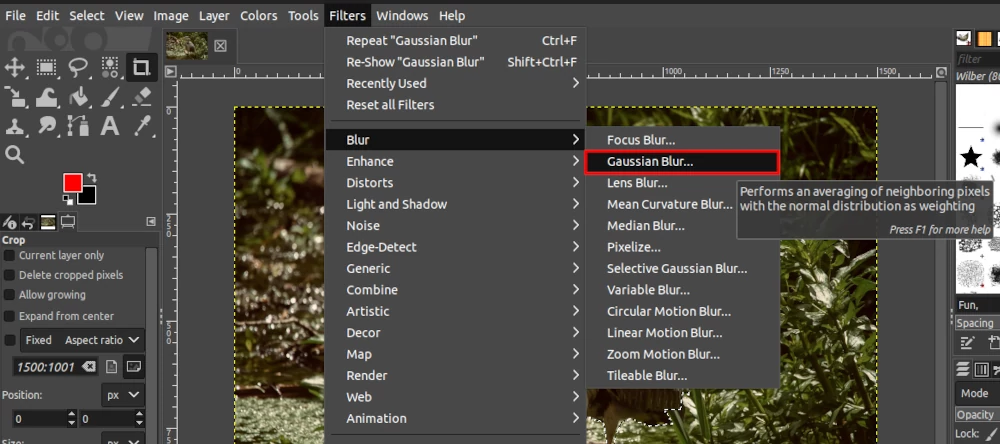
Step 4: Open the "Filters" menu, move the mouse over the "Blur" submenu, and click on your preferred blur effect. I prefer the Gaussian Blur effect so that is what I select in my case. You can try different effects to find out which suits you the best.
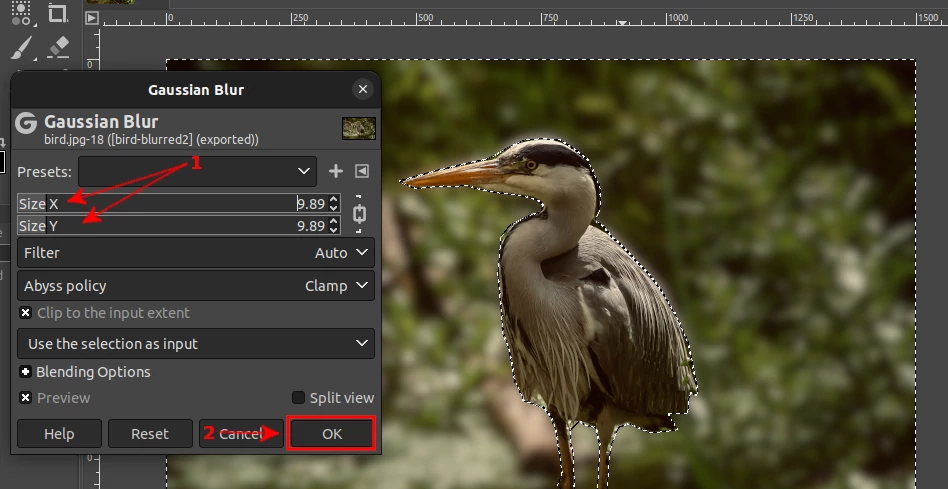
Step 5: A small window will open up. The level of blur is set by size X and size Y sliders. These sizes are by default locked to match each other, changing one will change the other equally. Play around with their values by sliding or using the up and down arrows until you are comfortable with the blur level. Then click on the OK button to apply the blur effect.
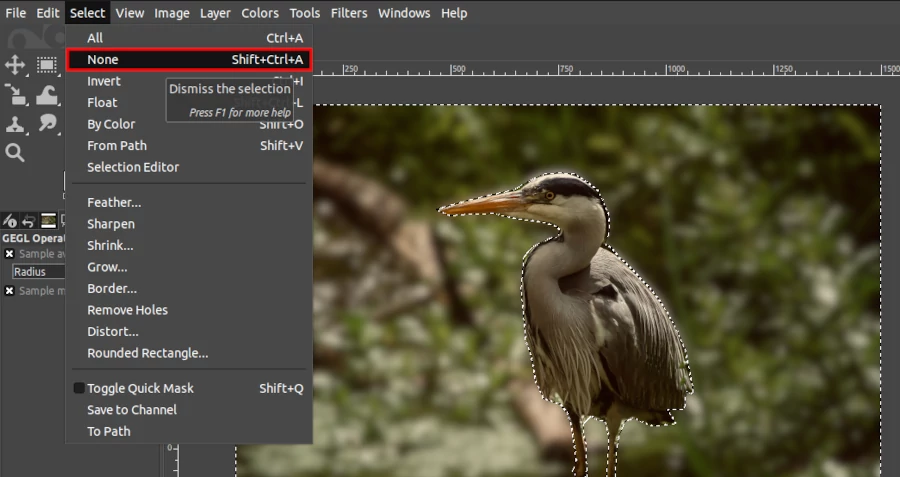
Step 6: Now remove the selection on the image by opening the "Layer" menu and then clicking on the "None" option.
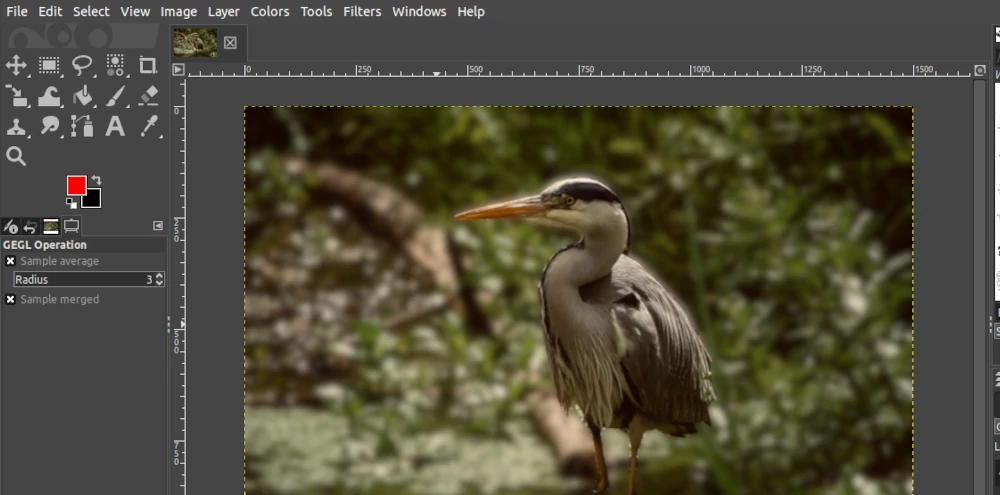
Now you will see your image with a blurred background and sharp focal point (the object you selected).
Export the image and save it into your device storage by opening the File and selecting the Export As... option or by using the Ctrl+Shift+E keyboard shortcut.
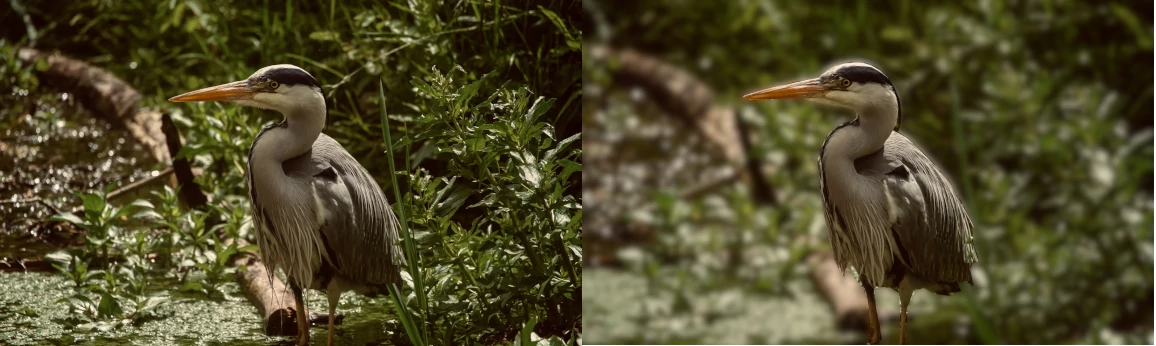
Below is a comparison of the image with a blurred background and the original one.
That's it! Now you know how to blur image backgrounds using the GIMP image editor.