How to create your custom patterns in GIMP
In GIMP, a pattern is a graphic design element that can be used to fill areas of an image or create a background. Patterns are commonly used in graphic design and digital art to add visual interest and texture to an image or design.
In the previous article, I covered what patterns are in detail and how you can use them in a variety of ways in your graphic design projects in GIMP.
While GIMP comes with pre-installed patterns ready for use in your designs, it also allows you to create and install your own custom patterns into it.
In this article, you will learn how to make your own custom patterns in GIMP and use them in your designs.
A study of the pre-installed patterns in GIMP
Before we delve into creating patterns for GIMP, a brief study of the default pre-installed patterns will help us have a better understanding of what GIMP patterns are.
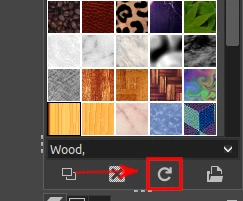
Open the GIMP's patterns tab and click on different patterns. Observe at the top.
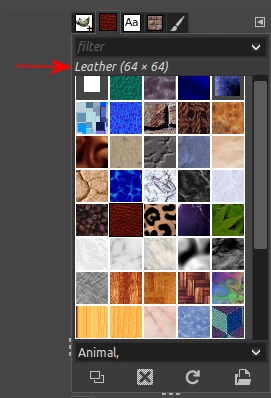
The name of the pattern is shown at the top and its dimensions in pixels within brackets. For example, in the above image, the selected pattern is named "Leather" and is 64px by 64px.
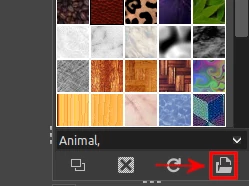
You can also try opening a pattern as an image by clicking on the "folder and file" icon at the bottom right of the patterns tab.
You will now see it much better in its actual size when it opens. Some of the patterns look like photos of real objects while others look like drawings. Try exporting it by opening the "File" menu and then selecting "Export As", or by using the "Ctrl+Shift+E" keyboard shortcut.
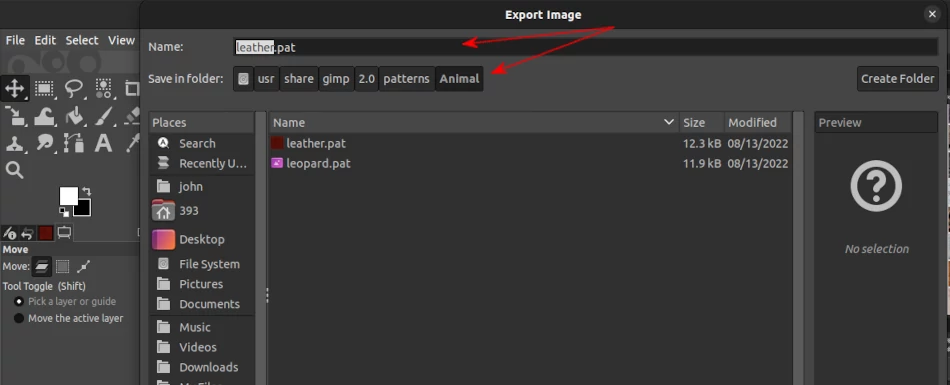
Check the name and "Save in folder" values. You will notice that all the patterns are saved in folders within a folder named patterns. In addition, you will note that all the patterns' names end with a ".pat" extension.
Observations Summary
These patterns are basically small images with the majority ranging from 50px by 50px to around 160px by 160px in size. However, there are few that are as small as 25px by 25px, and others few a bit larger than the given range. Though a majority of them are square in shape, some are rectangular.
All the pattern files are stored in a special GIMP "patterns" folder.
All the pattern files have their names ending with a ".pat" file extension.
Some patterns are typically photos of real objects while others are drawings.
Now that you have a better understanding of patterns, we can move on to the next section.
How to make custom patterns in GIMP
You can create your own custom pattern in GIMP by drawing it yourself or by importing and using an existing image. We will cover both of them.
Method 1: Drawing a pattern in GIMP
Here are the steps to create a custom pattern in GIMP by drawing:
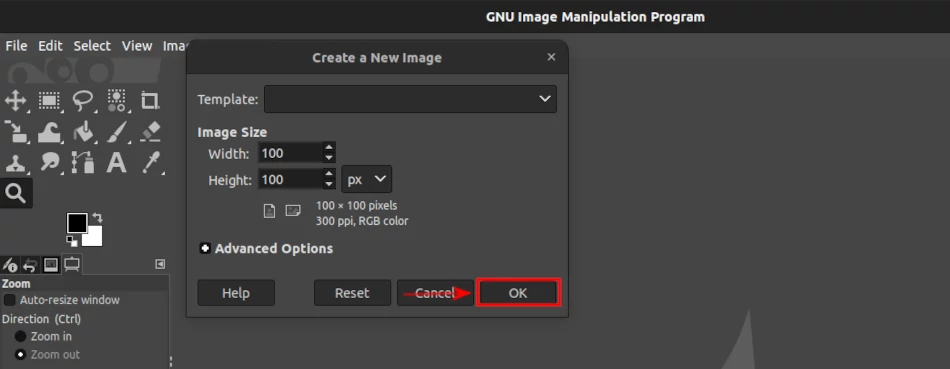
Step 1: Open GIMP and create a new document. I recommend a document size of anywhere between 50px by 50px to 150px by 150px.
Step 2: Create a new transparent layer on top by opening the "Layer" menu and selecting the "New Layer" option. Alternatively, use the Shift+Ctrl+N keyboard shortcut. In the "New Layer" dialog box that opens, select the "Transparency" option in the "Fill with" field and then click on the OK button.

Step 3: Using the various available tools in GIMP, draw the design that you want to turn into a pattern. This could be a simple shape or a more complex image.

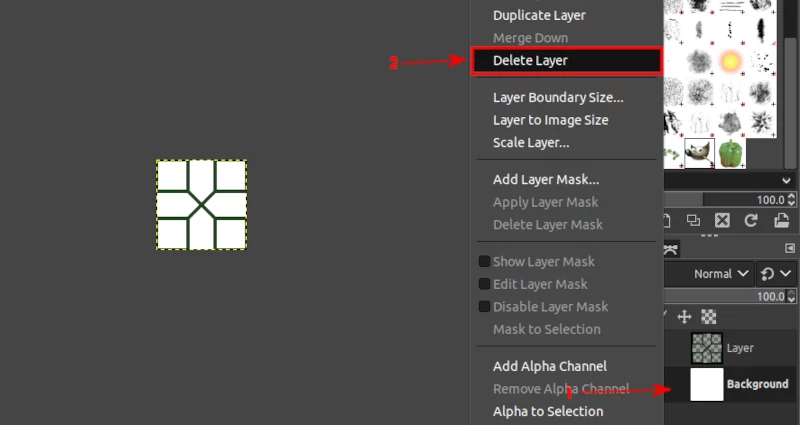
Step 4: Once the design looks good to you, delete the first/bottom layer by right-clicking on it in the layers tab and selecting the "Delete Layer" option in the menu.
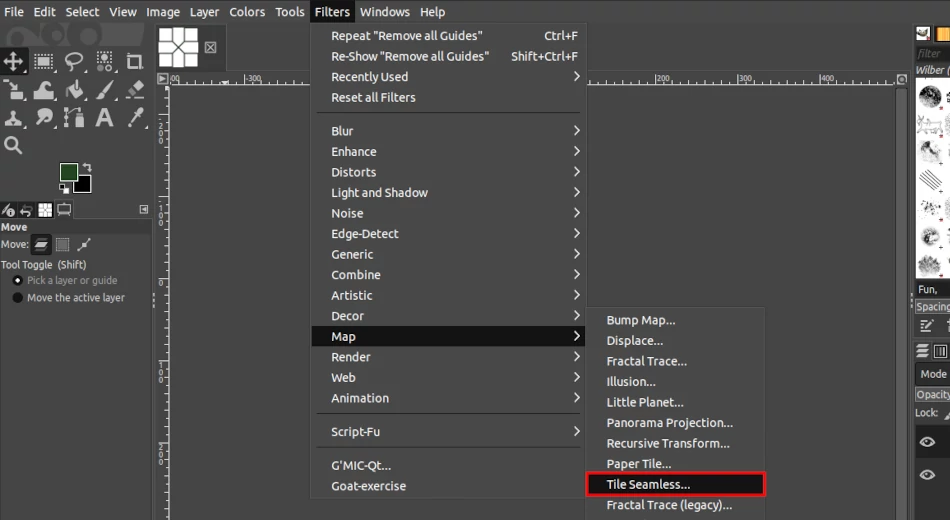
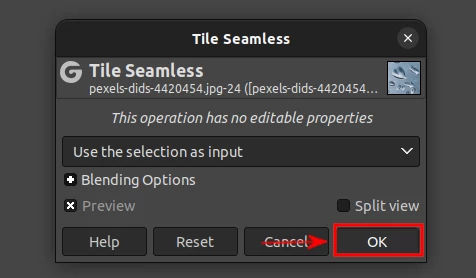
Step 5: Tile the image to make a seamless repeating pattern. To do this, open the "Filters" menu, "Map" submenu, and then the "Tile Seamless" option.
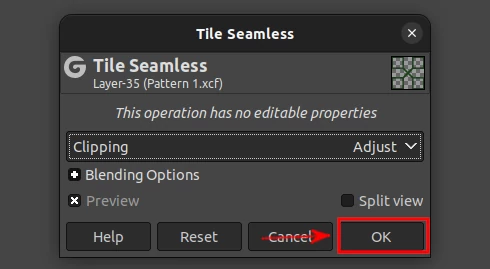
In the "Make Seamless" dialog box, click on the "OK" button to apply the seamless effect to your image.
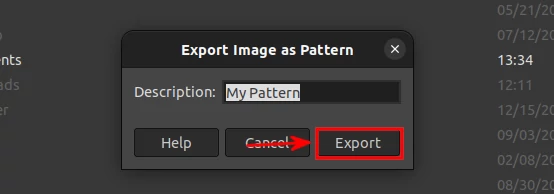
Step 6: Export the file via the "File" menu and then the "Export As" option. Alternatively, use the Shift+Ctrl+E keyboard shortcut. Give the pattern file your preferred name followed by a ".pat" extension in the Name field. Select the save folder and then click on the Export button at the bottom right.
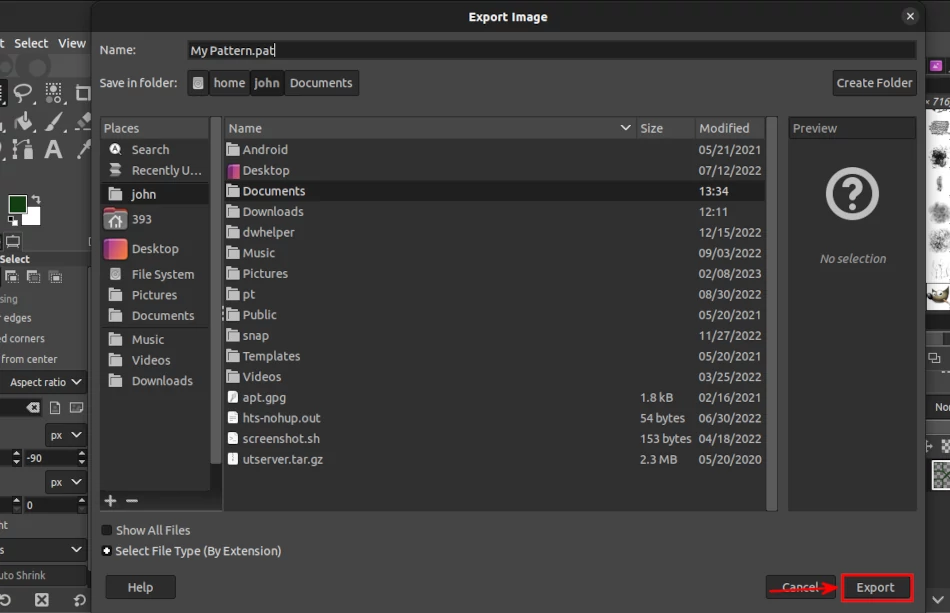
A small dialog box will open with a "Description" field. The value of this field will be displayed as the name of the pattern when clicked in the patterns tab or in the "Pattern fill" options. Leave it as it is or change it according to your preference then click on the Export button.
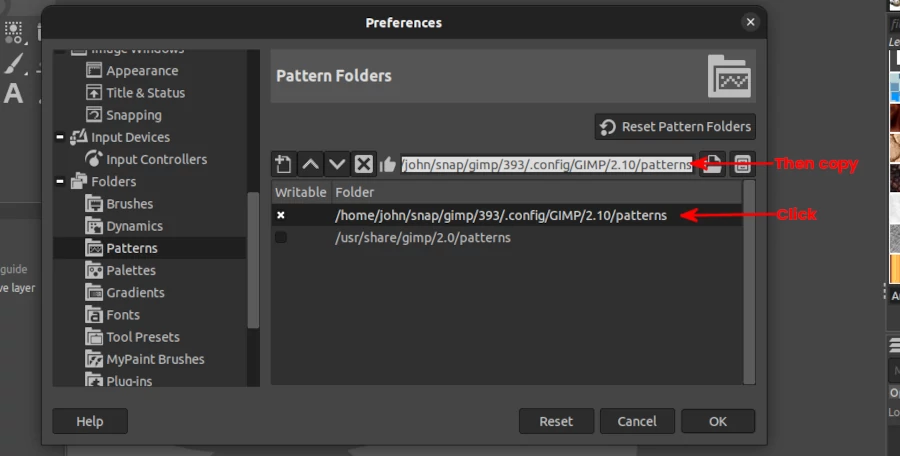
Step 7: Copy the exported pattern file to the GIMP patterns folder. There are two folders; one where the GIMP default pre-installed patterns are stored and another for storing custom patterns. GIMP will search for patterns in these folders every time when starting or when patterns are refreshed within the GIMP's patterns tab.
The path to this folder is different depending on your OS. There is one common method to check on all operating systems. Open the "Edit" menu and then the "Preferences" option. Scroll down on the left pane of the dialog box that opens and click to expand the "Folders" menu. Then click on the "Patterns" option.
You will see two folder paths in the right pane. Click on the top one and copy the path as you will need it in opening the folder.
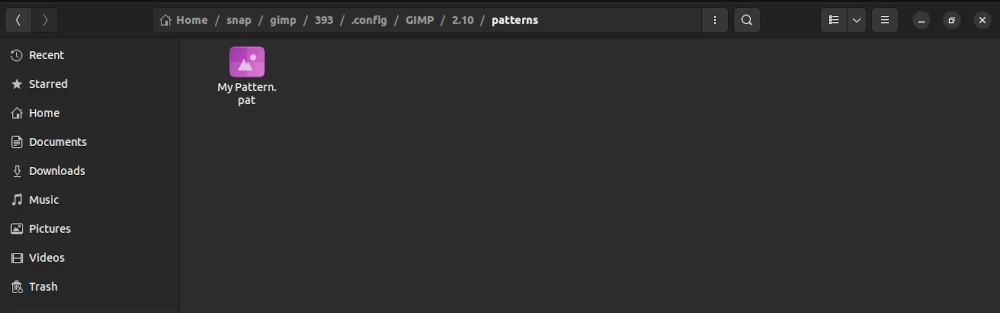
Open the File Explorer/File Manager/Finder and press the Ctrl+L keyboard shortcut to activate the address bar. Paste the path you copied in the step above in this address bar and press the Enter key to open the GIMPs custom patterns folder.
If on Linux, you may need to first enable the showing of hidden files using the "Ctrl+H" shortcut to be able to open the path as one folder in the path is a hidden folder (starts with a "." in its names).
Copy the pattern file that you exported and paste it into the patterns folder.
You will be able to see your new pattern in the patterns tab when you click on the refresh button and can start using it right away.
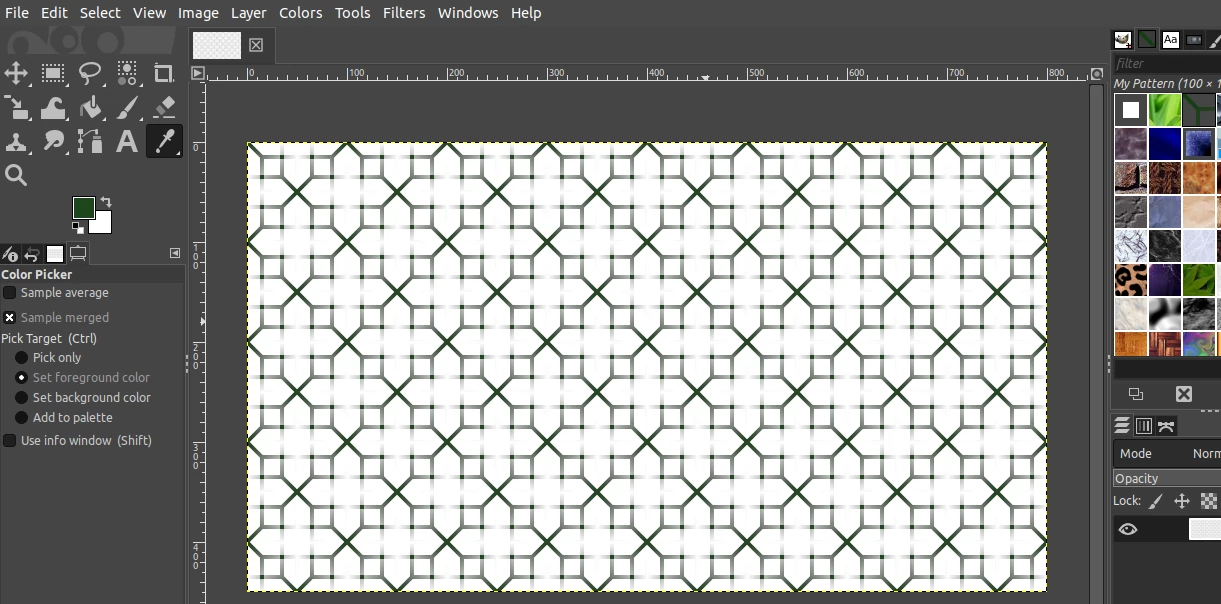
Below is a background made of the pattern we just made.
Method 2: Making a GIMP pattern from an image
Besides drawing a pattern from scratch, you can make also make it from an existing image.
To make a pattern from an image in GIMP, follow these steps:
Step 1: Open the image you want to create a pattern from in GIMP.
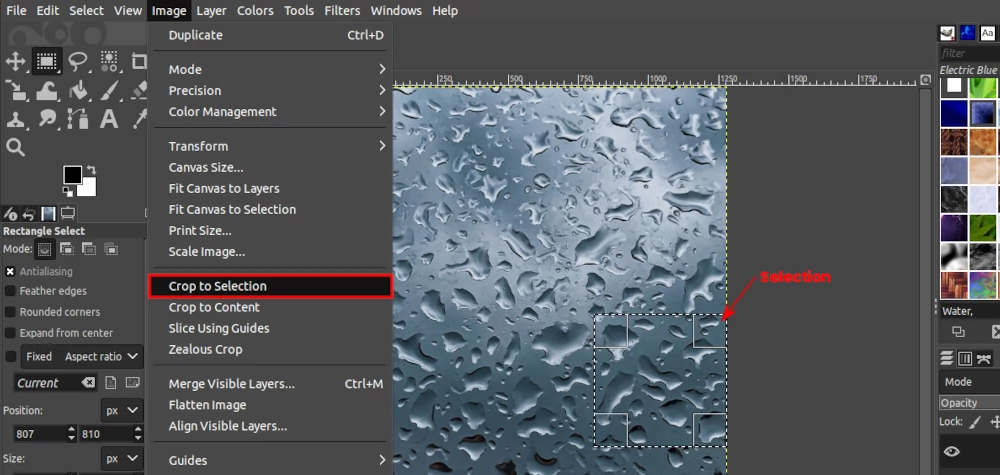
Step 2: Find the area with the best texture on the image that you want to use as a pattern and select it using the Rectangle Select Tool. Press the Shift key when selecting the area to make a square selection. The smaller the pattern dimensions, the better.
Step 3: Open the "Image" menu and select the "Crop to selection" option. This will crop the image and adjust the canvas size to that of the selected area.
Step 4: To sharpen the image and make it more detailed, open the "Filters" menu, select the "Enhance" submenu, and then click on the "Sharpen(Unsharp mask)" option. Adjust the values until you are comfortable with the sharpness (or leave it as default) and click on the OK button. This step is optional.
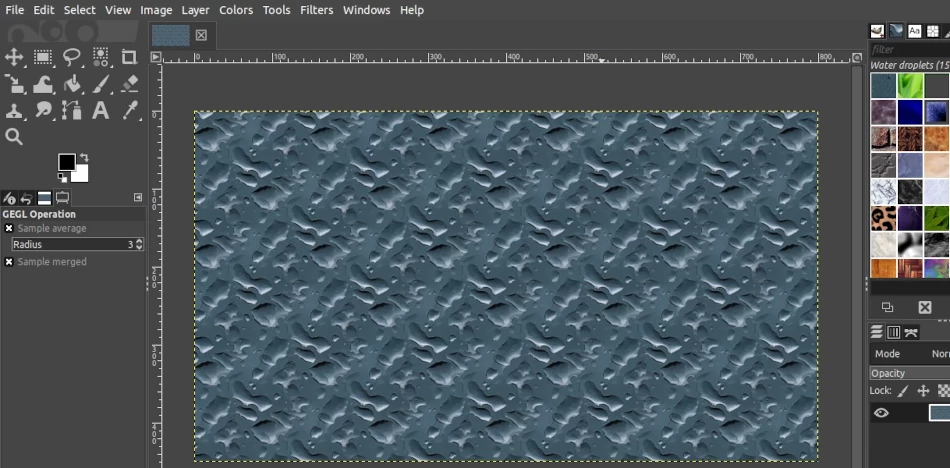
Step 5: Open the "Filters" menu, select the "Map" submenu, and then click on the "Tile Seamless" option.
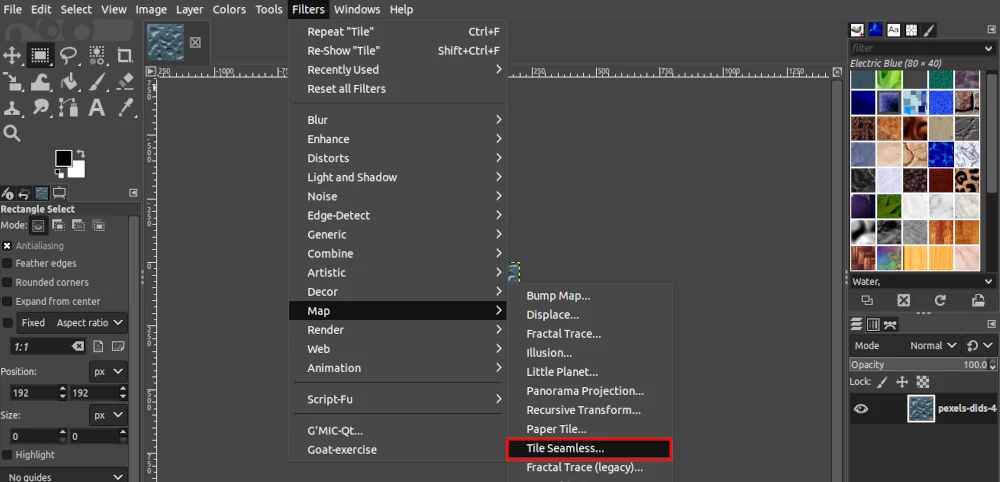
In the "Make Seamless" dialog box, click on the "OK" button to apply the seamless effect to your image.
Step 6: Export the image as a ".pat" file and copy/save it in the GIMP patterns folder as explained in steps 6 and 7 of method 1 above.
Below is the image background filled with the pattern that we just created.
That's it! Now you know how to make a pattern from an existing image in the GIMP image editor.
You can also download patterns from the web or acquire them from other sources. To install them in GIMP, copy the ".pat" files into the GIMP's patterns folder and then refresh and in GIMP and they will be available for use right away.